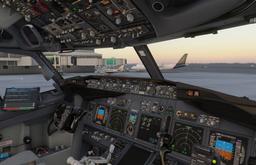
You bought the PMDG 737. You loaded into the cockpit. And now you're staring at a small screen with six buttons on each side, a keypad at the bottom, and absolutely no idea what to type first.
The FMC (Flight Management Computer) looks complicated because it packs an entire flight plan, performance calculations, and navigation database into a text-only screen designed in the 1980s. But the process of programming it is surprisingly linear. You go through a series of pages in order, type in the right numbers, and press EXEC when it tells you to. That's genuinely it.
This guide walks through every CDU page you need for a complete flight in the PMDG 737-800 in MSFS 2024. We'll use a KJFK to KBOS flight as our example — short, simple, and perfect for learning the workflow without getting lost in complexity.
Practise the pages as you read them. Our free 737 CDU Trainer recreates IDENT, POS INIT, ROUTE, and PERF INIT in your browser with step-by-step scenarios and instant feedback — no sim required.
If you haven't powered up the aircraft yet, start with the PMDG 737 cold and dark startup guide and come back here once you have electrical power and the CDU is lit up.
Affiliate disclosure: This guide contains affiliate links. If you purchase through these links, SimTuts earns a small commission at no extra cost to you. We only recommend products we genuinely believe improve the flight sim experience.
What the FMC Actually Does
The FMC is the aircraft's brain for navigation and performance. Everything you type into the CDU (Control Display Unit — the physical screen and buttons) gets stored in the FMC's memory. That data controls three things:
- Where the aircraft flies — your route, waypoints, airways, SID, STAR, and approach
- How it manages speed — climb speeds, cruise speeds, descent speeds, all calculated from your cost index and weight
- How it manages altitude — VNAV climb and descent profiles based on your cruise altitude and any altitude constraints
When you engage LNAV and VNAV on the autopilot, the FMC is what's actually flying the aircraft. The MCP (the autopilot panel on the glareshield) just tells the autopilot which FMC commands to follow.
Think of the FMC as the flight plan filing system and the autopilot as the pilot executing it.
1. IDENT Page
How to get there: Press INIT REF on the CDU. This is usually the first page you see after power-up.
The IDENT page shows you:
- Model — should read 737-800
- Engines — CFM56-7B series
- Nav Data — the AIRAC cycle dates (e.g., 12MAR26 to 09APR26)
What to do: Check the nav database dates. If you're using Navigraph, verify the cycle is current. Outdated nav data means waypoints, airways, and procedures might be wrong or missing. If you don't use Navigraph, the PMDG default database works fine for learning.
There's nothing to type here. Press NEXT PAGE or move on.
2. POS INIT (Position Initialisation)
How to get there: From the IDENT page, press NEXT PAGE. Or press INIT REF and select POS INIT.
This page tells the FMC where the aircraft is sitting right now. The IRS (Inertial Reference System) needs a starting position to align properly.
What to enter:
- REF AIRPORT (LSK 2L, the second line select key on the left): Type
KJFKon the scratchpad and press 2L. The FMC loads the airport coordinates and the position fields fill in automatically.
In MSFS 2024, the PMDG 737 usually picks up GPS position automatically, so you'll often see coordinates already populated. Entering the REF AIRPORT just confirms you're at the right place and helps the IRS align faster.
If you're at a gate, you can optionally refine the position by entering the gate on LSK 3L (the GATE line, directly below REF AIRPORT), but it's not required for the FMC to work.
3. ROUTE Page — The Main Event
How to get there: Press RTE on the CDU.
This is where you build your flight plan. The ROUTE page is the heart of FMC programming.
Step by step:
- ORIGIN (LSK 1L): Type
KJFKand press 1L - DEST (LSK 1R): Type
KBOSand press 1R - FLT NO (LSK 2R): Optional. Type any flight number you like (e.g.,
SIM1). This is cosmetic but helps with identification. (The left-hand CO ROUTE field at LSK 2L is where a stored company route name goes — more on that below.)
Now you need the actual route — the airways and waypoints between JFK and Boston.
Entering the Route Manually
Press NEXT PAGE to get to RTE page 2. The page has two columns: VIA (the airway) on the left, and TO (the waypoint) on the right.
- To fly an airway, type the airway on the scratchpad and press the VIA key (LSK 1L), then type the exit waypoint and press the TO key (LSK 1R)
- To go direct to a waypoint, type the waypoint and press the TO key (LSK 1R) — the VIA column fills in
DIRECTautomatically - Repeat down the page for each segment
For KJFK to KBOS, a simple route might be: MERIT J75 BRADD. You'd enter:
- 1R:
MERIT(a direct waypoint after the SID — it goes in the TO column, and VIA showsDIRECT) - Then on the next line:
J75on 2L (the airway) andBRADDon 2R (the exit waypoint) - Direct to
KBOSfills in when the STAR connects
Don't worry about getting the perfect route at this stage. For learning the FMC, any route that connects A to B works.
Loading from SimBrief (Easier Method)
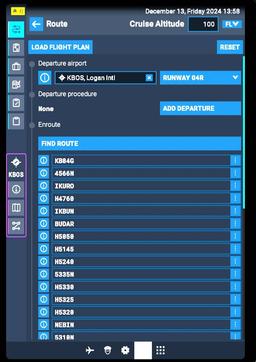
If you use SimBrief, the PMDG 737 can import your route directly. Create your flight plan in SimBrief first, then either enter the SimBrief-generated flight plan name in the CO ROUTE field (LSK 2L) on the RTE page, or use the SimBrief import option in the PMDG FMC menu. The FMC downloads your route, airways, cruise altitude, and weights — saving you from typing everything manually.
For the full SimBrief workflow, see the SimBrief to FMC integration guide.
Activating the Route
Once your route is entered (manually or via SimBrief):
- Press ACTIVATE (LSK 6R) — the route goes from "modified" to "pending"
- Press EXEC (the large button that should now be illuminated) — this commits the route to the active flight plan
The EXEC light is your confirmation signal. Whenever it's lit, the FMC is waiting for you to confirm a change. Always press it.
4. DEPARTURES Page — Selecting Your SID
How to get there: Press DEP ARR on the CDU. With the route active, it shows departure options for your origin airport.
A SID (Standard Instrument Departure) is the published route from the runway to the airway system. You need to select one that matches your runway and direction of flight.
What to do:
- You'll see a list of available SIDs for KJFK. Use the line select keys to scroll through them.
- Select a SID appropriate for your runway. For example, if you're departing runway 31L, you might select the SKORR5 departure.
- If the SID has a transition, select it too. The transition connects the end of the SID to your first enroute waypoint.
- Press EXEC to confirm.
If you're unsure which SID to pick, choose one that matches your runway — the FMC filters them for you. For a deeper understanding of SIDs and STARs, see the SIDs and STARs explained guide.
5. ARRIVALS Page — STAR and Approach
How to get there: Press DEP ARR on the CDU, then press LSK 1R (or the prompt for the arrival airport) to switch from departures to arrivals.
Here you select three things:
- STAR (Standard Terminal Arrival Route) — the published route from the airway system to the approach. For KBOS, you might select the ROBUC3 arrival.
- Transition — connects your last enroute waypoint to the STAR. Select the one that matches your route.
- Approach — the final procedure that guides you to the runway. You'll see options like:
- ILS 04R — precision approach with glideslope guidance. See the ILS approach guide.
- RNAV (GPS) 04R — GPS-based approach. See the RNAV approach guide.
For learning, pick the ILS approach. It's the most common and gives you the most guidance.
Press EXEC after each selection when the light illuminates.
At this point, your route is complete from gate to gate. The magenta line on your ND (Navigation Display) should show the full path from KJFK to KBOS.
Get flight sim tips in your inbox
New guides, checklists, and tips. No spam. Unsubscribe any time.
6. PERF INIT Page — Weights and Performance
How to get there: Press INIT REF on the CDU and select the PERF prompt (<PERF INIT) from the INIT/REF INDEX. Once your route is entered and activated, the FMC also prompts you toward PERF INIT automatically as the next required preflight step.
This page is where the FMC learns about your aircraft's weight and how you want it to perform. Every field here affects your speeds and fuel burn calculations.
Key entries:
-
CRZ ALT (LSK 1R): Your cruise altitude. For KJFK to KBOS, something like
FL240(24,000 feet) works. This is a short flight — no need to climb to FL370. Type240orFL240and press the key. -
ZFW (LSK 3L): Zero Fuel Weight — the weight of the aircraft without any fuel. You'll find this on the MSFS fuel and payload page. In the PMDG 737, you can also press LSK 3L when it shows a prompt to calculate it from the sim's current load. A typical value for a half-loaded 737-800 is around 105,000 to 120,000 lbs. Type the number in thousands (e.g.,
112.0) and press the key. -
RESERVES (LSK 4L): Fuel reserves in thousands of pounds. A reasonable value for a short domestic flight is
3.0to5.0. This tells the FMC how much fuel to protect and affects range calculations. -
COST INDEX (LSK 5L): A number from 0 to 500 that balances speed versus fuel efficiency. 0 = maximum fuel savings (slow), 500 = maximum speed (expensive). For short domestic flights, 30 to 50 is typical. For learning, type
35and press the key. The cost index determines your climb, cruise, and descent speeds — lower means slower and more fuel-efficient.
Getting the ZFW right matters. If this number is wrong, your V-speeds (takeoff speeds) will be wrong, and the FMC will calculate incorrect climb/descent profiles. Always cross-check it with the sim's payload page.
7. N1 LIMIT / TAKEOFF REF Page
How to get there: Press the N1 LIMIT prompt (LSK 6R) on the PERF INIT page, or press INIT REF and navigate to N1 LIMIT.
This is actually two pages that work together. The first sets your thrust limit, and the second calculates your takeoff speeds.
N1 LIMIT Page
You'll see thrust rating options:
- TO — full rated takeoff thrust
- TO 1 — first level derate (reduced thrust)
- TO 2 — second level derate (further reduced)
For learning, select TO (full thrust) by pressing the line select key next to it. Derated thrust is used in real operations to reduce engine wear on lighter loads or longer runways, but full thrust is simpler and safer while you're learning.
You can also enter an assumed temperature for further thrust reduction, but skip this for now.
TAKEOFF REF Page
Press the TAKEOFF prompt (LSK 6R) on the N1 LIMIT page.
Key entries:
-
FLAPS (LSK 1L): Enter your takeoff flap setting. For the 737-800, 5 is the most common setting. Type
5and press 1L. Other valid takeoff settings are 1, 10, 15, and 25, but flaps 5 covers most situations. -
CG (LSK 3L): Centre of Gravity as a percentage. You'll find this in the MSFS loadout or the PMDG EFB (Electronic Flight Bag). A typical value is around 25%. Type
25.0and press the key. (On this page the left column holds FLAPS, N1, CG, and TRIM; the V-speeds sit in the right-hand column.)
After entering flaps and CG, the FMC calculates your V-speeds:
- V1 — decision speed. Above this speed, you're committed to takeoff even if an engine fails.
- VR — rotation speed. Pull back on the stick at this speed.
- V2 — takeoff safety speed. The minimum speed to maintain if you lose an engine after V1.
These speeds appear in the right-hand column of the page. Verify they look reasonable — for a mid-weight 737-800, expect V1 around 130-145 knots, VR a few knots higher, and V2 a few knots above that.
The page also shows a TRIM setting. Note this value and set it on the stabiliser trim wheel on the centre pedestal. This is easy to forget and causes the takeoff configuration warning.
Press EXEC if the light is illuminated.
8. LEGS Page — Review Your Route
How to get there: Press LEGS on the CDU.
The LEGS page shows every waypoint in your route, with distances, bearings, and any altitude or speed constraints. This is where you verify everything looks correct before departure.
Scroll through the entire route using the NEXT PAGE and PREV PAGE keys. Check for:
- All waypoints are present and in the right order
- Speed and altitude constraints are shown where expected (especially on the SID and STAR)
- No unexpected gaps in the route
Closing Discontinuities
A discontinuity shows up as a row of dashes (sometimes shown as ----- or a THEN prompt) between two waypoints. This means the FMC doesn't know how to connect those two points.
To close a discontinuity:
- Find the discontinuity on the LEGS page
- Press the LSK next to the discontinuity to load it into the scratchpad
- Press DELETE on the keypad
- Press the same LSK again
Or select the waypoint after the discontinuity, load it into the scratchpad, and press the LSK of the discontinuity line to overwrite it.
Then press EXEC to confirm.
Discontinuities are the number one reason LNAV stops working mid-flight. Always check. For more on LNAV troubleshooting, see the general FMC programming guide.
9. VNAV — How the FMC Flies Your Profile
You don't need to configure VNAV separately — it pulls all its data from the pages you've already programmed. But understanding what it does helps you fly better.
VNAV (Vertical Navigation) uses your cost index, weights, cruise altitude, and route constraints to build a complete vertical profile:
- Climb: The FMC calculates an optimal climb speed (typically 250 knots below FL100, then a calculated speed above). It targets your cruise altitude.
- Cruise: Maintains the speed derived from your cost index at your cruise altitude.
- Descent: Calculates a top-of-descent point and a descent path that meets all altitude constraints on your STAR and approach. This is the part that catches most people — the VNAV descent guide covers it in detail.
The speed and altitude targets you see on the LEGS page are exactly what VNAV follows. If a waypoint shows 250/10000A, VNAV will cross that point at or above 10,000 feet at 250 knots.
To use VNAV, press the VNAV button on the MCP after takeoff (once above 400 feet AGL with LNAV also engaged). The FMC takes over speed and altitude management.
10. CLB, CRZ, and DES Pages
How to get there: Press CLB, CRZ, or DES on the CDU (or cycle through them with NEXT PAGE from the appropriate point).
These three pages show phase-specific information:
- CLB — current climb speed target, economy climb speed, and transition altitude. Useful for monitoring but rarely needs manual changes.
- CRZ — cruise altitude, optimum altitude, and step climb recommendations. On a short KJFK-KBOS flight, you won't need step climbs.
- DES — descent speed targets and path angle. Check this page before starting your descent to make sure the FMC's calculated path makes sense.
You generally don't need to change anything on these pages. They exist for monitoring and fine-tuning.
11. Common FMC Mistakes (and How to Avoid Them)
Even after you learn the workflow, these trip people up repeatedly:
Not Pressing EXEC
The FMC has a two-step confirmation system. When you make a change, the EXEC light illuminates. You must press it, or the change stays in a "modified" state and never gets applied. If your route looks different on the CDU than on the ND map, you probably forgot to press EXEC somewhere.
Leaving Discontinuities in the Route
Discontinuities break LNAV. The autopilot will fly to the waypoint before the gap and then revert to heading mode with no idea where to go next. Always scroll through the LEGS page before departure and close any gaps.
Wrong ZFW
If your Zero Fuel Weight doesn't match reality, every calculation downstream is wrong — V-speeds, climb rates, descent profiles, fuel predictions. Always pull the ZFW from the sim's current payload state, not from memory or a guess.
Forgetting the SID or STAR
If you enter a route but skip the DEPARTURES and ARRIVALS pages, your flight plan goes directly from the airport to the first enroute waypoint — which is probably 100 miles away at FL200. The SID gives you a structured path from the runway to the airway. The STAR gives you a structured path from the airway to the approach. Without them, you're asking LNAV to draw a straight line through terrain and traffic.
Typing Errors
Waypoint names are exact. MERIT works. MERRIT doesn't. If the FMC says NOT IN DATA BASE, you've either misspelled the waypoint or it doesn't exist in your nav database cycle. Double-check the spelling against your chart or SimBrief plan. For help reading charts, see the approach plates guide.
Not Setting the Trim
The TAKEOFF REF page displays a stabiliser trim value. If you don't set this on the trim wheel, you'll get a takeoff configuration warning when you advance the thrust levers — and the aircraft will pitch unpredictably on rotation.
What to Do Next
Your FMC is programmed. Your route is active. Your V-speeds are set. Here's the short version of what happens next:
- Set the MCP — heading to runway heading, altitude to your first cleared altitude, both flight directors ON, A/T ARM on
- Get your takeoff clearance and taxi out
- Line up, set thrust, and at VR rotate to about 15 degrees nose up
- At 400 feet AGL, engage LNAV and VNAV — the FMC takes over
The FMC does the thinking. You do the monitoring. And that's how every 737 flight works — in the sim and in real life.
A note on hardware: Programming the FMC is half the job — flying what it commands is the other half, and the 737 rewards proper controls. A Honeycomb Alpha yoke gives you Boeing-style push-pull and trim, while the Honeycomb Bravo puts an autopilot/MCP panel, dual thrust levers with reversers, and the gear and flap controls on your desk — useful the moment you engage LNAV/VNAV. And if you would rather drive the FMC on physical keys instead of the mouse, the MOZA MB7F Flight Computer Display is a hardware 737-style CDU with a 5.1-inch screen and backlit keypad that mirrors these pages in real time. The best hardware for airliners guide compares options across budgets.
If you want the complete power-up to takeoff sequence, the PMDG 737 cold and dark startup guide covers everything before and after FMC programming. For the general FMC concepts that apply across all Boeing types, see the FMC programming guide.