You just loaded into MSFS 2024 for the first time. You picked a gate at Heathrow, selected the Airbus A320neo, and now you are staring at a cockpit full of buttons, knobs, and screens that make absolutely no sense. Welcome to the iniBuilds A320 V2 -- the default airliner that ships with the simulator, and the aircraft that will either hook you on flight simulation or make you quit before you ever leave the ground.
Want to practise MCDU programming without loading the sim? Our free A320 MCDU Trainer lets you work through INIT page setup, route entry, and performance configuration in your browser with guided scenarios and instant AI feedback.
The good news: this plane is free. It comes with your copy of MSFS 2024. The bad news: nobody explains how to actually fly it. The in-game tutorials barely scratch the surface, and the iniBuilds manual -- while it exists -- does not exactly hold your hand through the Airbus philosophy that makes this cockpit work the way it does.
This guide takes you from a cold and dark cockpit to a completed flight. Not just which buttons to press, but why the Airbus works the way it does, what the autopilot is telling you at every stage, and how to fix the problems that trip up almost everyone.
Affiliate disclosure: This guide contains affiliate links. If you purchase through these links, SimTuts earns a small commission at no extra cost to you. We only recommend products we genuinely believe improve the flight sim experience.
The Airbus Philosophy: Why This Cockpit Feels Different
If you have flown a Boeing in the sim -- the PMDG 737 or 777 -- you are used to dialling in exact values and the autopilot following them. The Airbus does something fundamentally different. It has two modes for almost everything: managed and selected.
- Managed mode: you let the Flight Management and Guidance System (FMGS) decide. It uses whatever you programmed into the MCDU -- your route, your cost index, your altitude constraints. The autopilot flies the optimal profile.
- Selected mode: you take over. You dial in a specific speed, heading, altitude, or vertical speed, and the autopilot flies exactly that value, ignoring the MCDU programming.
The way you switch between these two modes is the single most confusing thing about this aircraft for new pilots: you push and pull the knobs on the Flight Control Unit (FCU).
Push a knob in = managed mode. The display shows dashes and a small green dot.
Pull a knob out = selected mode. The display shows the value you dialled in, no dot.
This push/pull logic applies to all four main FCU knobs: Speed, Heading, Altitude, and Vertical Speed. Once you understand this one concept, the entire Airbus autopilot system starts to make sense.
Mouse Controls: How to Actually Push and Pull
This is where most people get stuck. The iniBuilds A320 V2 uses the MSFS cockpit interaction system, and the controls are different depending on which mode you have selected. You can find this setting under General Options > Flight Interface > Cockpit Interaction System.
Lock Mode (Default)
Lock mode is the default in MSFS 2024. To interact with FCU knobs:
- Hover over the knob until it highlights
- Hold left mouse button to lock onto the knob
- While holding left click: right-click = push (engage managed mode)
- While holding left click: middle-click (scroll wheel click) = pull (engage selected mode)
- Scroll the mouse wheel to change the value
Legacy Mode
If you find Lock mode frustrating, switch to Legacy under the same settings menu. In Legacy mode:
- Click the top of the knob = push (managed)
- Click the bottom of the knob = pull (selected)
- Click left side = decrease value
- Click right side = increase value
Legacy mode is simpler and more intuitive for mouse-only flying. Many simmers prefer it specifically because of how often you need to push and pull knobs in the Airbus.
Cold and Dark Startup
This is a condensed startup sequence. If you want an exhaustive step-by-step with every overhead panel switch explained, see our Fenix A320 cold and dark guide -- the overhead panel layout and startup logic are nearly identical between the Fenix and iniBuilds versions, since both simulate the same real aircraft.
Power Up
- BAT 1 and BAT 2 — flip both to ON (overhead panel, centre section)
- EXT PWR — press ON if a ground power unit (GPU) is available. This gives you full electrical power without running the APU
- ADIRS 1, 2, 3 — turn all three to NAV. These are your Inertial Reference Systems. They take several minutes to align in the real aircraft, though the sim is more forgiving
Overhead Panel Essentials
- NAV lights — ON
- Seatbelt signs — ON
- Fuel pumps — all ON (left wing, right wing, and centre if you have fuel loaded there)
- Verify hydraulics and electrical panels are in their normal (up) positions — they should be by default
APU Start
- APU MASTER SW — ON
- APU START — press and wait for the AVAIL light
- APU BLEED — ON (this provides bleed air for air conditioning and engine start)
- Pack 1 and Pack 2 — ON (air conditioning)
You now have a powered cockpit. The screens are alive, the MCDU is ready for programming.
Programming the MCDU
The MCDU (Multipurpose Control and Display Unit) is where you tell the aircraft where you are going, how fast, and at what altitude. Here is the sequence.
Prefer physical keys? The MOZA MA3F Flight Computer Display is a hardware A320 MCDU with a 5.1-inch screen and backlit keypad that mirrors your sim's FMS pages in real time — everything below works the same way on it.
Option 1: SimBrief Import (Recommended)
If you use SimBrief for flight planning, you can import your entire route directly:
- On the MCDU INIT A page, press INIT REQUEST (right-side line select key)
- Wait a few seconds for the data to load
- The system fills in FROM/TO, cost index, cruise flight level, and the route
Note: you need your SimBrief Pilot ID configured. Check the EFB settings or the iniBuilds options menu for where to enter it. If the INIT REQUEST button appears greyed out, ensure you have generated a flight plan in SimBrief first.
Option 2: Manual Entry
If you prefer to programme everything by hand:
- INIT A page — enter your departure and arrival airports in the FROM/TO field (e.g., EGLL/EGPH). Enter your flight number, cost index (a value between 0 and 999 -- use around 30-40 for a typical short-haul flight), and cruise flight level (e.g., 350 for FL350)
- F-PLN page — press the F-PLN key, then select your departure runway and SID. Enter your enroute waypoints connected by airways. Select your STAR and approach at the destination
- INIT B page (which becomes the FUEL PRED page after engine start) — enter your Zero Fuel Weight and ZFW Centre of Gravity (ZFW/ZFWCG), and your block fuel. If you used SimBrief, these values are on your OFP
For a deeper dive into MCDU flight plan programming, see our FMC programming guide and SimBrief to FMC workflow guide.
Performance Page
- Press PERF on the MCDU to access the T.O. (takeoff) performance page
- V1, VR, V2 — these are your takeoff decision speeds. The MCDU may calculate them for you once weights are entered. If not, check your SimBrief OFP for the values
- FLAPS/THS — enter your takeoff flap setting. On the A320, valid takeoff configurations are 1 (which gives you Config 1+F on the ground, meaning slats plus flaps), 2, or 3. Config 1+F is the most common for standard conditions
- FLEX TEMP — this is the assumed temperature for reduced thrust takeoff. Enter a temperature higher than the actual outside air temperature. The engines will produce less thrust, saving wear and fuel. A typical value might be 50-60 degrees Celsius, but the correct value depends on your weight and runway length. Your SimBrief OFP provides this
- TRANS ALT — transition altitude. This varies by airport (e.g., 6000 feet at London airports, 3000 feet at some regional fields, and different values across Europe). Check your departure charts or SimBrief OFP for the correct value
Get flight sim tips in your inbox
New guides, checklists, and tips. No spam. Unsubscribe any time.
The FCU Explained
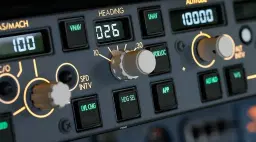
The Flight Control Unit sits on the glareshield directly in front of you. From left to right, the main elements are:
Speed/Mach Knob (Left Side)
- Turn to set a speed target (100-399 knots) or Mach number
- Push for managed speed -- the FMGS selects the optimal speed based on your cost index and flight phase
- Pull for selected speed -- the aircraft flies exactly the speed you dialled in
- The small SPD/MACH button toggles between knots and Mach display
Heading/Track Knob
- Turn to set a heading (000-359 degrees)
- Push for managed lateral navigation (NAV mode) -- the aircraft follows the route in the MCDU
- Pull for selected heading (HDG mode) -- the aircraft turns to and maintains the heading you set
- LOC button — arms localizer capture for an ILS approach
- HDG V/S - TRK FPA button — toggles between heading/vertical speed and track/flight path angle
Altitude Knob (Centre-Right)
- Outer ring switches between 100-foot and 1000-foot increments
- Inner knob dials the altitude value (range: 100 to 49,000 feet)
- Push for managed altitude -- the FMGS will climb or descend respecting altitude constraints from your SID, STAR, and airway restrictions
- Pull for selected altitude -- the aircraft climbs or descends to the altitude in the window, ignoring constraints
- EXPED button — engages expedite mode for maximum rate climb or descent
Vertical Speed / Flight Path Angle Knob (Right Side)
- Turn to set a vertical speed (-6000 to +6000 ft/min) or flight path angle
- Pull to engage V/S mode with the value you set
- Push to level off immediately (sets V/S to zero)
AP, A/THR, and APPR Buttons
- AP1 / AP2 — engage autopilot 1 or 2
- A/THR — engage autothrust
- APPR — arms both localizer and glideslope capture for an ILS approach
- LOC — arms localizer capture only (no glideslope)
Takeoff: What the FMA Is Telling You
The Flight Mode Annunciator (FMA) is the row of text at the very top of your Primary Flight Display (PFD). It has five columns, and reading it is the single most important skill for flying the Airbus. Here is what you see during takeoff:
Five FMA Columns (Left to Right)
- Autothrust mode — what the engines are doing
- Vertical mode — what the aircraft is doing in the pitch axis (climbing, descending, holding altitude)
- Lateral mode — what the aircraft is doing in the roll axis (following a heading, tracking a route, intercepting a localizer)
- Approach capability — precision approach readiness (CAT 1, CAT 2, CAT 3)
- Engagement status — which systems are active (AP1, AP2, FD1, FD2, A/THR)
The top line shows the engaged (active) mode in green. The second line shows armed modes in cyan -- these are waiting to activate when conditions are met.
During the Takeoff Roll
- Column 1: MAN TOGA (full thrust) or MAN FLX (flex/reduced thrust)
- Column 2: SRS — Speed Reference System. This maintains V2+10 during the initial climb
- Column 3: RWY — runway mode. The aircraft uses the localizer signal to follow the runway centreline (transitions to RWY TRK at 30 feet)
At Thrust Reduction Altitude (Typically 1500ft AGL)
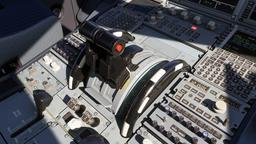
- Column 1 flashes LVR CLB — this is telling you to move the thrust levers back to the CL (climb) detent. This is the small notch below the FLX/MCT detent. Once you do, column 1 changes to THR CLB
At Acceleration Altitude
- Column 2 changes from SRS to CLB (managed climb) or OP CLB (open climb, if you pulled the altitude knob)
- The speed target increases from V2+10 to the managed climb speed
This is the point where the aircraft transitions from "getting safely off the ground" to "climbing to cruise." Gear should already be up, and you should be retracting flaps as the speed increases through the appropriate flap retraction speeds.
Climb and Cruise
If you set everything up correctly in the MCDU and pushed (not pulled) the speed, heading, and altitude knobs, the climb is almost entirely hands-off:
- Speed: managed — the FMGS accelerates to the optimal climb speed (around 250 knots below FL100 due to the speed restriction, then the cost-index-based climb speed above FL100, transitioning to a climb Mach number in the upper flight levels)
- Heading: managed (NAV mode) — the aircraft follows the programmed route
- Altitude: set your cleared altitude in the FCU window. As ATC clears you higher, dial the new altitude and push the knob to climb in managed mode
At cruise, the FMA shows SPEED in column 1 and ALT CRZ in column 2. The aircraft holds your cruise flight level and the FMGS manages speed based on your cost index.
The 250-Knot Speed Limit
Below FL100 (10,000 feet), air traffic regulations restrict speed to 250 knots. The managed speed mode handles this automatically -- you will see the speed target change to 250 knots as you descend through FL100, or the FMGS will hold below 250 during the climb. This is a speed limit, not a target. Your actual managed climb speed below FL100 will likely be 250 knots because the optimal climb speed is usually at or near this limit.
Descent and Approach
This is where most iniBuilds A320 flights go wrong. The descent requires more setup than the climb.
Setting Up the Arrival
- On the F-PLN page, select your STAR (Standard Terminal Arrival Route) and approach. Make sure you select the correct transition -- not just the base procedure. Selecting the full STAR with its transition ensures altitude constraints load correctly
- Dial the arrival altitude into the FCU (usually the initial approach fix altitude or whatever ATC assigns)
Initiating Descent
When you reach your Top of Descent (shown as T/D on the navigation display):
- Push the ALT knob — this gives you managed descent (DES mode). The FMGS calculates the optimal descent path, manages speed, and respects altitude constraints from your STAR. This is the recommended method
- Pull the ALT knob — this gives you open descent (OP DES mode). The engines go to idle and the aircraft maintains whatever speed you have set, but it ignores altitude constraints. Use this only if ATC gives you a clearance that conflicts with the published procedure
During managed descent, the FMA column 2 shows DES. Constraint altitudes appear in magenta on your PFD altitude tape. The autothrust manages speed using the idle/thrust balance to stay on the computed path.
ILS Approach Setup
- Verify the ILS frequency: go to the MCDU RAD NAV page. If you selected an ILS approach in your flight plan, the frequency should auto-populate. Cross-check it against your approach chart. If it looks wrong (this can happen due to scenery data discrepancies), enter the correct frequency or ILS identifier manually
- Set the decision altitude: on the PERF APPR page in the MCDU, enter your decision altitude (DA) or minimum descent altitude (MDA)
- Set the approach speed: the MCDU calculates Vapp (approach speed) automatically based on your landing weight. For a typical A320 landing, expect something in the range of 130-145 knots depending on weight
Flying the ILS
- Follow the STAR to get established on the approach. ATC (or your STAR) will vector you onto an intercept heading for the localizer
- Press APPR on the FCU. This arms both LOC (localizer) and G/S (glideslope) capture. You will see LOC and G/S appear in blue on the FMA (armed, waiting to capture)
- As the aircraft intercepts the localizer beam, LOC captures first — the FMA changes to LOC in green
- Once established on the localizer and descending to intercept the glideslope from below, glideslope captures — G/S turns green on the FMA
- Extend gear and flaps as speed decreases. Final landing configuration is typically Flaps FULL below about 2000 feet AGL, with gear down
Important: the aircraft must intercept the glideslope from below. If you arrive above the glideslope altitude, the autopilot will capture the localizer but will not descend to capture the glideslope. Use V/S mode to descend to an appropriate intercept altitude before activating APPR.
At around 400 feet on a manual landing, disconnect the autopilot and hand-fly to touchdown. For a full ILS approach walkthrough, see our dedicated ILS approach guide.
Common Problems and Fixes
These are the issues that fill the iniBuilds and MSFS forums. Every one of them has a specific cause and fix.
VNAV / Managed Descent Not Working
Symptom: the aircraft does not descend on the STAR profile, ignores altitude constraints, or stays level when it should be descending.
Causes and fixes:
- Incomplete arrival procedure: the most common cause. If you only selected the approach type and runway but not the full STAR with its transition, the MCDU does not have the altitude constraints it needs. Go to F-PLN, select the complete arrival: STAR name, transition waypoint, then approach type
- You pulled the ALT knob instead of pushing it: pulling gives you open descent (OP DES), which ignores constraints. Push the knob for managed descent (DES)
- FCU altitude set too high: if the altitude in the FCU window is higher than your cruise altitude, pushing it can cause unexpected behaviour. Set the altitude to your next cleared altitude before pushing
Heading Mode Stuck / Cannot Return to NAV Mode
Symptom: you switched to heading mode (pulled the HDG knob) during the flight, and now pushing it back in does not re-engage NAV mode.
Causes and fixes:
- Too far off the flight plan path: if you flew a heading that took you significantly off your programmed route, the FMGS cannot find a way to rejoin. Use Direct-To (DIR key on the MCDU) to select a waypoint ahead on your route. Once the aircraft has a path to follow, push the HDG knob for NAV mode
- Flight directors not enabled: managed modes require the Flight Directors to be on. Check the FD button on the glareshield (next to the LS button). It should be illuminated. If it is off, press it
- Discontinuity in the flight plan: check the F-PLN page for any gaps (shown as "DISCONTINUITY" between waypoints). Where the waypoints either side should be joined, clear the gap: press CLR with the scratchpad empty, then the line select key next to the discontinuity. Typing a waypoint onto the discontinuity line does not close it -- the waypoint goes in and the discontinuity moves down below it
ILS Will Not Capture
Symptom: you pressed APPR, but the localizer and/or glideslope never capture.
Causes and fixes:
- Wrong ILS frequency: the auto-tune relies on MSFS scenery data, which is sometimes incorrect. Open the RAD NAV page and verify the frequency against your approach chart. If wrong, type the correct ILS identifier or frequency and press the line select key to enter it
- Approaching from the wrong angle: you must intercept the localizer at a reasonable angle (45 degrees or less). If you are approaching from too steep an angle or from the wrong side, the system cannot capture
- Above the glideslope: the aircraft will not descend to capture the glideslope. You must be at or below the glideslope altitude. Use V/S mode (pull the V/S knob, dial about -1000 fpm) to descend to the correct intercept altitude, then press APPR
- APPR was pressed too late: arm APPR well before the localizer intercept point, ideally when you are on your base turn or being vectored
Autopilot Will Not Disengage
Symptom: you press your assigned autopilot disconnect button or key, and nothing happens. The AP stays engaged.
Cause: the default MSFS binding "Toggle Autopilot Master" has a known issue with the iniBuilds Airbus aircraft -- it can engage the autopilot but not disengage it.
Fix: rebind your joystick button or key to "Toggle Disengage Autopilot" instead of "Toggle Autopilot Master." This correctly mimics the red sidestick disconnect button. You will need to press it twice -- once to disconnect, and a second time to silence the disconnect warning. Alternatively, click the AP1 button directly on the FCU in the cockpit.
How This Differs from the Fenix A320
You will see the Fenix A320 mentioned constantly in forums and on YouTube. Here is what you need to know:
The iniBuilds A320 V2 is the free default aircraft that ships with MSFS 2024. It is a solid, functional simulation that gets the core Airbus philosophy right -- push/pull FCU logic, managed and selected modes, SRS and FMA annunciations, MCDU programming. It is the aircraft everyone starts with.
The Fenix A320 is a paid third-party add-on (separate purchase, not included with the sim). It is a study-level simulation with deeper systems modelling, custom failures, a more detailed EFB, and more accurate flight dynamics. If you plan to fly on VATSIM or want maximum realism, the Fenix is the upgrade path.
The key practical differences:
- Systems depth: the Fenix models more systems in greater detail (hydraulics, electrics, pneumatics). The iniBuilds version covers the essentials but some deeper systems are simplified
- Flight model: the Fenix generally feels more responsive during hand-flying. The iniBuilds flight model can feel heavier, particularly on manual approaches
- MCDU: both follow the same Airbus MCDU logic. The Fenix has a more complete implementation of secondary pages and features
- Price: iniBuilds is free. The Fenix is a premium purchase. For learning Airbus fundamentals, the iniBuilds V2 is more than sufficient
If you learn the iniBuilds A320 V2 thoroughly using this guide, everything you learn transfers directly to the Fenix. The cockpit layout, FCU logic, MCDU pages, and FMA reading are all the same -- because they are all modelling the same real aircraft.
Putting It All Together
Here is the complete flow for a typical flight:
- Cold and dark: power up, align ADIRS, start APU
- MCDU: programme or import your route, enter weights and fuel, set up the PERF takeoff page
- Before start: set FCU altitude, QNH, verify managed modes (dashes on speed and heading), arm ground spoilers, set flaps, test T.O. CONFIG
- Engine start: beacon on, ENG MODE to IGN/START, start engines 1 then 2
- Taxi: release parking brake, taxi with thrust as needed
- Takeoff: thrust levers to FLX/MCT (or TOGA), rotate at VR — smoothly, to about 15 degrees of pitch — gear up on positive climb
- Climb: thrust levers to CL detent at THR RED altitude, managed climb to cruise. Adjust altitude in FCU as ATC clears you higher
- Cruise: monitor, adjust as needed. The aircraft flies itself
- Descent: select full STAR and approach in MCDU, set descent altitude, push ALT knob at T/D for managed descent
- Approach: verify ILS frequency, press APPR on FCU, configure for landing
- Landing: disconnect AP around 400 feet, flare, touchdown, reverse thrust, autobrake
The iniBuilds A320 V2 is not a study-level aircraft, but it is a genuinely capable simulation of the world's most popular airliner. Master the push/pull FCU logic, learn to read the FMA, and programme the MCDU correctly, and you will have a solid foundation that transfers to any Airbus add-on you fly in the future.
A note on hardware: The Airbus's sidestick-and-detent design comes alive with kit that mirrors the real layout. The Thrustmaster TCA Sidestick Airbus Edition replicates the sidestick, and the TCA Quadrant Airbus Edition gives you the detented thrust levers that make CL/FLX/TOGA muscle-memory — the Officer Pack bundles both. Add rudder pedals for taxi and crosswind work. The best hardware for airliners guide breaks down options at every budget.
If you get stuck, our VNAV troubleshooting guide and SIDs and STARs explained go deeper into the navigation concepts that apply to this aircraft and every other airliner in the sim.