You are 80 miles from the airport, FL370, doing Mach 0.78, and ATC just cleared you to descend via the STAR. You press something. The aircraft does something. Twenty minutes later you are 3,000 feet above the glideslope, doing 280 knots in an area where you should be at 210, and the VATSIM controller is asking you to expedite your descent with a tone that suggests this is not the first time tonight.
Sound familiar? You are not alone. The descent phase is where the majority of sim pilots lose the plot, and the reason is simple: almost nobody actually understands what the VNAV automation is doing during descent, what mode it is in, or why it just decided to level off at an altitude you did not ask for.
Climbing is straightforward. You set an altitude in the MCP or FCU, you engage VNAV or managed climb, and the aircraft goes up. The automation handles speed and thrust and you sit there monitoring. Descent is a completely different problem. The aircraft has to lose altitude, lose speed, meet a series of constraints at specific waypoints, transition to approach configuration, and do all of this while you are also briefing the approach, setting up the radios, and responding to ATC. The automation is working hard, but it needs you to understand what it is doing so you can help it -- or take over when ATC throws a curveball.
This guide covers VNAV descent in the two most popular study-level airliners in MSFS 2024: the PMDG 737 and the Airbus A320 (Fenix and FlyByWire). The logic is different between Boeing and Airbus, the interface is different, and the failure modes are different. But the underlying physics are the same: you have a heavy object at high altitude going fast, and you need it at low altitude going slow, on a specific path, at a specific time.
Let's fix your descents.
Why Descent Is Harder Than Climb
When you climb, energy management is simple. The engines produce thrust, the aircraft trades speed for altitude (or maintains speed while climbing), and the automation has one job: get to the target altitude efficiently. There is excess energy available -- the engines are producing more thrust than needed for level flight, and that surplus goes into climbing.
Descent is the reverse, and it is fundamentally harder for three reasons.
You are managing energy removal, not energy addition. The aircraft at FL370 doing Mach 0.78 has an enormous amount of kinetic and potential energy. You need to get rid of most of it, at the right rate, at the right places. Engines at idle cannot always remove energy fast enough, especially if you are in clean configuration (no flaps, no gear, no speed brakes). Unlike climb, where you can always add more thrust, in descent you can run out of drag.
Constraints stack up. A typical STAR has five or six altitude and speed restrictions between the top of descent and the final approach fix. Miss one, and the rest of the profile falls apart. In climb, you usually have one target altitude and one speed (250 below FL100, then climb speed, then Mach). In descent, you might need to be at FL240 by one fix, FL180 by the next, 12,000 by another, and 250 knots at yet another -- all while decelerating from Mach 0.78.
ATC changes the plan constantly. Shortcuts, vectors, altitude assignments that differ from the STAR, speed restrictions -- all of these happen during descent. Each one changes your energy profile, and you have to adapt in real time. The automation can handle the published STAR perfectly. It cannot handle "turn left heading 270, descend and maintain flight level 240" without your intervention.
Understanding these three factors is the foundation. Everything that follows is about managing them.
The Basics: Top of Descent
What T/D Is
Top of Descent (T/D or TOD) is the point along your route where you need to begin descending from cruise altitude to arrive at the first altitude constraint on your STAR (or at the airport elevation if there are no constraints).
The FMC/FMGC calculates this by working backwards from the runway. It looks at every altitude and speed constraint on your STAR and approach, factors in your current weight, the forecast winds at each altitude, your descent speed schedule, and the aircraft's drag characteristics. Then it draws a line from the lowest constraint back up to your cruise altitude at a roughly 3-degree angle, adjusting for all those variables. Where that line meets your cruise altitude is T/D.
Where to Find T/D
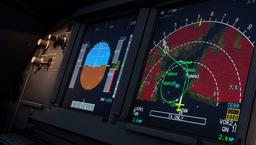
In the PMDG 737: T/D appears on the Navigation Display (ND) as a small white circle with a downward-pointing arrow, positioned along your route line. On the LEGS page of the CDU, you can also see the distance to T/D. On the VNAV DES page, the FMC shows you the planned descent path details.
In the Airbus A320 (Fenix/FBW): T/D appears on the ND as a downward-pointing arrow symbol (often called the "top of descent" marker) on the flight plan line. The MCDU PERF DES page shows descent parameters, and the PROG page shows distance to T/D.
The Green Arc and Descent Deviation
Boeing 737 PFD: Once you begin descending, you will see a green arc (sometimes called the "green banana") on the PFD's altitude tape. This arc shows where the VNAV path is relative to your current altitude. If the arc is above your current altitude, you are below the path. If it is below, you are above the path. There are also white altitude bugs on the altitude tape showing upcoming altitude constraints.
Airbus A320 PFD: The vertical deviation indicator (sometimes called the "yoyo" or V/DEV) appears on the PFD when you are in managed descent. It shows a green diamond indicating your position relative to the computed descent path. Diamond above centre: you are below path. Diamond below centre: you are above path. This is similar to a glideslope deviation indicator but for the VNAV path.
Why T/D Moves
T/D is not fixed. It recalculates continuously based on:
- Wind changes: If the FMC receives updated wind data (or if actual winds differ from forecast), the descent path changes. A stronger headwind during descent means you cover less ground per minute, so T/D moves closer. A tailwind pushes it further away.
- Weight changes: As you burn fuel in cruise, the aircraft gets lighter. A lighter aircraft descends differently than a heavier one.
- Speed schedule changes: If you change your descent speed in the FMC or if cost index calculations update, the path changes.
- Constraint changes: Loading a different STAR, adding or removing a waypoint, or receiving an ATC altitude assignment all change the constraints the path must meet.
The practical takeaway: do not fixate on T/D 100 miles out and assume it will stay there. Check it again at 30-40 miles. It may have shifted by several miles.
Boeing 737 VNAV Descent: The PMDG in Detail
The 737's VNAV descent logic is the most complex part of the aircraft's automation. It has two distinct sub-modes during descent, and understanding the difference between them is the single most important thing you can learn about Boeing VNAV.
VNAV PATH vs VNAV SPD
VNAV PATH means the FMC is flying a geometric path -- a specific vertical profile through space. It calculates the required vertical speed to follow this path and commands the elevators and/or throttles to stay on it. The green arc on the PFD shows this path. VNAV PATH is what you want during a normal descent on a STAR with altitude constraints.
The FMA (Flight Mode Annunciator) at the top of the PFD shows "VNAV PTH" when this mode is active.
VNAV SPD means the FMC has given up on the geometric path and is instead maintaining a target speed by controlling pitch. The aircraft descends (or levels off) at whatever rate is needed to hold the target speed with engines at idle. VNAV SPD activates when:
- You are above the VNAV path and the FMC cannot get back to it with the current drag configuration
- You are in the speed-priority segment of the descent (typically the early portion before constraints begin)
- The FMC does not have a path to follow (constraints have been removed or you have been vectored off the STAR)
The FMA shows "VNAV SPD" when this mode is active.
Why this matters: In VNAV PATH, the aircraft follows a precise profile and will arrive at each constraint at the correct altitude. In VNAV SPD, the aircraft is just maintaining speed while descending at idle thrust -- it has no guarantee of meeting altitude constraints. If you see VNAV SPD when you expect VNAV PATH, something has gone wrong with your descent profile and you need to intervene.
How to Initiate Descent
The sequence for initiating a VNAV descent in the 737:
-
Set the target altitude in the MCP altitude window. This is critical and a major source of confusion. In the 737, the MCP altitude window acts as a "clearance limit." VNAV will not descend the aircraft below whatever altitude is set in this window, regardless of what the FMC descent path shows. Before reaching T/D, set the MCP altitude to the altitude ATC has cleared you to (or the lowest altitude on your STAR if you have received "descend via" clearance).
-
Ensure VNAV is engaged (press the VNAV button on the MCP if it is not already active from cruise).
-
At T/D, VNAV begins the descent. The aircraft will pitch down and retard the throttles to idle. The FMA will typically show VNAV PTH if there are constraints to meet, or VNAV SPD if the initial descent segment is unconstrained.
If you set the MCP altitude too high, VNAV will level off at that altitude even though the FMC path continues below. This is by design -- the MCP altitude is a safety floor. You must lower it as you receive further clearances.
This is the single most reported "VNAV is broken" symptom, and it is worth meeting once in a controlled setting rather than at FL350 with a STAR to fly. In our browser 737 CDU trainer, the Premium VNAV Descent Troubleshooting scenario reproduces the level-off and walks the diagnosis, and Descent Setup (DES + FORECAST) builds the path it levels off from. If the CDU itself is new to you, start with the free ROUTE Page Basics.
The MCP Altitude Window: The Number One Boeing Gotcha
This deserves its own section because it causes more confusion than any other aspect of the 737.
The MCP altitude window in the Boeing serves as the lowest altitude VNAV will descend to. It is your representation of the ATC clearance. The FMC knows about the STAR constraints, but the MCP altitude represents what you have actually been cleared for.
Correct workflow during descent:
| ATC Instruction | MCP Altitude Action |
|---|---|
| "Descend via the STAR" | Set MCP to the lowest altitude on the STAR (often the final constraint, e.g., 4,000) |
| "Descend and maintain FL240" | Set MCP to FL240 |
| "Descend and maintain FL180" (further clearance) | Lower MCP from FL240 to FL180 |
| "Descend via, except maintain FL310 until BRAVO" | Set MCP to the lowest altitude on the STAR, but add an altitude constraint at BRAVO on the LEGS page |
If you forget to lower the MCP altitude, the aircraft will level off and you will suddenly be behind on your descent. This is the most common VNAV mistake in the 737.
DRAG REQUIRED
When you see "DRAG REQUIRED" on the CDU scratchpad, it means the aircraft cannot descend fast enough at idle thrust in clean configuration to stay on the VNAV path. You are going to go above the path unless you add drag.
What to do when you see DRAG REQUIRED:
-
Deploy speed brakes. This is the first and most common response. Extend the speed brake lever partially (you rarely need full extension). In the PMDG 737, the speed brakes add significant drag and will usually get you back on path within a few miles.
-
If speed brakes are not enough, consider requesting a lower speed from ATC. Slower speed means less energy to dissipate. Or, if you are still high, consider extending flaps early (only within the appropriate speed range).
-
Monitor the green arc. As you deploy speed brakes, watch the green arc on the PFD move relative to your altitude. You want the arc to be at or near your current altitude (on path).
DRAG REQUIRED often appears when you have been kept high by ATC and then cleared for a normal descent with constraints -- the aircraft simply does not have enough drag to make the path from a higher-than-planned starting altitude. It is a warning, not an emergency. Deploy speed brakes and manage the situation.
When ATC Gives You an Altitude Different From the STAR
This happens constantly. Your STAR says you should be at FL240 at JONES intersection, but ATC says "descend and maintain FL280."
What this means: ATC is modifying your vertical clearance. You are no longer descending via the STAR's published altitudes -- you are being given specific altitudes by ATC.
What to do in the 737:
- Set FL280 in the MCP altitude window.
- The FMC will now stop the descent at FL280 regardless of what the STAR constraints say below that altitude.
- When ATC gives further clearance ("descend and maintain FL240"), lower the MCP to FL240.
The problem: If you were on a "descend via" clearance and ATC switches to specific altitude assignments, the VNAV path may no longer make sense. The FMC might try to follow the STAR constraints, but the MCP altitude prevents it from doing so, and the path gets confused.
The fix: In this situation, consider using the ALT INTV (Altitude Intervention) button or manually managing the descent with V/S (Vertical Speed) or FLCH (Flight Level Change) mode until you rejoin the STAR.
ALT INTV: Altitude Intervention
The ALT INTV button on the 737 MCP tells VNAV to descend to the altitude in the MCP window, ignoring any intermediate constraints that are between your current altitude and the MCP altitude.
When to use ALT INTV:
- ATC clears you directly to a lower altitude, skipping intermediate STAR constraints
- You need to descend through a constraint that the FMC wants you to level off at
- You are being vectored and need to descend without the FMC trying to meet waypoint constraints
Example: You are at FL280, the next STAR constraint is "cross JONES at FL240," and ATC says "descend and maintain FL180." If you just set FL180 in the MCP, VNAV will still try to cross JONES at FL240 (leveling off or adjusting rate). If you press ALT INTV after setting FL180, VNAV will descend straight to FL180 without worrying about the FL240 constraint at JONES.
Speed Intervention
Pressing the speed knob on the MCP (the knob that normally shows the VNAV command speed) activates speed intervention. This tells VNAV to use whatever speed is currently showing in the MCP speed window, rather than the FMC-computed speed.
When to use speed intervention:
- ATC assigns a specific speed ("reduce speed to 250 knots")
- You need to slow down for turbulence
- You want to manually control speed while keeping VNAV in charge of the vertical path
After pressing the speed knob, you can dial in a new speed. To return to FMC-computed speeds, press the speed knob again (it toggles).
When to Use Speed Brakes
Speed brakes in the 737 are your primary tool for energy management during descent. Use them when:
| Situation | Speed Brake Use |
|---|---|
| DRAG REQUIRED message | Deploy immediately, partial to full |
| Above the VNAV path (green arc below you) | Deploy to regain path from above |
| ATC gives "descend now" after keeping you high | Deploy generously |
| Normal descent, on path | Not needed -- keep them stowed |
| Below the path (green arc above you) | Absolutely do not deploy -- you need to shallow your descent, not steepen it |
Important PMDG 737 note: Retract the speed brakes as you configure for approach. Boeing's FCTM technique is to minimise speed brake use at flaps 5 and beyond, and to have them retracted by the time you extend flaps 15 (and never use them below 1,000 feet AGL). Speed brakes do not auto-retract in flight — the autostow feature only operates on or near the ground — so do not forget them once you begin configuring for approach.
Transition From VNAV to Approach
As you approach the final approach fix, VNAV will typically transition to a speed-priority mode, managing your deceleration to approach speed. The key steps:
- Set the approach speed in the FMC. The APPROACH REF page should have your Vref and approach flap setting. If not, enter them.
- Arm the approach mode. Press the APP button on the MCP (for ILS) or the VOR/LOC button (for localizer only). This arms the localizer and glideslope capture.
- The transition: VNAV will manage the descent until the glideslope is captured. At that point, G/S (glideslope) mode replaces VNAV for vertical guidance. The FMA changes from "VNAV PTH" or "VNAV SPD" to "G/S."
- Configure on time. Extend flaps according to your speed -- flaps 1 first, then 5, then 15, then 25 or 30 for landing. The FMC speed bugs guide you.
Common mistake: Not arming approach mode in time. If you do not arm the approach before intercepting the localizer/glideslope, you will fly through them. Arm the approach well before reaching the final approach course -- 10 to 15 miles from the runway is a good minimum.
Airbus A320 Managed Descent: Fenix and FlyByWire in Detail
The Airbus approach to descent automation is philosophically different from Boeing. Where Boeing uses VNAV with modes you monitor and a speed knob you intervene with, Airbus uses the concept of "managed" vs "selected" guidance, controlled by the FCU (Flight Control Unit) knobs.
Managed vs Selected: The Fundamental Difference
Managed mode means the FMGC (Flight Management and Guidance Computer) is in charge. It computes the speed, altitude, and path, and the aircraft follows the plan. Managed mode is indicated by an illuminated dot next to the value in the FCU window, and the PFD shows the corresponding target in magenta.
Selected mode means you, the pilot, are in charge of that parameter. You have pulled the knob and manually set a value. The PFD shows blue targets when a value is selected.
This applies to three parameters independently:
| Parameter | Managed (push knob) | Selected (pull knob) |
|---|---|---|
| Speed | FMGC controls speed per flight plan | Pilot sets speed on FCU |
| Heading/Track | FMGC follows flight plan laterally | Pilot sets heading/track on FCU |
| Altitude | FMGC follows vertical profile | Pilot commands specific V/S, FPA, or open descent |
Pull vs Push on the Altitude Knob
This is the most critical FCU action during descent and the biggest source of Airbus confusion.
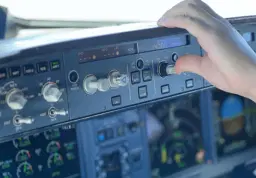
Push the altitude knob: This initiates a managed descent. The FMGC follows the computed descent profile, meeting all altitude and speed constraints on the STAR. The aircraft descends in DES mode. This is what you want for a normal "descend via" clearance.
Pull the altitude knob: This initiates an open descent (OP DES). The aircraft descends at idle thrust toward the altitude in the FCU window, using pitch to maintain the selected or managed speed. There is no path following -- the aircraft just goes down at idle. This is similar to VNAV SPD in the Boeing (no geometric path, just speed maintenance).
The golden rule: When ATC says "descend via the STAR," push the altitude knob. When ATC says "descend and maintain" a specific altitude with no STAR constraints, pull the altitude knob.
Many sim pilots get this backwards and wonder why the aircraft is not following the STAR constraints (they pulled when they should have pushed) or why it is leveling off at a constraint they want to ignore (they pushed when they should have pulled).
DES Mode: How Managed Descent Works
When you push the altitude knob to begin a managed descent, the A320 enters DES mode. Here is what the FMGC does:
- Computes a geometric path through all altitude and speed constraints on the STAR.
- Manages speed using pitch, with the engines at idle. It does not deploy the speed brakes for you -- if additional drag is needed it displays a "MORE DRAG" message and you deploy the speed brakes manually (see below).
- Shows the vertical deviation on the PFD (the green diamond V/DEV indicator). Centre is on path, above centre is below path, below centre is above path.
- Manages thrust. In DES mode, the engines are typically at idle. If the aircraft needs to slow down while descending, it adjusts pitch. If it needs to speed up, it adjusts pitch the other way (or you may see the thrust advance slightly).
The FMGC uses the "idle path" concept: it calculates where the aircraft would be if it descended at idle thrust following all constraints, and that becomes the path. If conditions change (wind, weight), the path recalculates.
The Vertical Deviation Indicator (V/DEV)
This green diamond on the PFD is your primary tool for monitoring the descent path in the A320. It works like a glideslope indicator but for the VNAV profile:
- Diamond centred: On path. The aircraft is exactly where the FMGC wants it.
- Diamond above centre: You are below the path. The FMGC will shallow the descent or even level off briefly to regain the path.
- Diamond below centre: You are above the path. The FMGC will steepen the descent within the managed speed range and, if that is not enough, display "MORE DRAG" on the PFD to prompt you to deploy the speed brakes.
If you see the diamond pegged at the bottom, you are significantly above the path and need to act -- deploy speed brakes manually, or consider an expedite descent.
Being high on the path is usually decided much earlier, on the MCDU, by a crossing constraint that was never entered. In our browser A320 MCDU trainer, the Premium Descent Setup — The Crossing Constraint scenario drills hanging one on a fix in VERT REV, and Managed Descent Rescue is the recovery when you are already above it. The free Speed & Altitude Constraints (VERT REV) teaches the entry itself.
Expedite Descent
When you are seriously above the path -- say ATC kept you at FL350 and you are now 20 miles past where you should have started descending -- the Airbus has an expedite function.
On the FCU, the EXPED pushbutton triggers an expedite descent (EXP DES). In expedite descent:
- The aircraft pitches down to fly at a high speed target -- M0.80 / 340 knots, whichever is higher (green dot is the target for expedite climb, not descent)
- Engines go to idle
- The descent rate is maximised
This is aggressive. You will get a very high rate of descent (4,000-6,000 feet per minute or more depending on altitude). Use it when you need to lose altitude fast, then disconnect it once you are back near the path by returning to managed descent (push the altitude knob again with appropriate altitude set).
Important: Expedite gives you speed. If you are both too high AND too fast, expedite will make the speed problem worse. In that case, speed brakes plus a reasonable descent rate is a better choice.
Speed Brakes in Airbus Philosophy
The Airbus has a unique approach to speed brakes during descent:
- In managed descent, the FMGC may command "MORE DRAG" on the PFD and MCDU. This is the equivalent of Boeing's "DRAG REQUIRED." It means the aircraft cannot stay on path at idle thrust without additional drag.
- The A320 does not deploy the speed brakes for you in DES mode. When "MORE DRAG" appears, the standard response is to deploy roughly half speed brake manually, then leave it out until the message clears and you are back on path.
- Manual speed brake deployment works like the Boeing: pull the lever back. The A320 will auto-retract the speed brakes when you advance the thrust levers or select flaps FULL (and it inhibits their use in certain configurations).
Airbus speed brake etiquette: On the A320, speed brakes are considered normal tools for energy management, not emergency measures. Deploying them during a managed descent to get back on path is perfectly standard. Do not feel like you are doing something wrong.
The Deceleration Point and Approach Phase
The FMGC computes a deceleration point (the "decel" marker on the ND) where the aircraft should begin slowing from descent speed to approach speed. This is shown as a "D" on the flight plan line on the ND.
Approach phase activation happens when the aircraft passes the decel point and begins slowing toward the approach speed. The MCDU switches to the PERF APPR page automatically.
What to have set before the decel point:
- PERF APPR page: QNH, temperature, wind, approach configuration (landing flaps and Vapp)
- Correct approach loaded on the MCDU ARRIVAL page
- ILS frequency and course set (if not auto-tuned)
Common Airbus mistake: Not activating the approach phase. If the FMGC does not transition to approach phase, the managed speed will not decelerate to approach speed. Verify the approach is loaded and the active leg on the F-PLN page leads to the approach. If needed, you can manually activate the approach phase from the PERF page.
STAR Altitude and Speed Constraints
Both the 737 and A320 handle STAR constraints the same way conceptually, though the interface for viewing and modifying them differs.
Types of Constraints
STARs and approaches use four types of altitude constraints:
| Constraint Type | Notation (chart) | Meaning | Example |
|---|---|---|---|
| At | A solid line above and below | Cross exactly at this altitude | Cross JONES at FL240 |
| At or above | A solid line below only | Do not be lower than this altitude | Cross SMITH at or above 8,000 |
| At or below | A solid line above only | Do not be higher than this altitude | Cross BAKER at or below FL180 |
| Between | Two altitudes shown | Cross between the two altitudes | Cross DELTA between FL200 and FL180 |
Speed constraints follow the same pattern:
| Constraint Type | Meaning | Example |
|---|---|---|
| At speed | Fly exactly this speed | Cross JONES at 250 knots |
| At or below speed | Do not exceed this speed | Cross SMITH at or below 210 knots |
How VNAV Builds a Path Through Constraints
The FMC/FMGC works backwards from the last constraint (usually the final approach fix) and builds a path that meets every constraint. For "at" constraints, the path must pass through that exact altitude at that waypoint. For "at or below" constraints, the path can be at or below that altitude -- the computer will choose the most efficient profile.
When you load a STAR, the constraints are automatically entered into the flight plan. You can see them on the LEGS page (Boeing) or F-PLN page (Airbus). They show up as altitude values next to each waypoint.
Key insight: The FMC builds a single continuous path. If you add a constraint that conflicts with another (for example, a very low altitude close to a very high constraint), the FMC may not be able to build a valid path. In that case, you will get error messages or the path will look wrong. Always sanity-check the descent path against your mental model.
What Happens When You Miss a Constraint
If you pass a waypoint above its "at or below" constraint or below its "at or above" constraint, a couple of things happen:
- The FMC recalculates. It cannot go back in time, so it rebuilds the path from your current position to the remaining constraints. This may result in a steeper descent to meet the next constraint.
- In the Boeing: VNAV may switch from PATH to SPD mode if the path becomes impossible. You might see "UNABLE NEXT ALT" on the CDU scratchpad.
- In the Airbus: The V/DEV indicator may peg out as the FMGC tries to steepen the path. You may see "MORE DRAG" or the aircraft may command speed brakes.
- Practically: Missing a constraint on VATSIM or with default ATC is not catastrophic, but it cascades. If you are 2,000 feet high at one constraint, you might be 3,000 feet high at the next because the path was already steep and you made it steeper.
"Descend Via" vs "Descend and Maintain"
These are two fundamentally different ATC clearances, and confusing them is a common mistake.
"Descend via the ARRIVAL" (or "descend via the STAR") means:
- Follow all published altitude constraints on the STAR
- Follow all published speed constraints on the STAR
- You are authorised to descend at your discretion to meet those constraints
- No need to wait for further altitude clearances until the STAR ends
- Boeing: Set MCP altitude to the lowest altitude on the STAR. VNAV handles the rest.
- Airbus: Set the lowest STAR altitude in the FCU window and push the altitude knob.
"Descend and maintain FL240" means:
- Descend to FL240 and level off
- Published STAR constraints do NOT apply (unless ATC also says "descend via")
- You need further clearance to go below FL240
- Boeing: Set FL240 in MCP. The aircraft descends to FL240.
- Airbus: Set FL240 in FCU and pull the altitude knob (open descent) or push (managed -- but the FMGC may still try to meet constraints, which could be confusing).
The hybrid: "Descend via the ARRIVAL, except maintain FL310 until JONES." This means follow the STAR constraints, but do not descend below FL310 until you pass JONES. After JONES, resume the STAR constraints.
Get flight sim tips in your inbox
New guides, checklists, and tips. No spam. Unsubscribe any time.
The Energy Problem: Being Too High or Too Fast
This is the core challenge of every descent. Let's be blunt about it.
How to Tell If You Are Above or Below the Path
Boeing 737:
- Green arc on the PFD altitude tape shows the VNAV path. If the arc is below your current altitude, you are above the path (too high).
- The CDU VNAV DES page shows deviation from path in feet.
- The ND shows the T/D marker -- if you are past it and still at cruise altitude, you are definitely too high.
Airbus A320:
- V/DEV (green diamond) on PFD. Diamond below centre = above path.
- The ND shows the descent profile if you have it enabled.
- The MCDU PROG page shows altitude prediction at the next constraint.
Rule of thumb: If the FMC predicts you will arrive at the next constraint more than 500 feet above the required altitude, you need to act now. Do not wait for it to sort itself out.
Recovery When Too High
Being too high is the more common problem. Here is the escalation ladder:
Step 1: Speed brakes. Deploy them. This is the normal, standard response. Speed brakes add drag without changing your speed significantly (the FMC adjusts pitch to maintain speed). Partial extension is often enough. Use full extension if you are significantly high.
Step 2: Increase descent speed. If the FMC is holding you at a relatively slow descent speed, you can increase it (speed intervention in Boeing, selected speed in Airbus). A faster descent speed means you cover more ground per foot of altitude lost, which seems counterintuitive, but the higher speed also allows a steeper idle descent angle. Discuss with ATC if speed restrictions apply.
Step 3: Use V/S or FPA. If VNAV or managed descent is not descending fast enough, take over vertical guidance. Select V/S mode (Boeing) or pull the V/S knob (Airbus) and dial in a higher rate of descent. 2,500-3,000 FPM is aggressive but manageable. Above 3,000 FPM, passengers would complain in the real world, but this is a sim -- do what you need to.
Step 4: Dirty configuration early. If you are really desperate -- gear down early, flaps early (within speed limits). This adds enormous drag. Flaps 1 at 250 knots adds meaningful drag. Gear down adds even more. This is a last resort and would look strange to ATC, but it works.
Step 5: Ask ATC for help. Request vectors to extend the path, request a higher speed, or request a hold. "Approach, SimTuts 451, we are high on the arrival, request vectors for spacing." VATSIM controllers are generally understanding. This is better than blasting through constraints.
Recovery When Too Fast
Being too fast is closely related to being too high but requires different actions:
- Speed brakes work here too. They add drag, which decelerates the aircraft while maintaining descent rate.
- Reduce power to idle. If the engines are not already at idle, bring them back.
- Level off briefly. Level flight bleeds speed quickly without drag devices. If you have the altitude to spare, a brief level segment to slow down, then resume descent, is effective.
- Extend flaps within speed limits. Flaps 1 is available at relatively high speeds (230 knots in the 737, 230-235 in the A320 depending on weight). This adds drag and allows you to slow down while descending.
The Dirty Secret
Sometimes, despite your best efforts, you cannot make the descent work. The STAR is too compressed, ATC kept you high too long, or conditions conspired against you. In these cases, ask for help. Request vectors, request a hold, or tell ATC you cannot make the crossing restriction. Real pilots do this. Sim pilots should too. Blasting through constraints at 300 knots and 3,000 feet too high is far worse than saying "unable" and getting a workable solution.
Why Being Too Low Is More Dangerous Than Too High
This might sound counterintuitive -- most people worry about being too high. But being too low on a STAR is actually worse:
- Terrain clearance. STAR altitudes are designed with terrain clearance margins. If you descend below the published "at or above" altitude, you may be below minimum safe altitude. In mountainous areas, this is life-threatening in the real world.
- You cannot descend to lose altitude you do not have. If you are too high, you can always descend faster. If you are too low, climbing during descent wastes an enormous amount of energy and makes the rest of the arrival very difficult.
- Speed builds. Descending below the path means you are in denser air at a lower altitude, and if you were at idle thrust, the aircraft may start to accelerate as the denser air and gravity combine.
The takeaway: if you are going to err, err high. It is easier and safer to lose altitude than to regain it during an arrival.
Common Scenarios and How to Handle Them
ATC Shortcuts You Past Waypoints
You are on the STAR, approaching JONES intersection, and ATC says "direct BAKER" -- where BAKER is three waypoints ahead. The waypoints between your current position and BAKER had altitude constraints, and now you are skipping them.
What happens to VNAV:
- Boeing: The FMC recalculates the path from your current position directly to BAKER's constraint. If the skipped waypoints had higher constraints than BAKER, you might now be descending more steeply. If BAKER has a lower constraint, you might have extra distance. VNAV usually handles this well, but check the new path on the CDU LEGS page.
- Airbus: The FMGC rebuilds the path through the remaining constraints. The ND will show the new direct routing. Check V/DEV to see if you are still on path.
What to do:
- Execute the direct-to (enter BAKER on the CDU scratchpad and line-select it to the active waypoint, or use DIR TO on the MCDU).
- Check the new descent path. Are you above or below?
- Adjust if needed. Often, a shortcut puts you high because you skipped the gradually descending constraints.
ATC Says "Descend and Maintain" Instead of "Descend Via"
You expected "descend via the STAR" but instead got "descend and maintain FL240." This means ATC is giving you a specific altitude, and published STAR constraints may not apply.
Boeing:
- Set FL240 in the MCP.
- If VNAV was following STAR constraints, it may now try to level off at a constraint above FL240. You can either wait for VNAV to sort it out, or use FLCH/V/S to descend directly.
- When you get the next clearance ("descend and maintain FL180"), lower the MCP.
Airbus:
- Set FL240 in the FCU.
- Pull the altitude knob for open descent (OP DES). This descends to FL240 without following constraints.
- Alternatively, push the altitude knob to stay in managed descent -- but be aware the FMGC will still try to meet intermediate constraints, which may not match ATC's intent.
Turbulence During Descent
ATC or your own judgment tells you to slow down for turbulence. You need to reduce to turbulence penetration speed.
Boeing:
- Press the speed knob on the MCP (speed intervention).
- Dial in turbulence speed (typically 280 knots or the published value for the 737).
- VNAV continues to handle the vertical path but uses your selected speed.
- When clear of turbulence, press the speed knob again to return to FMC speeds.
Airbus:
- Pull the speed knob on the FCU.
- Dial in the turbulence penetration speed (275 knots / M0.76 above FL200, 250 knots below FL200).
- The aircraft maintains selected speed. DES mode remains active for vertical guidance.
- When clear, push the speed knob to return to managed speed.
ATC is Busy and You Need to Descend
You are approaching T/D, you have your STAR loaded, but ATC has not issued a descent clearance. You cannot just start descending on your own.
Options:
- Request descent. "Approach, SimTuts 451, requesting descent." Simple and direct.
- Begin descent planning. Brief the arrival, set up the approach, get everything ready so that when the clearance comes, you execute immediately.
- If you have pilot's discretion: Some clearances include "descend pilot's discretion." This means you choose when to descend. Use the 3x rule and start when ready.
- If on VATSIM and there is no controller: You are your own ATC. Descend via the STAR at your discretion.
The risk of starting late: Every mile past T/D that you stay at cruise altitude is altitude you will have to lose in a shorter distance. Starting 20 miles late might mean a descent rate of 2,500 FPM instead of 1,800 FPM. Starting 50 miles late could make the descent profile impossible without speed brakes and aggressive maneuvering.
Step-Down Fixes on the Approach
Some approaches have step-down fixes -- waypoints between the final approach fix and the runway with "at or above" altitude constraints. These exist because of terrain or obstacles below the approach path.
Boeing: VNAV handles step-down fixes automatically if they are in the FMC. Verify on the LEGS page.
Airbus: Managed descent handles these automatically. Verify on the F-PLN page.
If hand-flying: You need to be aware of each step-down fix altitude and ensure you do not descend below it until you pass the fix. This is a workload item that automation handles beautifully but that is easy to miss when hand-flying.
The Descent Checklist
Here is what to brief, set, and verify before reaching T/D. Do this with 50-80 miles to go -- do not leave it until the last minute.
Pre-Descent Preparation
Flight plan verification:
- STAR is loaded and correct
- Approach is loaded (ILS, RNAV, visual -- whatever you expect)
- Transition is selected if applicable
- Review all constraints on the STAR -- do they match the chart?
Landing data:
- Landing weight calculated (or at least estimated)
- Approach speed / Vref calculated and entered
- Landing flap setting decided
- Autobrake set (typically autobrake 3 for a normal landing, or as required for runway length)
Approach briefing:
- Type of approach (ILS, RNAV, visual)
- Runway length and elevation
- Decision height / minimum descent altitude
- Missed approach procedure
- Notable terrain or obstacles
- Expected wind and weather at the field
- NOTAMS affecting the approach (real-world pilots check these; in sim, check the ATIS)
Systems setup:
- ILS frequency set and identified (if not auto-tuned)
- Course set for the approach runway
- Approach mode armed (not yet, but know when you will arm it)
- Landing lights on (typically when descending through FL100 or entering the terminal area)
The QNH / Transition Altitude Question
During descent, you transition from standard pressure (1013.25 hPa / 29.92 inHg) to local QNH (actual barometric pressure at the destination).
When to set QNH:
- When descending through the transition level/altitude. In the US, this is FL180. In Europe and most other regions, it varies by country (typically between FL30 and FL130 depending on the area).
- The ATIS or ATC will give you the current QNH/altimeter setting.
Boeing: Manually set the altimeter from STD to the QNH value when descending through the transition altitude. The PFD will change from showing flight levels to showing altitude in feet.
Airbus: The FMGC can remind you. When you descend through the transition altitude, you will see a "SET QNH" prompt. Set the baro reference on the EFIS control panel from STD to the QNH value. The PFD will switch from showing flight levels to altitude.
If you forget: Your altitude readout will be wrong. At most airports, the difference between standard pressure and QNH is a few hundred feet, but that matters when you are flying an approach to 200 feet decision height.
Common Mistakes
These are the mistakes that cause most descent problems. If you fix these, your arrivals will improve dramatically.
Starting Descent Too Late
The number one cause of being too high on arrival. If ATC has not cleared you to descend and you are past T/D, request descent immediately. Every extra mile at cruise altitude costs you. The 3x rule tells you the maths: descending from FL350 to 10,000 feet means shedding 25,000 feet, which normally needs about 75 miles (25 x 3). If you are still at FL350 with only 60 miles left to reach 10,000 feet, that is 416 feet per mile, or about a 4-degree descent -- steeper than normal and requiring speed brakes for the entire descent.
Not Managing the MCP Altitude Window (Boeing)
As discussed above, leaving the MCP altitude too high causes VNAV to level off unexpectedly. Leaving it too low causes issues too -- if you set the MCP to the field elevation while still at FL350, VNAV has no intermediate protection and will descend all the way there if nothing else stops it. The correct technique is to set the MCP to the cleared altitude and update it as you receive new clearances.
Fighting the Automation Instead of Understanding It
When VNAV does something unexpected, the instinct is to disconnect it and fly manually. This often makes things worse, because now you are managing speed, altitude, and path by hand while also trying to figure out what went wrong. Instead:
- Look at the FMA. What mode is active?
- Look at the MCP/FCU. What altitude and speed are set?
- Think about whether those settings match what you want.
- Adjust the inputs, not the mode.
Most "automation surprises" are caused by incorrect inputs, not by the automation malfunctioning.
VNAV SPD When You Want PATH (Boeing)
If the FMA shows VNAV SPD but you are on a STAR with constraints, the FMC has lost the geometric path. Common causes:
- You are above the path and the FMC has reverted to speed priority
- A constraint was deleted or modified
- ATC gave you a clearance that broke the path
Recovery: Deploy speed brakes to get back to the path. Once you intercept the path from above, VNAV will transition back to VNAV PTH. If it does not, check the LEGS page for missing or incorrect constraints.
Pushing When You Should Pull, Pulling When You Should Push (Airbus)
The push/pull logic on the Airbus FCU is elegant once you understand it, but it is the single most common Airbus mistake:
- Push = managed. The computer follows the plan.
- Pull = selected. You have chosen a specific value.
For altitude during descent:
- Push = follow the STAR constraints (DES mode)
- Pull = descend directly to the FCU altitude (OP DES mode)
If you are on a "descend via" clearance, push. If ATC says "descend and maintain," pull.
The mistake: Pushing (managed) when ATC has given you a specific altitude that conflicts with the STAR constraints. The FMGC tries to meet the STAR constraints AND your altitude, which confuses the profile. Or pulling (selected) when you have a "descend via" clearance -- the aircraft ignores the STAR constraints and descends in a straight line, missing them all.
Forgetting to Arm Approach Mode
Boeing: The APP button on the MCP must be pressed to arm LOC and G/S capture. If you forget, the aircraft flies through the localizer and glideslope without capturing them. You will notice this when you are supposed to be turning onto final and the aircraft keeps going straight, or when you pass through the glideslope and VNAV tries to keep descending on its own profile.
Airbus: On the A320, the approach mode (LOC and G/S) is typically armed automatically when the approach is active in the FMGC and you are in the correct configuration. However, if you have been using selected heading, you need to ensure the aircraft is established on the localizer course. The APPR button on the FCU activates LOC and G/S arming.
When to arm: Arm the approach when you are vectored onto the final approach course, or when ATC clears you for the approach. At the latest, arm it before intercepting the localizer (typically 10-15 miles from the runway on a straight-in, or when turning final from a base leg).
Practice Exercise: EDDM ILS 26L via the BETOS Arrival
Here is a specific scenario to practice everything in this guide. Set up this flight in either the PMDG 737 or the Fenix/FBW A320.
The Setup
- Departure: EDDF (Frankfurt), any runway
- Cruise altitude: FL350
- Route: EDDF to EDDM (Munich) via airways (use SimBrief for a realistic route)
- Arrival: BETOS gate, then the BETOS26 (BET26) RNAV transition to ILS 26L at Munich
- Weather: Set standard conditions initially, then try with wind for a challenge
This is a short flight (~150 NM) that gives you a realistic descent with multiple constraints. The BETOS26 transition has several altitude and speed restrictions and leads to a straightforward ILS approach. (Munich normally clears you to the BETOS gate and then onto the runway transition; the lettered STARs like BETOS 1A are only flown in a comms-failure or non-standard situation.)
What Correct Descent Looks Like
Here is the flow at each key point:
100 NM from EDDM (pre-descent):
- The BETOS26 transition to ILS 26L is loaded in the FMC/MCDU
- ILS 26L approach is loaded
- Approach briefing is complete: ILS frequency, decision height, missed approach procedure
- Landing data entered: Vref, flaps, autobrake
- Review the STAR constraints on the LEGS/F-PLN page
- Check T/D position on the ND -- should be approximately 80-90 NM from EDDM depending on conditions
At T/D (approximately 80-90 NM):
- Boeing: MCP altitude set to the lowest constraint on the STAR (verify this -- do not guess). VNAV engaged. At T/D, the aircraft pitches down and begins descending. FMA shows VNAV PTH.
- Airbus: FCU altitude set to the lowest constraint on the STAR. Push the altitude knob. DES mode activates. Check V/DEV -- should be centred.
Passing the first constraint:
- Verify altitude at the waypoint matches the chart. Were you at the correct altitude? If yes, good. If no, note the deviation and understand why.
- Boeing: Check FMA -- still VNAV PTH? Good.
- Airbus: Check V/DEV -- still centred? Good.
Approaching FL100 (transition):
- Set QNH from the ATIS
- Speed should be reducing toward 250 knots (or the STAR speed if lower)
- Landing lights on
- Begin configuring: flaps 1, then flaps 5 as speed decreases
At the final approach fix:
- You should be at the published altitude (typically 3,000-4,000 feet for Munich ILS 26L)
- Speed should be approach speed or decelerating toward it
- Configuration: flaps 15 or more, gear coming down
- Approach mode should be active (LOC and G/S captured or capturing)
- Boeing: FMA shows LOC and G/S (not VNAV PTH)
- Airbus: FMA shows LOC and G/S, managed speed is driving toward Vapp
On the glideslope:
- Stabilised by 1,000 feet AGL: correct speed, correct configuration, on the glideslope, on the localiser
- If not stabilised by 1,000 feet, go around. This is the discipline that separates good pilots from bad ones.
Try It Multiple Ways
- First attempt: Normal conditions, no ATC interference. Follow the STAR exactly. Get comfortable with the baseline.
- Second attempt: Set a 30-knot headwind at FL350. Notice how T/D moves and the descent profile changes.
- Third attempt: Pretend ATC keeps you at FL350 until 60 NM from EDDM (20 NM past T/D). Practice the recovery -- speed brakes, maybe expedite descent. Can you still make the constraints?
- Fourth attempt: Pretend ATC gives "direct BETOS, descend and maintain FL240" instead of "descend via." Practice the transition from managed/VNAV descent to a specific altitude assignment.
- Fifth attempt: Fly it on VATSIM when Munich is staffed. Real ATC instructions, real traffic, real pressure. This is where the learning happens.
Pulling It All Together
Descent management is a skill, and like all skills, it improves with practice and understanding. Here are the core principles to take away:
Know what mode you are in. Look at the FMA. VNAV PTH or DES means the automation is following a path. VNAV SPD or OP DES means it is just managing speed at idle. This one piece of information tells you whether the aircraft will meet its constraints or not.
Manage the MCP/FCU altitude. In the Boeing, the MCP altitude is your clearance limit -- keep it updated. In the Airbus, the FCU altitude combined with push/pull determines managed vs selected behaviour.
Use speed brakes proactively. Do not wait until you are 3,000 feet above the path. If you see yourself trending above, deploy speed brakes early. A small correction early is far better than a desperate correction late.
Understand the clearance. "Descend via" and "descend and maintain" are different instructions requiring different automation inputs. Get this wrong and the rest of the descent unravels.
Brief early. Everything you can do before T/D is one less thing to do during the high-workload descent phase. Approach briefing, landing data, radio setup -- do it all in cruise.
When in doubt, ask. ATC is there to help. If you are too high, too fast, or confused about the clearance, speak up. "Unable" is a complete sentence.
The descent is where flying an airliner gets genuinely challenging. It is also where the satisfaction comes from. When you nail an arrival -- hitting every constraint, arriving at the FAF at the correct altitude and speed, perfectly configured for the approach -- it is one of the best feelings in sim aviation. That does not happen by accident. It happens because you understood what the automation was doing, you set it up correctly, and you managed the energy.
Now go fly the EDDM arrival and see for yourself.