Affiliate disclosure: This guide contains affiliate links. If you purchase through these links, SimTuts earns a small commission at no extra cost to you. We only recommend products we genuinely believe improve the flight sim experience.
Helicopters are the most rewarding and the most humbling aircraft you can fly in Microsoft Flight Simulator 2024. Within five minutes of your first attempt, you will almost certainly crash. Within five hours of practice, you will wonder how you ever found fixed-wing flying challenging.
The gap between those two moments is what this guide is about. Helicopter flying is genuinely difficult, but it is not impossible, and MSFS 2024 gives you all the tools you need to learn. You just need the right approach.
This guide will walk you through everything: what controls you need, how to set them up, the core concepts that make helicopters different, and a step-by-step process for your first hover, your first takeoff, and your first landing. We will also cover which helicopters to fly, what career mode missions are available, and the assistance settings that make learning manageable without taking away the challenge entirely.
Why Fly Helicopters?
If you have only flown fixed-wing aircraft in MSFS 2024, you have been experiencing about half of what the simulator can do. Helicopters open up an entirely different world.
You can go places airplanes cannot. Mountain ridges, forest clearings, rooftops, offshore platforms, tiny helipads carved into cliff faces. A helicopter does not need a runway, which means the entire world map becomes your landing zone. That remote alpine lake you fly over in a Cessna? You can land beside it in an R66.
The flying is hands-on in a way fixed-wing never is. In an airliner, you set the autopilot and monitor systems. In a helicopter, you are flying every single second. All four limbs are doing something different, and even in cruise flight you are making constant small corrections. It is exhausting and deeply satisfying.
Career mode comes alive. Search and rescue missions where you hover to hoist survivors from places you cannot land. Sling load operations dangling cargo from a hook beneath the helicopter. Tourism flights through scenic valleys. These are some of the most engaging mission types in MSFS 2024, and they are all rotorcraft missions.
It makes you a better pilot overall. The coordination skills you develop flying helicopters translate directly into smoother fixed-wing flying. Your hands and feet learn to work together in ways that stick with you no matter what you fly next.
What You Need: Controls and Hardware
Let us get the most important thing out of the way first. You need more than a keyboard to fly helicopters. It is technically possible with keyboard and mouse, but you will have a miserable time. Helicopters require smooth, precise, simultaneous inputs on multiple axes, and digital on/off keys cannot provide that.
Here is what you need, from minimum to ideal.
The Absolute Minimum: A Joystick with Twist
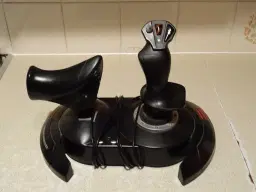
A single joystick with a twist grip handles three of the four helicopter axes. The stick itself controls the cyclic (pitch and roll), and the twist handles anti-torque (yaw). You then map the throttle slider on the joystick base to the collective.
The Thrustmaster T16000M FCS is the best budget option here. It uses Hall effect sensors on the pitch and roll axes, which gives you the precision helicopters demand and avoids the wear of contact potentiometers on those axes. It is not a dedicated helicopter setup, but it will get you flying.
The Important Upgrade: Rudder Pedals
Helicopter flying uses far more pedal input than fixed-wing. You will be working the anti-torque pedals constantly, adjusting for every power change, every turn, every gust of wind. A twist grip on a joystick is functional but fatiguing, and it couples your yaw input to the same hand that is trying to make precise cyclic corrections.
Thrustmaster TFRP Rudder Pedals are the budget entry point. They work well enough and free up your twist axis. If you can stretch the budget, the Logitech Pro Flight Rudder Pedals offer better build quality and smoother travel.
For serious helicopter pilots, the MFG Crosswind V3 pedals are considered the gold standard, with smooth, progressive resistance that makes precise anti-torque inputs far easier.
The Game-Changer: A Dedicated Collective
In a real helicopter, the collective is a lever at your left side that you pull up to increase blade pitch (and therefore lift) and push down to decrease it. Having a separate physical lever for this transforms the experience.
The Thrustmaster TCA Quadrant Airbus Edition is the most popular budget collective substitute. One of its two throttle levers maps beautifully to the collective axis, and it sits naturally at your left hand. It was designed for airliner throttles, but the community has adopted it for helicopter collective duty because the form factor works well.
For a purpose-built solution, Virpil makes dedicated helicopter collective controls that replicate the feel and range of motion of a real collective lever. These are premium products at premium prices, but if helicopters become your primary interest, the difference is substantial.
The Ideal Setup: Joystick + Pedals + Collective
A mid-range helicopter setup looks like this:
- Cyclic: VKB Gladiator NXT EVO — widely regarded as the best mid-range stick. Its smooth, precise gimbal movement is exactly what helicopters reward.
- Pedals: Thrustmaster TFRP or MFG Crosswind depending on budget
- Collective: Thrustmaster TCA Quadrant or Virpil collective
This gives you independent control of all four helicopter axes with both hands and both feet, which is exactly how a real helicopter is flown.
Setting Up Your Controls in MSFS 2024
MSFS 2024 has dedicated helicopter control bindings that are separate from fixed-wing bindings. Here is how to set them up.
Cyclic (Your Joystick)
Go to Options > Controls and select your joystick. Search for "cyclic" and you will find two axes:
- SET CYCLIC LONGITUDINAL AXIS — bind this to your joystick's pitch (forward/back) axis
- SET CYCLIC LATERAL AXIS — bind this to your joystick's roll (left/right) axis
Collective (Your Throttle or Dedicated Collective)
Under the Power Management section, search for "collective" and bind:
- COLLECTIVE AXIS — bind this to your throttle lever or collective hardware
Important: You will likely need to invert this axis so that pulling the lever up (or back, depending on your hardware) increases the collective. Test it in the cockpit: moving the lever should raise the collective handle on screen. If it goes the wrong way, tick the "Reverse" checkbox for that axis.
Do not accidentally bind to other collective-related entries. The one you want is specifically COLLECTIVE AXIS under Power Management.
Anti-Torque Pedals (Your Rudder)
MSFS has a dedicated tail rotor axis for anti-torque, and also accepts the standard rudder axis:
- TAIL ROTOR AXIS (or RUDDER AXIS) — bind one of them to your pedals or joystick twist. Do not bind both to the same axis, or the two inputs will fight each other.
Helicopter Throttle (Optional)
If you have a spare axis and want to manage the engine throttle independently from the collective (for more realism), search the controls for helicopter throttle and bind the helicopter throttle axis.
Most beginners should skip this. Turbine helicopters like the R66 have a governor that manages rotor RPM automatically, so you only need the collective.
Sensitivity Curves
This is critical. Helicopter controls are extremely sensitive near the centre of their travel, and default linear sensitivity will make the aircraft feel twitchy and uncontrollable.
Go to your joystick sensitivity settings and add a curve to both cyclic axes. A sensitivity setting of around -30% to -40% flattens the response near the centre for fine control while still allowing full deflection at the extremes. (A curve is not a dead zone: keep any dead zone at or near zero, or small corrections will do nothing at all.) Do the same for your rudder axis.
You want the controls to feel like you can make tiny adjustments without the helicopter lurching. If it feels twitchy, add more curve. You can always reduce it later as your skills improve.
Understanding Helicopter Controls: The Core Concepts
Before you try to fly, you need to understand what your four controls actually do and how they interact. This is where helicopter flying diverges completely from fixed-wing.
The Collective: Up and Down
The collective controls how much lift the rotor blades generate by changing their pitch angle. Pull it up and the blades bite into the air more aggressively, generating more lift. The helicopter goes up. Push it down and lift decreases. The helicopter goes down.
The critical thing to understand is that the collective also changes engine torque. More blade pitch means more drag on the rotor, which means the engine works harder, which means more torque trying to spin the fuselage. Every collective change requires a corresponding pedal change to keep the nose straight.
The Cyclic: Direction of Movement
The cyclic is your joystick. It tilts the rotor disc in the direction you push it. Push forward, the rotor disc tilts forward, and the helicopter moves forward. Push left, it tilts left, and you drift left.
In a hover, the cyclic is incredibly sensitive. Tiny inputs produce large movements. In forward flight, it becomes more manageable because the helicopter has aerodynamic stability from the airflow.
Anti-Torque Pedals: Keeping the Nose Straight
The main rotor spins in one direction, and Newton's third law means the fuselage wants to spin in the opposite direction. The tail rotor counteracts this torque, and your pedals control how much thrust the tail rotor produces.
Which pedal does what depends on the helicopter's main rotor direction. In US-built helicopters like the R66 and Bell 407 (counter-clockwise rotor, seen from above), adding power needs left pedal. In the French-designed H125 and Cabri G2 (clockwise rotor), it is right pedal instead. Any change in collective or power requires a pedal adjustment to compensate for the changing torque. This is the coordination that makes helicopter flying challenging and satisfying.
The Governor: Your Friend
Turbine helicopters such as the R66 have a governor that automatically manages rotor RPM. This means you do not need to worry about manually adjusting the throttle to keep the rotor spinning at the correct speed. The governor handles it.
This is a huge simplification for beginners. The real R66 has a hydromechanical governor that does exactly this job. Appreciate that it exists, because flying without one (as in some older or simpler helicopters) adds another entire layer of workload.
How Everything Connects
Here is the part that makes helicopters uniquely challenging: every control affects every other control.
- Raise the collective? More torque, need more left pedal (right pedal in a clockwise-rotor helicopter). The increased drag slows the rotor momentarily, and the governor adds throttle.
- Push the cyclic forward to move? The helicopter dips its nose and starts to accelerate, which changes the aerodynamic forces on the rotor. You need a touch more collective to maintain altitude, which means a touch more pedal, which means...
This cross-coupling is why beginners feel overwhelmed. It gets better. Your brain eventually processes these adjustments automatically, the same way you stop thinking about steering a car.
Get flight sim tips in your inbox
New guides, checklists, and tips. No spam. Unsubscribe any time.
Your First Hover: Step by Step
Hovering is the hardest thing you will do in a helicopter. Real helicopter students take many hours of dual instruction before they can hover reliably. In MSFS 2024 there is no physical danger or fear response, but expect your first several attempts to end in a crash.
That is completely normal. Here is how to approach it systematically.
Setup
- Pick a calm day. Set the weather to clear skies and no wind. You can add weather later once you have the basics.
- Pick the Robinson R66. It is the most forgiving default helicopter and responds predictably to inputs.
- Start on a large, flat surface. A wide runway works perfectly. You want plenty of room to drift without hitting anything.
- Turn on assistance. Go to Assistance Options > Piloting and enable the helicopter Assisted Tail Rotor and Assisted Cyclic options. Also enable Vortex Ring State Protection (added in Sim Update 4). There is no shame in using these while learning. We will turn them off later.
The Procedure
- Centre everything. Make sure your cyclic (joystick) is centred, pedals are neutral, and the collective is fully down.
- Start the engine. Follow the startup procedure for the R66, or use the quick-start option from the menu if the helicopter is already running.
- Very slowly raise the collective. This is the most important word in helicopter flying: slowly. Millimetres at a time. Watch the helicopter get light on its skids.
- As the helicopter gets light, watch what happens. The nose will probably swing to one side from torque. Apply a small amount of pedal to counteract it. The helicopter might drift to one side. Make a tiny cyclic correction. Tiny. Not the correction you think you need, but about a quarter of that.
- Continue raising the collective until the skids are 2-3 feet off the ground. This is where things get interesting. You are now balancing on a column of air, and every input you make propagates through every other axis.
- Do not try to hold a perfect hover. Instead, try to keep the corrections small. The helicopter will drift. Let it drift a little, then bring it back gently. If you start a big oscillation (rocking back and forth with increasing amplitude), put it down and start again.
- Look at a reference point well ahead of you. This is essential. Do not stare at the helicopter or the ground directly below you. Use your peripheral vision for altitude and look forward at a fixed point to judge your drift. This is the same technique real helicopter pilots are taught: looking too closely or straight down leads to overcontrolling.
What Will Go Wrong
- Pilot-Induced Oscillation (PIO). You push the cyclic to correct a drift. The helicopter swings back past centre. You correct the other way, harder. It swings further. Each correction makes it worse until you lose control. The fix: make smaller corrections and wait to see the result before correcting again. Think of it as applying gentle pressure rather than moving the stick.
- Collective mis-management. You pull up too fast and shoot into the air, then push down too fast and slam into the ground. Keep collective changes slow and smooth.
- Forgetting the pedals. Every collective change needs a pedal change. If the nose swings, that is usually a pedal problem, not a cyclic problem.
When to Move On
You can hover when you can keep the helicopter within roughly a 20-metre circle for 30 seconds without the oscillations growing. It does not need to be rock-solid. A gentle drift that you can correct is perfectly fine. Real helicopter hovering is never completely still either.
A guided session with an experienced helicopter pilot can compress the learning curve significantly here. Hovering is one of those skills where having someone talk you through the corrections in real time saves hours of trial and error.
Takeoff: From Hover to Forward Flight
Once you can hold a reasonable hover, the transition to forward flight is actually the easy part.
- Establish a stable hover at normal hover height (2-3 feet). Take your time.
- Gently push the cyclic forward. A small amount. The nose will dip, and the helicopter will start moving forward. Add a little collective as it starts to move, or it will sink.
- As you accelerate, you will feel the helicopter become more stable. This is translational lift — as airspeed increases, the rotor becomes more efficient because it is moving through undisturbed air. You will notice a distinct improvement at around 16-24 knots. This is called Effective Translational Lift (ETL): expect a brief vibration, and the extra lift makes the nose rise and the helicopter roll slightly (to the right in a counter-clockwise rotor), so hold it with forward and a touch of lateral cyclic. It is completely normal.
- Add a touch of collective as you accelerate to maintain your altitude. The nose-down attitude for forward flight means some of your rotor thrust is going forward rather than up, so you need slightly more collective to maintain height.
- As speed builds, the helicopter will fly more like an airplane. The airflow over the fuselage and tail helps stabilise the aircraft. The cyclic becomes less twitchy, pedal inputs become less frequent, and you can start to relax slightly.
- Climb to 500-1,000 feet and level off. Congratulations, you are flying a helicopter.
Cruise Flight
Cruise flight in a helicopter is more relaxed than hovering, but it is never hands-off. You will be making small corrections continuously. Here are the essentials:
- Airspeed: The R66 cruises comfortably at around 100-110 knots (110 KIAS is its maximum recommended cruise). Do not push past the Vne placard — for the R66, this is 140 knots below 2,200 lb takeoff weight and 130 knots at or above it, and it reduces further with altitude and temperature.
- Altitude changes: Use the collective primarily. More collective to climb, less to descend. Keep the changes gradual.
- Turns: Use the cyclic to bank, just like a fixed-wing aircraft. Apply a little more collective in the turn because the tilted rotor is generating less vertical lift. Add pedal as needed to coordinate.
- Trim: Use the force trim system if your helicopter has one. It holds your current cyclic position so you do not have to maintain constant pressure. Set it in straight-and-level cruise and your workload drops significantly.
Landing: The Controlled Approach
Landing is hovering in reverse. You slow down, transition to a hover, then descend to the ground. Here is the sequence:
- Set up on final at about 300 feet above the ground, lined up with your landing spot. Lower the collective to descend along a steady approach angle of roughly 7-12 degrees.
- Gradually reduce forward speed. Pull the cyclic back slightly. As you slow down, you will feel the helicopter become less stable as you lose the aerodynamic benefits of forward speed.
- Pass back through ETL (around 25 knots and below) and you are back in the hover regime. You lose the extra lift, so add collective to hold your approach angle. The helicopter will feel mushier and require more pedal work. Be ready for this.
- Arrive in a hover over your landing spot at normal hover height. Take your time getting stable.
- Slowly lower the collective to descend. Stay over your landing point with small cyclic corrections. The descent should be very slow.
- Near the ground you are in ground effect. It builds from about one rotor diameter up (roughly 33 feet for the R66) and is strongest close to the surface, where the air cushion beneath the rotor makes the helicopter feel slightly more buoyant. This is normal and actually helps.
- Touch down gently and lower the collective fully. Congratulations, you have completed a helicopter flight.
The One Thing to Avoid: Vortex Ring State
If you descend too fast at low airspeed (slower than effective translational lift speed, in a near-vertical descent of 300 feet per minute or more while using some power — the FAA gives 20 to 100 percent), the rotor can enter vortex ring state (VRS). The rotor becomes engulfed in its own downwash and loses the ability to generate effective lift. Adding more collective makes it worse: it only increases the stalled area of the rotor and the rate of descent.
The recovery is counter-intuitive: push the cyclic forward to gain airspeed and/or lower the collective, and fly out of the vortex. This requires altitude, which is why VRS at low altitude is so dangerous.
MSFS 2024 models VRS, and Sim Update 4 added a Vortex Ring State Protection assistance option that automatically adjusts your collective to prevent entry. Keep this turned on while learning.
The Helicopters of MSFS 2024
MSFS 2024 comes with a solid selection of helicopters across its editions. Here is what is available and which to start with.
Standard Edition
- Guimbal Cabri G2 — A light two-seat training helicopter. Small, responsive, and simple. Good for learning the basics in a machine that does not have much power to get you into trouble. Note: it is quite sensitive.
- Robinson R66 — A light turbine helicopter seating up to five (pilot plus four passengers). This is the recommended starter. It has enough power to be forgiving, the governor handles RPM management, and it responds predictably to inputs. Start here.
- Bell 407 — A popular utility helicopter. More challenging to fly than the R66 with more complex systems. A good second helicopter once you are comfortable hovering.
- Airbus H125 (formerly AS350 Ecureuil) — A workhorse single-engine helicopter used worldwide for everything from tourism to mountain rescue. Good all-rounder with more power and complexity than the R66.
- Erickson S-64 Aircrane — A massive heavy-lift helicopter with a cargo hook. This is for sling load career mode missions. Not a beginner helicopter.
- Magni M-24 Orion — Technically an autogyro rather than a helicopter. It uses an unpowered rotor for lift and a pusher propeller for thrust. It cannot hover. Fun to fly, but a different discipline entirely.
Premium Deluxe Edition
- Airbus H225 (formerly EC225 Super Puma) — A large, twin-engine heavy helicopter used in offshore operations and SAR. Complex systems and significant weight.
- Boeing CH-47D Chinook — A tandem-rotor military transport helicopter. Two counter-rotating rotors mean no tail rotor — yaw is controlled by tilting the two rotor discs laterally in opposite directions (differential lateral cyclic) rather than a separate anti-torque system. A unique flying experience.
Aviator Edition
- Bell 47J Ranger — A classic light helicopter. A piece of aviation history and enjoyable to fly.
- Westland Scout / Wasp — British light military helicopters of the 1960s.
Third-Party Add-Ons Worth Knowing About
The third-party market for MSFS 2024 helicopters is growing rapidly:
- HPG (Hype Performance Group) H145 and H160 — Highly detailed twin-engine helicopters with advanced systems modelling. The H160 is often described as the most advanced helicopter available for MSFS.
- FlyInside Bell 47 and Bell 206 JetRanger — Excellent classics with detailed flight models.
- CowanSim R66 and Bell 206 — The CowanSim R66 is widely considered an upgrade over the default R66, with more detailed systems and a refined flight model.
Which One First?
Start with the Robinson R66. It is included in the Standard Edition, it has a turbine engine with a governor (so no manual throttle management), it is responsive without being twitchy, and it has enough power to hover comfortably at most altitudes. Once you can hover, take off, cruise, and land the R66 reliably, move to the Bell 407 for more challenge, then to the H125 for utility operations.
Helicopter Career Mode Missions
MSFS 2024's career mode includes several helicopter-specific mission types that are among the most engaging content in the game.
Flightseeing and Passenger Transport
Fly tourists and passengers on scenic routes and between helipads, resorts, islands, and mountaintops, in lighter helicopters like the Bell 407 and R66. They are a good entry point into helicopter career flying because the missions are relatively straightforward: take off, fly a scenic route, land at the destination. They are also excellent for building hours and learning to fly precise routes at lower altitudes.
Search and Rescue (SAR)
SAR missions come in two forms (the SDK calls them SAR-ROT and SAR-ROI):
- Rotorcraft search and rescue: Fly to a search area, locate missing persons, and land nearby to recover them. These test your ability to fly at low altitude, hover in confined areas, and land on unprepared surfaces.
- Hoist rescue: More advanced missions involving a hoist to rescue people from locations where you cannot land.
Sling Load Operations
Use a hook-equipped helicopter such as the Erickson S-64 Aircrane to carry cargo suspended from a hook beneath the helicopter. This is precision flying at its most demanding, requiring you to hover over a pickup point, hook the load, fly to the destination, and place the load accurately.
Unlocking Helicopter Missions
You will need to progress through the career mode certification system to access helicopter missions. This means earning a rotorcraft licence, and then endorsements such as the hoist and hook ratings, through training modules and exams. As you complete missions and gain experience, more specialised mission types like hoist rescue become available.
Assistance Settings: What to Use and When
MSFS 2024 provides several helicopter-specific assistance options under Assistance Options > Piloting — assists for the tail rotor, the cyclic and the collective, plus Vortex Ring State Protection. Here is what the main ones do and a recommended progression for turning them off.
Helicopter Assisted Tail Rotor
This automatically manages your anti-torque pedals, compensating for torque changes when you adjust the collective. With this on, you barely need to touch the pedals.
When to turn it off: Once you are comfortable hovering and can maintain a stable hover for a minute or so. Pedal management is the next skill to develop after basic cyclic and collective coordination.
Helicopter Assisted Cyclic
This adds stability to the cyclic, damping out oscillations and making the helicopter less sensitive to small inputs. It acts a bit like a stability augmentation system.
When to turn it off: Once you can hover without large oscillations. This is the last assist you should remove because the difference in cyclic sensitivity is substantial.
Vortex Ring State Protection
This automatically adjusts your collective to prevent entry into VRS during descents.
When to turn it off: Only once you understand VRS thoroughly and can recognise the conditions that lead to it. For most recreational flyers, there is no reason to turn this off at all.
Recommended Progression
- Everything on: Your first several hours. Focus on learning the basic feel of collective, cyclic, and movement.
- Turn off Assisted Tail Rotor: Learn to manage pedals. This adds significant workload but teaches you how helicopters actually work.
- Turn off Assisted Cyclic: The full experience. The helicopter is now responding to your inputs without any artificial damping.
- Optionally turn off VRS Protection: For maximum realism.
Common Mistakes and How to Fix Them
Over-Controlling
The single most common beginner mistake. You make a correction, it is too large, so you correct back harder, creating an oscillation that grows until you crash. The fix is always the same: smaller inputs. Think of pressing on the cyclic rather than moving it — helicopter controls are driven more by pressure than by gross movements.
Death Grip on the Cyclic
Gripping the joystick tightly increases fatigue and magnifies every small movement. Hold it lightly, as if balancing a ball on your palm. Your fingers should rest on the stick, not squeeze it.
Staring at the Ground Beneath You
Your instinct will be to look straight down during a hover. Fight this. Look at a reference point well ahead of you. Use your peripheral vision for altitude and position. Looking down creates a feedback loop where you chase tiny movements with large corrections.
Forgetting the Pedals Exist
Many fixed-wing pilots treat the rudder as an afterthought. In a helicopter, the pedals are an active, primary control. Every collective change needs a corresponding pedal adjustment. If the nose keeps swinging left or right, that is almost always a pedal issue, not a cyclic issue.
Approaching Too Fast and Too Steep
Fixed-wing instincts tell you to descend towards the landing point. Helicopter approaches should hold a steady, moderate angle and a controlled closure rate — the FAA's normal approach is 7 to 12 degrees, slowing to about a brisk walking pace over the ground near the end. Slow progressively and arrive in a hover over the landing point. Rushing the approach is how you end up in VRS.
Collective Slamming
Raising or lowering the collective too quickly causes dramatic pitch and yaw changes that cascade through every other control axis. Make collective changes slowly and smoothly. If you need to climb or descend quickly, make the change in stages rather than slamming the lever.
Transitioning From Fixed-Wing: What Transfers and What Does Not
If you already fly fixed-wing in MSFS 2024, some skills transfer and some actively work against you.
What Transfers
- Instrument scanning. Looking at airspeed, altitude, and heading in a regular pattern.
- Radio procedures. ATC communication works the same way.
- Navigation. Using the map, GPS, and VORs translates directly.
- Weather awareness. Understanding how wind affects your flight plan.
What Does Not Transfer
- Control loading. In a fixed-wing aircraft, you set the controls and trim, and things stay relatively stable. In a helicopter, you are constantly making adjustments. Let go of the cyclic for even a second and the helicopter will roll or pitch.
- Approach technique. Fixed-wing approaches are about maintaining a glideslope and airspeed. Helicopter approaches are about transitioning from forward flight to a hover, which is a completely different skill.
- Throttle management. In a fixed-wing, throttle controls speed. In a helicopter, the collective (analogous to throttle) primarily controls altitude. Speed is controlled by cyclic attitude.
- Use of rudder. Rudder in fixed-wing is mainly for coordination in turns. Anti-torque pedals in a helicopter are a primary control used constantly.
For more on getting started with MSFS 2024 as a whole, see our MSFS 2024 beginner's guide. If you want to understand how helicopter flight models compare across simulators, our helicopter flight model comparison covers that in detail. And once you are comfortable with powered flight, helicopter autorotation is the essential emergency procedure to learn next.
A note on hardware: Helicopter flying lives in your feet and your left hand, and a spring-centred stick fights you the whole way. A dedicated set of rudder pedals makes the constant anti-torque corrections far more controllable than twisting a stick for yaw — the MOZA MRP pedals add adjustable centring force and dampers, which helps enormously when you are learning to hold a hover. Pair them with a force-feedback base like the MOZA AB6 and MH16 flightstick: the stick loads up as the aircraft moves, so you feel a drift starting instead of chasing it on the instruments, and one of its analog levers maps neatly to the collective.
Final Thoughts
Helicopter flying in MSFS 2024 is difficult. Accept that upfront and you will enjoy the process of learning far more than if you expect to be good quickly. Every helicopter pilot in the world, real or simulated, struggled with their first hover. The physics demand it.
But the reward is proportional to the challenge. When you nail your first stable hover, when you execute a smooth approach to a mountain helipad, when you place a sling load on a platform in a crosswind — those are the most satisfying moments in all of flight simulation.
Start with the R66. Turn on the assists. Raise the collective slowly. Look ahead, not down. Make small corrections. Be patient with yourself.
You will get there.