You just got a clean radar lock on a MiG-29 at 30 miles. You fire an AMRAAM, crank away, and feel pretty good about life. Then your RWR lights up, the missile launch tone screams in your headset, and four seconds later you're a fireball. Sound familiar?
Getting shot down in DCS is frustrating because it often feels random. One moment you're flying, the next you're dead, and you have no idea what you could have done differently. The truth is that surviving missiles in DCS is a skill that can be learned, practiced, and mastered. This guide will teach you the defensive fundamentals that keep experienced pilots alive.
For a deeper look at how missiles actually work under the hood, see our air-to-air missiles guide. This article focuses on the other side: what to do when those missiles are coming at you.
Understanding the Threat: Your RWR Is Trying to Save You
Your Radar Warning Receiver is the single most important defensive instrument in your cockpit. It tells you who is looking at you, what they are using, and how urgently you need to react. If you are ignoring your RWR, you are flying blind in a hostile environment.
How the RWR Works
The RWR detects radar energy hitting your aircraft and classifies it by type. Every radar has a signature — its frequency, pulse repetition interval, and scan pattern — and the RWR matches these against a threat library to display a symbol on your scope.
Key RWR indications you must recognize:
- Search mode — A symbol appears on the RWR but without any special emphasis. An enemy radar is scanning the sky and has swept across you. No immediate danger, but you are visible.
- Lock / STT (Single Target Track) — The symbol gets emphasized (circled, bolded, or highlighted depending on the aircraft). A radar has transitioned from search to tracking you specifically. This is the precursor to a missile launch.
- Launch — A flashing symbol, a new "missile" icon, or the dreaded launch tone. A missile is in the air and your survival clock is now ticking.
Radar-Guided vs IR Missiles: Why It Matters
This distinction dictates your entire defensive response.
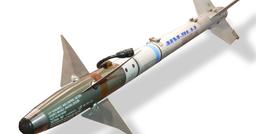
Radar-guided missiles (Fox 1 and Fox 3) follow radar energy. Semi-active radar homing (SARH) missiles like the R-27R need continuous illumination from the launch aircraft. Active radar homing (ARH) missiles like the AIM-120 and R-77 have their own onboard radar that activates in the terminal phase. Your RWR can detect the radar energy associated with both types, giving you warning.
Infrared missiles (Fox 2) follow heat. The R-73, AIM-9X, and similar weapons home on your engine exhaust, hot airframe surfaces, and aerodynamic heating. Your RWR will give you zero warning of an IR missile launch. This is why visual awareness and checking six is so critical — an IR missile will kill you silently.
The practical implication: if your RWR shows a launch, it is a radar-guided threat and you respond with chaff, notching, and geometry. If you see a missile trail visually with no RWR warning, it is likely IR and you need flares and a hard break.
Chaff and Flares: Your Expendable Lifeline
Chaff
Chaff consists of thousands of tiny metallic strips that create a cloud of radar reflections. When dispensed correctly, chaff creates a false target that a radar-guided missile may track instead of your aircraft.
When to use chaff:
- Against any radar-guided missile (SARH or ARH)
- When notching or beaming (chaff is most effective when combined with perpendicular flight)
- Against SAM radar tracking
When chaff does NOT work:
- Against IR missiles (they ignore radar reflections entirely)
- If you dispense it while flying straight at or away from the threat (the missile's Doppler filter can distinguish you from the stationary chaff cloud)
- If dispensed too late when the missile is in terminal guidance at close range
Flares
Flares are burning magnesium/pyrotechnic cartridges that produce intense infrared radiation, designed to lure IR-seeking missiles away from your aircraft's heat signature.
When to use flares:
- Against any IR missile (Fox 2)
- When you see a missile trail with no RWR warning
- Preemptively when you suspect IR threats are in the area (low altitude, close range engagements)
When flares do NOT work:
- Against radar-guided missiles (they track radar returns, not heat)
- Against modern IR seekers like the AIM-9X in certain conditions (imaging seekers can distinguish between a flare and an aircraft shape)
- If dispensed without maneuvering (the missile needs a reason to prefer the flare over your aircraft)
Countermeasure Programs in DCS
Most DCS aircraft let you configure countermeasure programs that dispense specific patterns of chaff and flares with a single button press. Setting these up correctly before a mission is essential.
F-16C Viper:
In the DCS F-16, press LIST then 7 on the ICP to access the CMDS programming page. You can set up to six programs with different chaff/flare quantities, burst intervals, and sequence counts. A common defensive program is: 2 chaff + 1 flare, burst interval 0.5 seconds, 4 sequences. Bind your countermeasure dispense button (default E for bypass or AltGr for program dispense).
F/A-18C Hornet: The Hornet uses the ALE-47 countermeasure system. Access it through the EW page on a DDI. You can select between manual, semi-automatic, and automatic modes. In semi-auto mode, the system dispenses the appropriate countermeasure based on the detected threat type. Many pilots prefer manual mode for greater control.
F-15E Strike Eagle: The F-15E uses TEWS (Tactical Electronic Warfare System) and ALE-47 dispensing system. Countermeasure programs are set via the UFC. The Eagle's large countermeasure capacity (120 chaff, 60 flares in a typical loadout) gives you more margin for error.
A-10C Warthog: The A-10C has the CMSP (Countermeasures Signal Processor) on the left console. Set programs through the CMSP display. The A-10 carries fewer expendables and is slower, so every flare matters. Program a conservative dispense pattern — you cannot afford to burn through your flares in the first threat encounter.
Defending Against Radar-Guided Missiles
This is where geometry saves your life. Against radar-guided threats — whether from a BVR missile or a SAM site — your primary defense is manipulating your position relative to the threat's radar.
Notching (Beaming)
Notching is the single most important defensive maneuver in DCS. It exploits a fundamental limitation of pulse-Doppler radar: the velocity gate filter.
Pulse-Doppler radars — used by most modern aircraft and SAM systems — filter returns by Doppler shift (relative velocity). They are designed to reject ground clutter, which has near-zero Doppler shift relative to the radar. When you fly perpendicular to a radar (placing the threat on your 3 o'clock or 9 o'clock, also called the beam or 3/9 line), your relative velocity toward or away from the radar drops to near zero. The radar's Doppler filter sees you as ground clutter and may lose lock entirely.
How to notch in DCS:
- Identify the threat bearing on your RWR
- Turn to place the threat at your 3 o'clock or 9 o'clock (perpendicular to the threat)
- Descend toward the ground to blend with terrain clutter
- Dispense chaff — bundles of 2-3 chaff at 1-second intervals
- Monitor your RWR — if the lock breaks, the notch is working
- Maintain the beam until the missile passes or goes for the chaff
Critical details:
- You must be within roughly 5-10 degrees of perpendicular. Close enough matters.
- Descending improves notching because you put real terrain clutter between you and the radar.
- Chaff dispensed while beaming is extremely effective because the chaff cloud has the same near-zero Doppler signature as you, and the radar cannot distinguish between the two.
- Speed matters: too fast and your Doppler signature bleeds through even at 90 degrees. 400-500 knots is a reasonable notching speed for most situations.
The Crank Maneuver
Cranking is not purely a defensive maneuver — it is a BVR tactic that puts you in a position to support your own missile while angling away from the threat. But it has strong defensive value because it extends the range at which you can transition to a full notch or go cold.
After firing a missile, turn 40-60 degrees off the threat bearing. This keeps your radar able to support your missile's mid-course guidance while reducing the closure rate and increasing the distance the enemy missile must travel to reach you. If the enemy missile gets close, you can quickly transition from a crank to a full 90-degree notch.
For more on using radar while cranking, see our F/A-18 radar guide.
Going Cold (Turning Away)
If you determine a missile is in flight and you have range to play with, turning your tail to the threat and running is viable. This is called going cold or defensive. You are maximizing the distance the missile must cover while it bleeds energy chasing you.
Going cold works best at long range. If a missile is fired at you from 40+ nautical miles, turning cold and accelerating can cause the missile to run out of energy before it reaches you. At medium range (15-30 NM), going cold alone is usually insufficient — you need to combine it with notching and chaff.
Never go cold at close range. If a missile is within 10 NM and tracking you, turning away gives the missile a tail-chase with you showing your hottest IR signature and a predictable flight path. At close range, you need to notch or go to a last-ditch maneuver.
Terrain Masking
Mountains and ridgelines block radar line-of-sight. If you can put terrain between yourself and the threat radar, the radar cannot track you and any missile using SARH guidance will lose its illumination.
Terrain masking is particularly effective against SAM sites because they are stationary — you know exactly where the threat is and can plan your ingress route to keep ridgelines between you and the radar. It is less effective against airborne threats that can maneuver to regain line of sight.
In DCS maps like the Caucasus and Syria, learn the mountain ranges and valleys. The Caucasus mountains running northwest to southeast offer excellent masking corridors for strike packages moving against targets in the valleys.
Defending Against IR Missiles
IR missiles are terrifying because they arrive with no RWR warning. Your first indication is usually a visual — a smoke trail or a bright dot accelerating toward you — or a missile proximity warning if your aircraft has one.
Flare Employment
When you detect an IR missile, immediately:
- Dispense flares — not just one, but a pattern. Multiple flares over 2-3 seconds give the missile more false targets to choose from.
- Break hard — pull into a high-G turn perpendicular to the missile's flight path. This physically separates your aircraft from the flare cloud, giving the missile a clear choice between the hot, stationary flare and a maneuvering aircraft.
- Reduce throttle — if time permits, pulling your throttle out of afterburner dramatically reduces your IR signature. In DCS, the difference between mil power and afterburner on IR detectability is significant.
The key principle: flares alone are not enough. You must combine flares with maneuvering. If you dump flares while flying straight, a modern IR seeker will stay on you because the flare rapidly falls behind and the seeker maintains track on the consistent heat source moving through its field of view.
Reducing Your IR Signature
- Avoid afterburner when you suspect IR threats. Afterburner multiplies your IR signature many times over.
- Aspect angle matters: your aircraft is hottest from the rear (engine exhaust). Turning perpendicular to the threat presents a smaller, cooler profile.
- Altitude: at low altitude, the warm ground behind you can make it harder for an IR seeker to pick you out against the background. At high altitude against cold sky, you are a bright target.
Using the Sun
In real life, early IR missiles could be decoyed by the sun's heat signature. In DCS, this effect is modeled to some degree. If you can place the sun behind you relative to the threat, some older IR seekers may struggle to maintain lock. This is a minor tactic and should not be relied upon, but in a desperate situation where you have exhausted your flares, turning toward the sun can help.
SAM-Specific Defenses
Surface-to-air missiles deserve special attention because SAM sites in DCS are consistent, predictable threats that you can learn to defeat systematically. For offensive SEAD tactics, see our SEAD/DEAD guide.
Understanding SAM Engagement Envelopes
Every SAM system has a performance envelope defined by:
- Maximum range — the farthest a missile can physically reach
- Effective range — the range at which the missile has enough energy to maneuver and kill
- Minimum range — too close for the missile to arm or track
- Altitude limits — both minimum and maximum engagement altitude
The lethal envelope is smaller than the maximum envelope. A SAM missile fired at maximum range arrives with depleted energy and can be defeated with basic maneuvering. A SAM missile fired within the lethal envelope is a much more serious threat.
Defeating Common DCS SAM Threats
SA-6 Gainful (2K12 Kub): Medium-range threat with a 3-missile launcher. Effective range roughly 24 km. The SA-6 uses semi-active radar homing, so notching and chaff are effective. The tracking radar is the 1S91 "Straight Flush" — learn to recognize its RWR symbol. The SA-6 can be defeated by maintaining speed, notching at medium range, and using terrain masking on ingress.
SA-10 Grumble (S-300): The S-300 is one of the most dangerous SAM systems in DCS. Long range (up to 100+ km for some variants), high-altitude capability, and track-via-missile guidance make it extremely difficult to defeat kinematically. Your best defenses are: stay below its radar horizon using terrain masking, use anti-radiation missiles (HARMs) to force the radar to shut down, or saturate the system with multiple simultaneous targets. Do not try to fly through an S-300 engagement zone at medium altitude — you will die.
SA-11 Gadfly (Buk): A mobile, medium-range SAM that is particularly dangerous because it moves. The SA-11 uses semi-active radar homing with a range of roughly 30 km. It is more resistant to jamming than the SA-6 but still vulnerable to notching and chaff. The Buk's mobility means it might not be where your intelligence said it was.
Altitude and Speed Considerations
Low altitude reduces SAM detection range (radar horizon) and gives terrain masking opportunities, but makes you vulnerable to AAA and MANPADS.
High altitude keeps you above most short-range threats but makes you visible to long-range SAMs from much farther away.
Speed is survival. A fast aircraft is harder to hit because the missile must lead more and expend more energy maneuvering. Never slow down in a SAM threat area unless you are terrain masking and need to maneuver in a tight valley.
The optimal profile against a dense SAM environment is usually: ingress at low altitude and high speed, pop up briefly to acquire and engage targets, then return to low altitude immediately.
Aircraft-Specific Differences
Each DCS aircraft has different defensive strengths and weaknesses. Understanding your platform's specific capabilities is essential.
F-16C Viper
RWR: ALR-56M — excellent threat library with clear symbology. Threats are displayed as letter codes on a circular scope (e.g., "10" for S-300, "11" for SA-11). The F-16's RWR is one of the best in DCS for situational awareness.
Countermeasures: 60 chaff, 30 flares standard (4 ALE-47 buckets; each holds 30 chaff or 15 flares). Six programmable countermeasure programs.
ECM: The F-16C can carry the ALQ-131 or ALQ-184 ECM pods on the centerline. These actively jam enemy radar, degrading tracking accuracy and potentially breaking lock. The ALQ-184 is the more capable of the two. In DCS, ECM pods provide a meaningful defensive advantage against SAMs and should be carried whenever the threat environment warrants it. Activate with the ECM switch on the CMSP panel.
Maneuverability: The F-16 is the best rate fighter in DCS. Its ability to sustain 9G turns gives it excellent kinematic defeat options against missiles. The Viper's light weight and powerful engine mean it loses less energy in defensive maneuvers than almost any other aircraft.
F/A-18C Hornet
RWR: ALR-67(V)2 — displays threats as symbols on the azimuth indicator. The Hornet's RWR integrates with the EW page on the DDI, providing detailed threat data.
Countermeasures: ALE-47 system, highly configurable. Semi-auto mode automatically selects chaff or flares based on threat type. Standard loadout is 60 chaff and 60 flares.
ECM: The Hornet has an internal ALQ-165 ASPJ (Airborne Self-Protection Jammer). This is a significant advantage over the F-16 because it does not require an external pod, freeing up a hardpoint. Activate it through the EW page.
Maneuverability: The Hornet excels at low-speed nose authority thanks to its large leading-edge extensions, but it bleeds energy faster than the F-16 in sustained turns. In defensive situations, the Hornet is better at one-circle fights and nose-on snapshots but worse at prolonged rate fights. Be mindful of airspeed — the Hornet can get slow quickly in a defensive fight.
F-15E Strike Eagle
RWR: ALR-56C with the TEWS (Tactical Electronic Warfare System). Excellent coverage and threat identification.
Countermeasures: Large countermeasure capacity via ALE-45 dispensers. The Strike Eagle can carry significantly more expendables than the F-16 or F-18.
ECM: The F-15E can carry the ALQ-135 internal countermeasures set as well as external ECM pods. In DCS, the TEWS system provides integrated EW management.
Maneuverability: The Strike Eagle is big and heavy but fast. It is not going to out-rate an F-16 in a defensive turn, but its raw speed and energy allow it to extend away from threats effectively. Against SAMs, the F-15E's speed is its best defense — accelerate and get out of the engagement zone.
A-10C Warthog
RWR: ALR-69 — functional but less capable than the fighters' systems. Provides basic threat identification and bearing.
Countermeasures: Limited expendable capacity. The A-10 simply cannot sustain prolonged countermeasure employment the way a fighter can. Every chaff bundle and flare counts.
ECM: The A-10C can carry the ALQ-184 ECM pod. Given the A-10's speed limitations, the ECM pod is arguably more important on the Warthog than on any other platform.
Maneuverability: This is where the bad news lives. The A-10 is slow and cannot out-maneuver most missiles kinematically. Your defensive strategy in the Warthog is fundamentally different from the fighters: avoid being shot at in the first place. Use terrain masking aggressively, plan ingress routes that keep ridgelines between you and SAM sites, stay low, and do not overfly known threat positions. When an SA-11 locks you in an A-10, your options are extremely limited. Prevention is your best defense.
The Last-Ditch Maneuver
When all else has failed — you notched late, you are out of chaff, or the missile is just too close — you have one final option: the last-ditch maneuver.
How to execute a last-ditch:
- Visually acquire the missile. You need to see it, or at least know its approximate direction from your RWR.
- Wait. This is the hardest part. You need to wait until the missile is close — roughly 2-3 seconds from impact. Breaking too early gives the missile time to correct.
- Pull maximum G into the missile. Break as hard as your aircraft allows, perpendicular to the missile's flight path. You are trying to generate a miss distance by forcing the missile into a turn it cannot make at its current speed and proximity.
- Dispense everything. Chaff and flares together, in rapid succession. At this range, quantity matters more than conservation.
- Keep pulling. Maintain the break until the missile passes or detonates. Do not roll wings level until you are sure the threat has passed.
The physics behind last-ditch: missiles have a proportional navigation guidance law. They aim ahead of you based on the rate of change of the line-of-sight angle. By waiting until the missile is close and then breaking hard, you create a massive change in line-of-sight that the missile cannot match because it does not have enough time or energy to turn.
Last-ditch success rate in DCS: Moderate. Against long-range shots where the missile arrives low on energy, last-ditch works well. Against a close-range missile with full energy, it is a coin flip. But a coin flip beats the certainty of dying if you fly straight.
Common Mistakes That Get You Killed
Flying Straight After Notching
You successfully notch a missile, the RWR lock breaks, and you immediately roll wings level and resume your original heading. The problem: the missile or the launch aircraft may reacquire you within seconds. After a successful notch, maintain your perpendicular heading for several more seconds, continue dispensing chaff, and do not resume your attack heading until you are confident the threat has passed.
Not Checking Six
Visual awareness is your only defense against IR missiles. If you never look behind you, the first AIM-9 or R-73 will be the last thing that happens to you. Use padlock view (default: numpad period in most DCS aircraft) or TrackIR/VR to check your six regularly, especially in a furball.
Wasting Countermeasures
Dumping all your chaff and flares the moment an RWR warning appears leaves you defenseless for the second and third missiles that follow. Use disciplined, programmed dispense patterns. Save countermeasures for confirmed launches, not search radar detections.
Ignoring the RWR Completely
Many new players treat the RWR as background noise — the beeping is annoying, the symbols are confusing, so they ignore it. This is like driving with your eyes closed. Spend time in a training mission learning your specific aircraft's RWR symbology. Set up a practice scenario with known SAM sites and fly toward them, observing how the RWR indications change as you enter search, track, and launch phases.
Notching the Wrong Direction
When a missile is in the air, notching in the wrong direction (turning toward the missile rather than perpendicular to it) is fatal. Under stress, pilots sometimes turn the wrong way. Practice until identifying the correct perpendicular heading is instinctive. If the threat is at your 12 o'clock, you need to be heading 3 o'clock or 9 o'clock — pick whichever gives you the best terrain or egress options.
Flying at Medium Altitude in SAM Territory
The 15,000-25,000 foot altitude band is the "coffin corner" against SAM threats. You are too high for effective terrain masking, too low for your speed to help you out-range the missiles, and perfectly visible to every radar in the area. Either go low (below the radar horizon, using terrain) or go very high and fast where only long-range systems like the S-300 can reach you.
Panicking and Pulling Into the Vertical
When a missile is inbound, some pilots instinctively pull straight up or dive straight down. Both are poor choices. Pulling up bleeds your speed rapidly and makes you predictable. Diving straight at the ground is dangerous for obvious reasons. Controlled, perpendicular breaks with chaff/flare employment will always beat panic maneuvers.
Putting It All Together
Surviving in DCS is about building habits. Before every mission, set up your countermeasure programs. During flight, keep your RWR in your scan. When a threat appears, classify it immediately: radar or IR? At what range? From what direction?
The decision tree is straightforward:
- Radar lock at long range: Crank, prepare to notch, consider going cold
- Radar launch at medium range: Notch immediately with chaff, descend for terrain clutter
- Radar launch at close range: Last-ditch break with chaff
- IR missile detected visually: Hard break with flares, reduce throttle
- SAM launch: Notch with chaff, terrain mask if possible, ECM on
Every death in DCS is a learning opportunity. After you get shot down, use the replay (Ctrl+R) to understand what happened. Watch the missile's flight path. See where it was fired, how it tracked, and what you could have done differently. The pilots who improve fastest are the ones who review their deaths as carefully as their kills.
Want to accelerate your learning? A SimTuts tutor can fly as your wingman in training scenarios, calling out threats and coaching your defensive reactions in real time. There is no faster way to build the muscle memory that keeps you alive.