The F/A-18C Hornet's radar is simultaneously one of its greatest strengths and one of the most confusing systems to learn. You're staring at a display full of symbols, acronyms, and numbers. RWS, TWS, STT, LTWS, L&S, DT2, HAFU, ASE, NIRD... it feels like someone spilled alphabet soup on your MFD.
Here's the thing: once you understand what the radar is actually doing and why these modes exist, it all clicks into place. The workflow becomes intuitive. You'll stop button-mashing and start methodically prosecuting targets like you're supposed to.
Let's break it down from first principles.
Affiliate disclosure: This guide contains affiliate links. If you purchase through these links, SimTuts earns a small commission at no extra cost to you. We only recommend products we genuinely believe improve the flight sim experience.
How Pulse Doppler Radar Works (The Short Version)
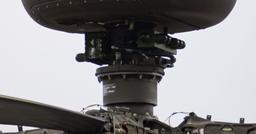
Before we touch a single button, you need to understand what your radar is doing. The APG-73 in the Hornet is a pulse Doppler radar, and understanding this explains most of its behaviour.
Traditional radar sends out a pulse of energy and measures how long it takes to bounce back. Simple: longer time equals further away. The problem? When you're flying over land, the ground reflects everything. Your scope fills with useless clutter, and you can't see enemy aircraft hiding in the noise.
Pulse Doppler radar solves this using the Doppler effect—the same phenomenon that makes an ambulance siren sound higher-pitched when it's coming toward you. By analysing how the frequency of the returned signal shifts, the radar can determine whether something is moving toward you, away from you, or stationary relative to the ground.
This is why modern fighters can "look down, shoot down." The ground clutter gets filtered out because it's not moving (much), while aircraft stand out because they are.
The trade-off: Pulse Doppler radar has a weakness called the velocity gate or notch. If a target flies perpendicular to you at exactly the right speed, the Doppler shift from their movement gets cancelled out by the Doppler shift from the ground. They disappear from your scope. This is called "notching" or "beaming," and it's a deliberate defensive tactic. If targets keep vanishing when they turn sideways to you, that's why.
The radar uses different Pulse Repetition Frequencies (PRF) to balance range detection versus velocity measurement:
- High PRF excels at velocity measurement and detecting fast-approaching targets
- Medium PRF balances range and velocity (good for tracking manoeuvring targets)
The APG-73 automatically selects appropriate PRFs—you don't control this directly—but understanding it explains why sometimes targets seem easier or harder to track depending on their aspect angle.
The Four Core Radar Modes
The Hornet gives you four main air-to-air radar modes. Each exists for a reason, and using the right mode at the right time is what separates effective pilots from button-mashers.
RWS (Range While Search)
What it does: General area search. The radar sweeps back and forth across a wide area, showing you everything it sees.
When to use it: This is your default mode. When you're on patrol, don't know where the enemy is, and need to cover lots of airspace, RWS is your friend. It's the "looking for trouble" mode.
The catch: RWS gives you targets, but it doesn't track them in the traditional sense. The radar just paints contacts as it sweeps past. You see them, but you can't shoot at them—the fire control system doesn't have enough data.
Typical settings: 80nm range, 80° azimuth, 4-bar elevation scan. This is the "AMRAAM set" that real Hornet pilots use for Combat Air Patrol.
TWS (Track While Scan)
What it does: Continues scanning like RWS, but simultaneously builds "track files" on contacts—calculating their heading, speed, and altitude. You can shoot AMRAAMs at tracked targets while still seeing other contacts.
When to use it: Once you've found a group of targets and committed to engage them. TWS sacrifices some search coverage for much better target tracking. It's the mode you'll use for most BVR (Beyond Visual Range) AMRAAM shots.
Why it matters: In TWS, your missiles get continuous updates via datalink. The missile knows where the target is and adjusts its flight path. If you shoot from STT, the enemy's radar warning receiver screams at them continuously—in TWS, they get much less warning.
Typical settings: Narrower than RWS—often 40° azimuth, 2 bars. You're focused on a specific group now, not searching everywhere.
LTWS (Latent Track While Scan)
What it does: A hybrid mode—technically you're still in RWS, but when you designate a contact, the radar builds a track file on it.
When to use it: LTWS lets you keep wide-area search while "soft locking" specific targets of interest. You get targeting information (airspeed, altitude, heading) without losing situational awareness.
The catch: No SHOOT cue. LTWS doesn't provide the fire control solution needed for a shot. You'll need to step up to full TWS or STT to employ weapons.
How to enable it: Press the LTWS option select button on the Attack Radar page.
STT (Single Target Track)
What it does: The radar stops scanning and locks onto one target with all its energy. Maximum tracking fidelity on that specific contact.
When to use it: When you absolutely, positively need to hit that one target. STT gives the best firing solution and is required for some weapon types. Also useful when a target is manoeuvring hard and TWS is struggling to maintain track.
The massive downside: You lose all situational awareness. The radar shows you nothing except your locked target. In a multi-bogey environment, his wingman is setting up on you while you're fixated on him. Real fighter pilots say "STT is a last resort" for this reason.
Warning: STT also blasts continuous energy at the target. Their Radar Warning Receiver (RWR) will scream at them, telling them exactly what's happening. Any element of surprise is gone.
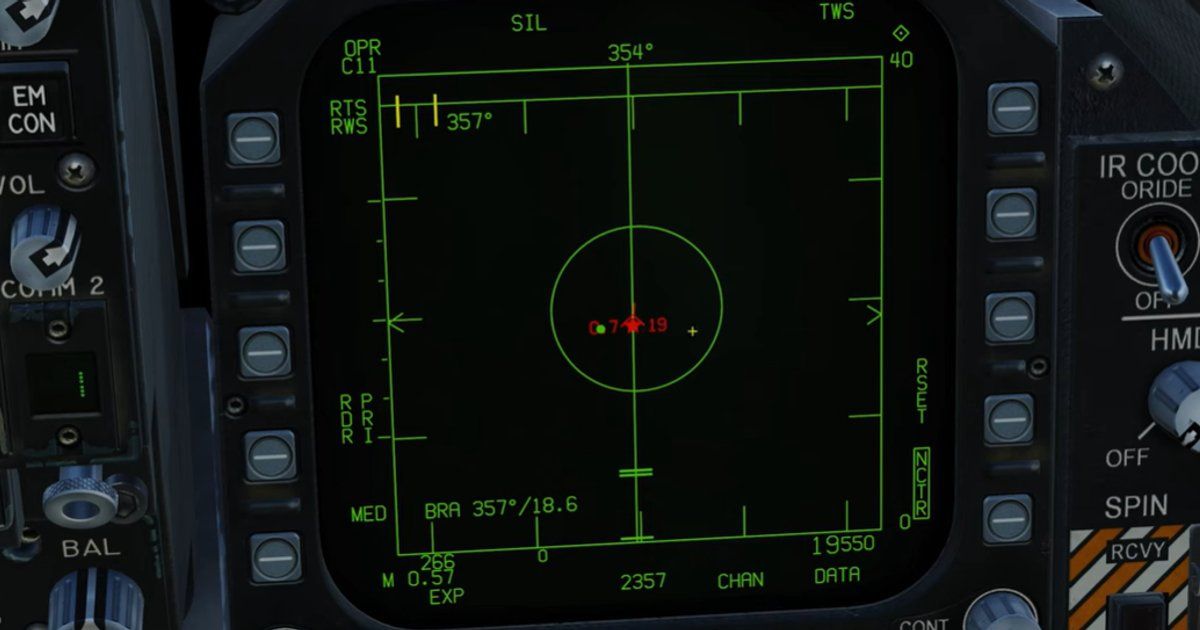
Reading the Radar Display
Before you can work the radar, you need to understand what you're looking at.
HAFU Symbols
Every contact on your radar is displayed as a HAFU (Hostile, Ambiguous, Friendly, Unknown). The shape tells you what you know about the contact:
- Ambiguous (staple/bracket shape) = Unknown (no IFF response yet)
- Half-circle = Friendly. Caret/triangle = Hostile. Filled vs empty indicates data quality.
- Filled/solid shape = Hostile (confirmed via IFF and AWACS)
- Circle with cross inside = Friendly (positive IFF response)
The actual shape (circle vs. half-circle vs. caret) indicates the contact's aspect angle and whether they're approaching or departing.
L&S (Launch & Steering)
When you designate a target, it becomes your L&S (Launch & Steering) target. This is your primary target—the one your weapons will guide to. On the radar display, the L&S is shown with a star inside the HAFU symbol.
On your HUD, the L&S appears as a box (Target Designation or TD box).
DT2 (Designated Target 2)
You can designate a second target as DT2. This lets you monitor two specific contacts closely—both show detailed tracking information and launch zones. On radar, DT2 has a diamond inside the HAFU. On the HUD, DT2 appears as an X.
If you lose your L&S (target goes outside gimbal limits or times out), DT2 automatically becomes the new L&S.
Trackfiles and Low Priority Targets
In TWS, the radar maintains track files on multiple contacts but only displays full HAFU symbols for the top 8. Additional contacts appear as small + symbols called Low Priority Trackfiles (LPT). These are still real contacts—just lower priority for engagement.
The TDC: Your Radar's Mouse
The TDC (Throttle Designator Controller) is how you interact with the radar—think of it as a mouse cursor for your MFD. The small diamond with a dot on your radar display shows where the TDC is pointing.
Critical concept: The TDC can only control one display at a time. You assign TDC control using the Sensor Control Switch (the "castle switch" on your stick):
- Castle Right = Assign TDC to right MFD
- Castle Left = Assign TDC to left MFD
- Castle Down = Assign TDC to centre MFD (if applicable)
When a display has TDC control, you'll see a small diamond with a dot in the corner.
TDC Actions
Once the TDC is assigned to your radar display:
- TDC Slew = Move the cursor around the radar display
- TDC Depress (short press) = Designate target under cursor as L&S (or DT2 if L&S already exists)
- Castle towards that MFD again = Fast acquisition of target under cursor
Workflow: Finding and Identifying Targets
Here's the step-by-step workflow for detecting and identifying bogeys.
Step 1: Set Up Your Radar
- Master Arm ON (flick the switch up on the left console)
- Select A/A Master Mode (press the A/A button on the UFC or use your HOTAS binding)
- Your radar should now show the Attack Radar page on one of your MFDs
- Assign TDC to that display (Castle switch toward it)
Step 2: Configure Scan Volume
Use the OSB (Option Select Buttons) around the radar display to set:
- Range: Start wide (80nm) for patrol, narrow down as you find targets
- Azimuth: ±60° or ±80° for wide search, ±20° or ±40° when focused on a group
- Bars: 4-bar for vertical coverage during search, 2-bar when tracking specific targets
- Mode: Ensure you're in RWS for initial search
Step 3: Scan and Detect
Fly your patrol pattern. The radar sweeps automatically. Contacts appear as HAFU symbols.
When contacts appear, note:
- Their position (range and bearing)
- Whether they're approaching (pointed toward you) or departing
- How many there are
Step 4: Interrogate for IFF
Before you shoot anything, you need to know if it's hostile.
To interrogate a specific contact:
- Slew TDC over the contact
- Press Sensor Select Depress (castle switch inward) simultaneously (this is the IFF interrogation command)
The symbol will change:
- Circle with cross = Friendly (do NOT shoot)
- Filled/solid = Hostile (valid target)
- Remains empty circle = Unknown (no response—could be hostile with IFF off, or their equipment is broken)
Important: To get confirmed hostile (red) symbology on non-responding contacts, you need an AWACS aircraft in the mission with EPLRS datalink enabled. Without AWACS, non-responders stay yellow (unknown), not red (hostile). Check your Rules of Engagement before shooting unknowns.
Step 5: Enable NCTR (Non-Cooperative Target Recognition)
The radar can identify aircraft types using NCTR—analysing the unique radar return signature of rotating jet engine compressor blades.
Toggle NCTR ON using the OSB on the radar page. When you lock or designate a target, the radar will attempt to identify the aircraft type (e.g., "MIG29" or "SU27"). This appears in the target data block.
NCTR has range limitations (typically under 25nm) and works better at certain aspect angles, but it's another tool for positive identification.
Workflow: Engaging a Single Target (STT)
The simplest engagement—one target, one missile.
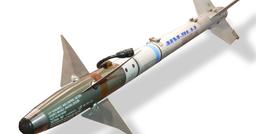
Step 1: Select AIM-120 AMRAAM
Use the weapon select switch or press the appropriate OSB to select AIM-120.
Step 2: Designate Target
- Slew TDC over the target you want to engage
- Press TDC to designate as L&S (star appears inside HAFU)
Step 3: Transition to STT
With TDC over your L&S target, press TDC again (or Castle toward the radar MFD) to command STT. The radar locks onto that target exclusively. The display changes to show only that contact with detailed tracking information.
Step 4: Manoeuvre for Shot
Your HUD now shows:
- TD Box = Target Designation (where the target is)
- ASE Circle = Allowable Steering Error circle
- Steering Dot = Where you need to fly
- Range/Closure information
Fly to place the Steering Dot inside the ASE Circle. This means your aircraft's flight path will intercept the target properly for missile launch.
Step 5: Wait for SHOOT Cue
As range closes, your fire control system calculates launch zones:
- Rmax = Maximum range (missile might reach if target doesn't manoeuvre)
- Rne = No-Escape range (target can't outrun the missile even with perfect defence)
- Rmin = Minimum range (too close for missile to arm/guide)
When you're within acceptable launch parameters, the SHOOT cue appears on your HUD.
Step 6: Fire
With SHOOT cue visible, squeeze and hold the trigger. The missile launches, and the aircraft automatically begins guiding it toward the target via datalink.
Step 7: Support the Missile
Critical: The AIM-120 doesn't go fully autonomous ("pitbull") until approximately 8-10nm from the target. Until then, you must keep the target locked so your aircraft can send updates to the missile.
If you break lock before pitbull, the missile goes stupid and will likely miss. Maintain radar contact until you see/hear "pitbull" or the missile goes active.
Workflow: Engaging Multiple Targets (TWS)
TWS allows you to engage multiple targets without giving them the full RWR warning of STT. This is the preferred mode for BVR combat.
Step 1: Transition to TWS
From RWS, designate your first target as L&S. The radar automatically narrows its scan and enters TWS mode. You'll see "TWS" on the radar display.
Step 2: Designate Multiple Targets (Optional)
With L&S already designated, slew TDC over a second contact and press TDC. That contact becomes DT2.
You now have two prioritised targets with full tracking data and launch zones displayed for both.
Step 3: Set Up the Shot
Same as STT: fly to place the Steering Dot inside the ASE Circle. The difference is your radar continues scanning—you can still see other contacts, and the enemy's RWR isn't being blasted continuously.
Step 4: Fire When SHOOT Appears
TWS provides SHOOT cues just like STT. Fire when ready.
Step 5: Switch Targets
After firing at L&S, you can immediately designate DT2 as your new primary target:
- Slew TDC over DT2 and press TDC (this swaps L&S and DT2)
- Or press Undesignate to swap them
Continue engaging sequential targets. The radar keeps tracking everything while you methodically work through the threats.
Why TWS > STT for Multiple Targets
- Situational awareness: You see the whole fight, not just one target
- Less warning to enemy: No continuous spike on their RWR
- Flexibility: Can reprioritise targets mid-engagement
- Multi-target capability: Datalink can support multiple missiles in flight
ACM: Close Range Dogfighting
When the fight goes close-in and you need instant locks, ACM (Air Combat Maneuvering) modes take over.
ACM modes have a fixed 10nm range (5nm for some sub-modes) and different scan patterns optimised for dogfight acquisition.
Entering ACM
Press Castle Forward (or your bound "Enter ACM" control). The radar switches to ACM mode with Boresight (BST) acquisition.
ACM Sub-modes
Toggle between sub-modes using the Castle switch:
BST (Boresight) - 10nm range
- Radar scans a small area directly in front of the aircraft
- Point your nose at the target and the radar grabs them
- Good for: predictable, straight-ahead acquisition
VACQ (Vertical Acquisition) - 5nm range
- Radar scans a narrow, tall vertical slice
- Ideal for: knife-edge fights where targets are above/below you
- Best overall ACM mode for manoeuvring combat
WACQ (Wide Acquisition) - 10nm range
- Radar scans a wider horizontal area
- Good for: finding targets in a turning fight when you can't quite get your nose on them
- Can be horizon-stabilised (helpful in high-G turns)
GACQ (Gun Acquisition) - 5nm range
- Automatically selected when you select the gun
- Scan volume approximates HUD field of view
- Designed for guns solutions—puts you into STT the moment it grabs something
Exiting ACM
Castle Right (Return to Search) exits ACM mode and returns to your previous BVR mode.
Common Mistakes and Tips
Mistake: Using STT When TWS Would Work
STT is tactically inferior for BVR combat. It sacrifices SA and warns the target. Only use STT when:
- TWS is struggling to maintain track on a hard-manoeuvring target
- You need the tightest possible firing solution
- You're already at merge and SA doesn't matter
Mistake: Shooting Without Proper IFF
In multiplayer or campaigns with mixed forces, "unknown" isn't good enough. Get positive ID before you shoot. That MiG-29 might be a friendly foreign air force. That unknown might be a civilian airliner. Check datalink. Use NCTR. Ask AWACS. Don't commit fratricide.
Mistake: Breaking Lock Before Pitbull
Your AIM-120 needs support until it goes active. Breaking lock early wastes missiles. Wait for pitbull, then consider your next move.
Tip: Use LTWS to Build Your Picture
LTWS lets you soft-lock contacts and gather information (altitude, speed, heading) without committing to TWS. Build your mental picture of the battlespace before you commit.
Tip: Narrow Your Scan When Committed
Wide azimuth and 4-bar scans are for searching. Once you're committed to a group, narrow to ±40° or less and drop to 2 bars. This increases track file update rate and gives your missiles better data.
Tip: Scan Centering
Pressing TDC (without a target under cursor) centers the radar scan on that point. Use this to focus your radar's attention where the threat is, rather than scanning empty sky.
Tip: Mind Your Gimbal Limits
The radar can only look so far off your nose (~60°). If a target goes beyond the gimbal limits, you'll lose lock. Keep target-bearing in mind during manoeuvres, and unload to point your nose toward the fight if you need to maintain track.
Putting It All Together
A typical BVR engagement workflow:
- Detect: RWS at 80nm/80°/4-bar shows contacts
- Identify: Slew cursor, interrogate IFF, check NCTR
- Commit: Designate L&S on priority threat, radar transitions to TWS
- Set up: Narrow scan, manoeuvre for ASE
- Shoot: AMRAAM away when SHOOT appears
- Support: Maintain track until pitbull
- Reassess: Second target? Defensive needs? Continue or disengage.
The radar isn't complicated once you understand it's just a tool with different modes for different jobs. Search with RWS, track with TWS, focus with STT, dogfight with ACM. Designate with TDC. Check IFF before you shoot.
Practice the workflow until it's muscle memory. Then the acronyms won't matter anymore—you'll just be working the problem.
A note on hardware: The Hornet's radar is designed to be run entirely from the HOTAS — TDC slew, lock, mode changes, and weapon selection without ever touching the mouse. A Thrustmaster T16000M FCS HOTAS puts those hats and buttons under your fingers so the workflow above becomes muscle memory. Head-tracking — TrackIR 5, the Tobii Eye Tracker 5, or a VR headset like the Meta Quest 3 — lets you scan the MFD and the sky at once.
Want hands-on radar training with real-time feedback? Book a session with one of our experienced F/A-18C tutors. Working through intercepts together builds the muscle memory faster than solo practice—and they can spot the habits that are costing you kills.
The DCS F/A-18C's radar system is comprehensively documented in the official DCS Hornet documentation and the Hoggit Wiki. For visual learners, Matt Wagner's official tutorial videos on YouTube cover these systems in detail.