The AN/APG-78 LONGBOW Fire Control Radar (FCR) is the AH-64D Apache's most distinctive and powerful sensor system. Mounted atop the rotor mast in an aerodynamic radome, this millimeter-wave radar fundamentally changed attack helicopter warfare by enabling crews to detect, classify, and engage targets while remaining concealed behind terrain.
This guide synthesizes operational doctrine, real-world pilot experiences, and tactical best practices for employing the FCR in combat and simulation environments.
Affiliate disclosure: This guide contains affiliate links. If you purchase through these links, SimTuts earns a small commission at no extra cost to you. We only recommend products we genuinely believe improve the flight sim experience.
Table of Contents
- FCR Capabilities & Limitations
- Target Detection & Prioritization
- CPG Workload Management
- Continuous Scan Mode: Tactical Considerations
- Scan Size & Zoom Employment
- Scan Orientation & Azimuth Control
- C-Scope: When and How to Use It
- Attack Strategies with FCR
- Common Mistakes & Best Practices
FCR Capabilities & Limitations
Core Specifications
The AN/APG-78 LONGBOW FCR provides:
- Target Capacity: Detect up to 256 targets and simultaneously track up to 128 (moving and stationary)
- Prioritization: Automatically prioritize the top 16 most threatening targets
- Engagement Timeline: Initiate precision attacks within 30 seconds of detection
- Detection Range: Up to 8 kilometers for ground and low-flying air targets
- Scan Sector: 90° sector from the aircraft nose
- Primary Modes: Ground Target Mode (GTM), Air Targeting Mode (ATM), Maritime Targeting Mode (MTM)
The Mast-Mounted Advantage
The AN/APG-78 LONGBOW FCR radome mounted atop the Apache's rotor mast
The unique mast-mount placement of the FCR provides a critical tactical advantage. The radome's raised position enables target detection while the helicopter is behind obstacles (e.g. terrain, trees or buildings). Target locations may be viewed while still masked behind terrain, allowing the receiving aircrew to easily gain situational awareness of the battlefield before unmasking their own aircraft from behind cover.
This terrain masking capability is the cornerstone of Apache survivability in high-threat environments.
Limitations to Understand
While powerful, the FCR has constraints:
- Short-range system: Optimized for 0-8km engagements, not strategic reconnaissance
- Millimeter-wave limitations: Performance degrades in heavy rain, snow, or dense smoke
- Line-of-sight dependent: Requires unobstructed view to target (though mast mount helps)
- Emissions signature: Active radar emissions make you detectable to advanced EW systems
- Processing prioritization: System focuses on highest-threat targets, may ignore lower-priority contacts
Target Detection & Prioritization
How FCR Prioritizes Targets
The FCR doesn't just detect targets—it intelligently prioritizes them based on threat assessment.
According to operational documentation: "In a scenario in which enemy helicopters are expected to employ high-speed moving, pop-up, or diving attacks, target priorities will be focused on helicopters that are moving over the battlefield. If enemy aircraft are detected inbound with a positive closure rate toward the ownship, these aircraft are prioritized for targeting over aircraft that are flying away from the ownship or are in a stationary hover."
Priority Factors (highest to lowest):
- Air threats with positive closure rate (inbound helicopters/aircraft)
- Moving ground targets (tanks, IFVs, mobile SAMs)
- Stationary high-value targets (command vehicles, SAM sites)
- Departing air threats (aircraft flying away)
- Low-value stationary targets
Priority Fire Zones (PFZ) and No Fire Zones (NFZ)
Crews can incorporate PFZs and NFZs into FCR prioritization. This allows you to:
- Force the system to prioritize targets in specific grid squares
- Automatically filter out targets in friendly areas
- Coordinate fires with other team members
Practical Application: If you know enemy armor is approaching from the northeast, create a PFZ in that sector. The FCR will bump those targets to the top of the High Priority Target List (HPTL).
Does the FCR Properly Prioritize?
Short answer: Yes, but with caveats.
The automated prioritization works well for its designed mission (anti-armor warfare against conventional forces), but pilots report situations where manual intervention is needed:
- Asymmetric threats: FCR may prioritize a tank over a technical with a Stinger MANPADS
- Terrain limitations: Targets in defilade may be deprioritized even if tactically important
- Fire support coordination: You may need to manually override to deconflict fires with friendly artillery
Best Practice: Trust the automation as a baseline, but maintain situational awareness and be ready to manually designate targets based on mission-specific intelligence.
CPG Workload Management
The CPG's Role with FCR
The FCR dramatically reduces CPG workload compared to TADS-only operations. Instead of manually searching for targets with the optical sensor, the CPG can:
- Scan large areas in seconds with the FCR
- Rapidly classify contacts using automated threat detection
- Confirm high-priority targets with TADS before engagement
- Coordinate with the pilot while maintaining situational awareness
The rapid search, detection, classification, and prioritization of targets by the Longbow FCR can then be quickly and positively identified by using the electro-optics of TADS. The center of view can be focused on the location of the highest priority target and the CPG, at the touch of a switch, can view either display.
Crew Coordination Model
Pilot Responsibilities:
- Manage FCR scan mode and orientation
- Monitor air threats in ATM mode
- Coordinate team movement and positioning
- Execute unmasking maneuvers for radar scans
CPG Responsibilities:
- Confirm FCR contacts with TADS visual ID
- Designate targets for weapon employment
- Manage weapon selection and sequencing
- Coordinate fires with other aircraft
Effective crews operate in a "sensor fusion" mode:
- Pilot runs FCR wide-area search for initial detection
- CPG confirms priority targets with TADS zoom
- Both crewmembers maintain cross-check on threat awareness
How Much Work Does the CPG Do?
Low-Threat Environment: FCR automation handles 70-80% of the target acquisition work. CPG focuses on confirmation and weapon employment.
High-Threat/Complex Battlespace: CPG workload increases significantly:
- Manual target designation for time-sensitive targets
- Managing multiple simultaneous engagements
- Coordinating with other aircraft via datalink
- Overriding automated prioritization
- Maintaining friendly force deconfliction
Pilot Insight: The FCR transforms the CPG from a "searchlight operator" into a battle manager. Instead of spending mental energy hunting for targets, the CPG can focus on tactical decision-making, threat assessment, and optimal weapon employment.
Continuous Scan Mode: Tactical Considerations
What is Continuous Scan?
Continuous scan keeps the FCR actively scanning without manual input. Targets detected appear on both the FCR page and the TSD (Tactical Situation Display) when in ATK mode.
Is Leaving FCR in Continuous Mode Dangerous?
YES, under certain conditions.
Advantages of Continuous Scan:
- ✅ Constant situational awareness
- ✅ Immediate threat detection
- ✅ Reduced crew workload in low-threat areas
- ✅ Rapid reaction to pop-up threats
Disadvantages and Risks:
- ⚠️ Persistent radar emissions make you detectable by Electronic Warfare (EW) systems
- ⚠️ Radio Frequency (RF) signature can be triangulated by enemy direction-finding equipment
- ⚠️ Increased risk of counter-fire from radar-guided SAMs and AAA
- ⚠️ Battery drain (minor concern, but relevant on extended missions)
Tactical Emission Control (EMCON)
Real-world Apache operations follow EMCON discipline:
High-Threat Environments (near modern IADS, enemy EW assets):
- Use single-scan mode only when needed
- Scan briefly, then revert to passive sensors (TADS, visual)
- Coordinate with other aircraft to minimize radar exposure time
- Consider masked position firing to reduce exposure
Permissive Environments (low/no air defense threat):
- Continuous scan is acceptable for maintaining situational awareness
- Still recommend periodic EMCON checks (scan off for intervals)
- Monitor for unexpected threats (man-portable SAMs, enemy helicopters)
Best Practice from Doctrine: Default to passive sensors. Use FCR aggressively when you need it, but turn it off when you don't. Every second the radar is radiating is a second the enemy can localize you.
When to Use Continuous Scan
Recommended Situations:
- Initial battlespace familiarization at safe stand-off range
- Low-threat reconnaissance missions
- Training environments with simulated threats
- Coordinated team operations where one aircraft provides radar coverage
Avoid Continuous Scan When:
- Operating near known SAM threats
- In EW-rich environments
- During covert approach to target areas
- When other team members already have radar coverage
Scan Size & Zoom Employment
Available Scan Sizes
The FCR offers multiple scan sizes to balance detection area vs. resolution:
- Wide Scan: Maximum coverage, lower resolution
- Medium Scan: Balanced coverage and fidelity
- Narrow Scan: Focused sector, higher resolution
- Zoom Scan: Tight sector, maximum detail
Tactical doctrine suggests: "For initial detection and classification of targets within the battlespace, Wide/Medium scan sizes are recommended, while target acquisition and weapons engagement benefit from Narrow/Zoom scan sizes."
How to Use Scan Size to Your Advantage
Phase I: Initial Contact (Wide/Medium)
Use wide scans during:
- Initial approach to battle area
- Recon of unknown terrain
- Search for dispersed enemy forces
- Coordination with team members to divide coverage
Example: Approaching a suspected enemy assembly area, use Wide scan to detect the overall disposition of forces (north/south/east groupings). This gives you the "big picture" without focusing on individual targets yet.
Phase II: Target Development (Medium/Narrow)
Switch to narrower scans when:
- You've identified a high-threat sector
- Confirming target classification (tank vs. BMP vs. truck)
- Preparing for weapon employment
- Coordinating fires in a specific grid square
Example: Wide scan shows a concentration of targets in the northeast sector. Switch to Narrow scan focused on that 30° sector to refine target classification and select priority targets.
Phase III: Engagement (Narrow/Zoom)
Use zoom for:
- Final target confirmation before weapon release
- Precision targeting of high-value assets
- Engaging targets at maximum range
- Distinguishing closely-spaced targets
Example: You've identified what FCR classifies as "tracked vehicle" at 6km. Switch to Zoom to confirm it's a T-72 and not a friendly M2 Bradley before committing Hellfire missiles.
Scan Size and Terrain
Factors such as terrain, anticipated enemy positions or movement on the battlefield, proximity of friendly forces, and the maneuvering of the AH-64D team itself play significant roles in determining the ideal FCR scan size.
Complex Terrain (mountains, urban): Use narrower scans to reduce clutter from terrain features.
Open Terrain (desert, plains): Use wider scans to maximize coverage and detect maneuvering forces.
Friendly Forces Nearby: Use zoom to positively identify contacts before engagement to avoid fratricide.
Scan Orientation & Azimuth Control
Understanding Scan Center
The FCR scans a 90° sector, but you control where that sector is centered. The scan center is typically:
- Nose-centric: Scan centered on aircraft heading
- TADS-centric: Scan centered on TADS line-of-sight
- Manual azimuth: Crew-selected specific bearing
How to Use Scan Orientation Tactically
Scenario A: Oblique Approach
You're approaching a target area from the southwest, but expect threats from the north.
- Poor: Keep scan centered on aircraft nose (southwest)—you're scanning empty terrain
- Good: Slave scan center to 45° right of nose—you're scanning the actual threat axis
Scenario B: Terrain Masking
You're in defilade behind a ridgeline. Enemy is expected northeast.
- Poor: Scan centered forward—radar is pointing into the hill you're hiding behind
- Good: Manually set scan center to 60° right—radar scans over the ridgeline toward threat
Scenario C: Team Coordination
You're operating as a two-ship team.
- Lead: Scans left sector (270-360°)
- Trail: Scans right sector (0-90°)
- Result: 180° combined coverage with no overlap
Dynamic Scan Adjustment
Experienced crews constantly adjust scan center based on:
- Aircraft maneuvering
- Threat axis changes
- TADS hand-off requirements
- Friendly force positions
Pilot Technique: As you maneuver the aircraft, keep the scan center pointed at the highest-threat sector, not necessarily where the aircraft is pointing. This requires active crew coordination ("I'm turning left, but keep the radar scanning east").
C-Scope: When and How to Use It
What is C-Scope?
C-Scope is a display mode that overlays FCR target symbols on your Helmet-Mounted Display (HMD) and TADS symbology. Instead of looking down at the FCR page on your MPD (Multi-Purpose Display), you see radar contacts in your helmet or targeting sight.
Benefits:
- Head-up target awareness
- Faster target handoff from FCR to TADS
- Reduced workload (no head-down time looking at FCR display)
- Improved situational awareness during maneuvering flight
Drawbacks:
- Can clutter HMD symbology in target-rich environments
- Less detailed information than full FCR display
- Requires practice to interpret correctly
When to Use C-Scope
Recommended Situations:
High-Workload Phases:
- During aggressive maneuvering
- While conducting pop-up attacks
- When transitioning from search to engagement
Target Handoff Operations:
- CPG needs to quickly slew TADS to FCR contact
- Pilot needs to confirm target location before unmasking
- Coordinating multiple simultaneous engagements
Low-Density Target Environments:
- Few contacts (C-Scope symbology won't clutter display)
- High-value targets need continuous track
Avoid C-Scope When:
- Target-Rich Environments: Too many symbols clutter HMD/TADS view
- Complex Targeting: Need detailed FCR page information (range, velocity, classification)
- Initial Battlespace Development: Better to use full FCR display for comprehensive picture
C-Scope Tactical Employment
Example Workflow:
- Use full FCR display for initial wide-area scan
- Identify 3-4 high-priority targets
- Enable C-Scope
- Conduct pop-up attack with C-Scope symbols in HMD
- CPG uses C-Scope to rapidly slew TADS to each target
- Disable C-Scope after engagement to reduce clutter
Pilot Technique: C-Scope is most valuable during dynamic maneuvering. When you're flying nap-of-the-earth (NOE) and popping up for quick scans, C-Scope lets you keep your head up and eyes outside while maintaining target awareness.
Attack Strategies with FCR
The FCR enables several attack strategies that wouldn't be possible with optical sensors alone.
Masked Position Firing
The Core FCR Tactic
This is the most important attack strategy for survivability in high-threat environments.
Concept:
- Position aircraft in defilade (behind terrain, treeline, or structure)
- Extend FCR mast above cover to scan for targets
- Acquire and prioritize targets while completely hidden
- Unmask briefly only to fire, then return to cover
Execution:
- Identify good mask (ridgeline, treeline, urban structure)
- Approach to hover in defilade, nose toward expected threat
- Execute FCR scan—radar sees over the obstacle, aircraft remains hidden
- CPG confirms priority target with TADS (may require brief unmask)
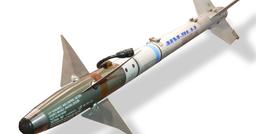
- Fire RF (Radar Frequency) Hellfire from masked position (missile flies ballistic until radar seeker activates near target, aircraft never fully exposes to enemy)
- Return to full defilade or displace to alternate firing position
Operational experience shows: "During the force-on-force phase, Longbow flight crews frequently elected to override the system's automatic mode selection logic and fire missiles from a masked position, which can significantly increase the helicopter's survivability."
Why This Matters: In conventional Apache tactics (TADS-only), you must unmask enough to get TADS line-of-sight to the target. With FCR + RF Hellfire, you can remain completely hidden during the entire engagement.
Rapid Ripple Engagement
Concept: Use FCR prioritization and RF missiles to engage multiple targets in rapid succession.
Execution:
- Conduct FCR scan, system prioritizes top 16 targets
- Fire first RF Hellfire at Next-to-Shoot (NTS) target
- FCR automatically sequences to next target on High Priority Target List
- Fire second missile immediately
- Continue sequence—can engage all 16 priority targets in under 60 seconds
Per system documentation: "Each time an RF missile is fired at the NTS target or an RFHO is transmitted, the NTS and ANTS designations will automatically sequence to the next targets on the High Priority Target List, allowing rapid engagement of the high priority targets by RF missiles."
Tactical Application: This is devastating against armor formations. A single Apache can neutralize an entire tank platoon before the enemy even knows they're under attack.
Pop-Up Quick Attack
Concept: Combine FCR speed with aggressive terrain flying to minimize exposure.
Execution:
- Fly NOE to pre-planned battle position (BP)
- Execute pop-up maneuver (10-20 feet above mask)
- Conduct scan (less than 2 seconds of FCR scan time)
- Immediately return to defilade
- Review FCR data while masked
- Execute second pop-up (different location) to confirm targets with TADS
- Engage and displace
Timing:
- Total exposure time: less than 10 seconds
- Enemy reaction time (detection to engagement): 15-30 seconds
- Result: You're back in cover before enemy can effectively engage
Team Coordinated Attack
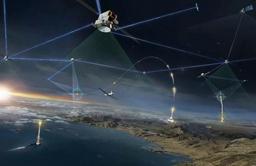
Concept: Multiple aircraft use FCR datalink to share target information and deconflict fires.
Execution (Two-Ship Team):
Lead Aircraft:
- Conducts initial FCR scan from primary BP
- Transmits target data to Trail via RF Hand-Off (RFHO)
- Engages targets on priority list (first half)
- Provides suppressive fires during Trail's attack
Trail Aircraft:
- Receives FCR target data from Lead
- Positions at alternate BP (different angle to target area)
- Confirms targets on own FCR (second half of list)
- Engages while Lead repositions
Advantage: Enemy faces simultaneous threats from multiple axes, can't effectively orient defenses.
Stand-Off Reconnaissance
Concept: Use FCR at maximum range to develop the battlefield without entering threat envelope.
Execution:
- Position aircraft 10-12km from suspected threat area (outside most AAA/MANPADS range)
- Use maximum FCR range (8km detection)
- Conduct wide-area scans to locate enemy positions
- Transmit target data to friendly ground forces or air support
- Reposition before enemy can localize your emissions
Use Cases:
- Pre-assault reconnaissance
- Artillery targeting support
- Hasty battle handover to follow-on units
- Intelligence collection in denied areas
Common Mistakes & Best Practices
Common Mistakes
❌ Leaving FCR in Continuous Scan Near SAM Threats
- Result: Shot down by radar-guided SAM that tracked your emissions
- Fix: Use single-scan mode; scan briefly, then go passive
❌ Using Wide Scan During Final Target Acquisition
- Result: Insufficient resolution to distinguish tank from BMP
- Fix: Transition to ZOOM scan before engagement
❌ Trusting FCR Prioritization Without Confirmation
- Result: Engaged low-threat truck while MANPADS team went undetected
- Fix: CPG confirms priority targets with TADS before firing
❌ Forgetting to Set NFZ Around Friendlies
- Result: FCR prioritized friendly vehicles as targets
- Fix: Always input NFZ/PFZ during pre-mission planning
❌ Scanning Into Your Own Mask
- Result: FCR shows no contacts because you're scanning the hill you're hiding behind
- Fix: Orient scan center toward threat, not aircraft nose
❌ Using C-Scope in Target-Rich Environment
- Result: HMD is cluttered with 50+ symbols, can't see anything
- Fix: Use C-Scope selectively when you have fewer than 10 targets
❌ Staying in One Position After FCR Scan
- Result: Enemy localizes your radar emissions and engages your position
- Fix: Scan from one BP, displace, engage from different BP
Best Practices
✅ Scan-Displace-Engage-Displace Cycle
- Never stay static—constant movement prevents enemy targeting
✅ Cross-Check FCR with TADS
- Use both sensors to confirm targets (sensor fusion)
✅ Coordinate with Wingman
- Divide scan sectors, deconflict targets, provide mutual support
✅ Plan Multiple Battle Positions
- Primary, Alternate, Subsequent—always have next move planned
✅ Use Terrain to Your Advantage
- FCR is most effective when you can scan from defilade
✅ Adapt Scan Size to Phase of Mission
- Wide → Medium → Narrow → Zoom as you progress from search to engagement
✅ Monitor Emissions Discipline
- Default to FCR OFF; only radiate when you need the information
✅ Practice Target Handoff (FCR to TADS)
- Smooth handoff reduces engagement timeline by 50%
✅ Use PFZ/NFZ Religiously
- Prevents fratricide and focuses automation on real threats
✅ Brief and Debrief FCR Employment
- Discuss what worked/what didn't to improve crew coordination
Conclusion
The AN/APG-78 LONGBOW FCR is a game-changing sensor that fundamentally altered attack helicopter tactics. When employed correctly, it provides:
- Survivability: Engage from masked positions the enemy can't target
- Lethality: Detect and engage targets in seconds, not minutes
- Situational Awareness: Know where threats are before they know you're there
- Coordination: Share target data across the team for synchronized attacks
The key to effective FCR employment is understanding when to be aggressive (permissive environment, time-sensitive targets) and when to be cautious (high-threat environment, EMCON discipline).
Master the workflows in this guide, practice crew coordination, and you'll unlock the full potential of the world's only attack helicopter FCR system.
A note on hardware: The Apache is a two-handed aircraft and DCS maps its sensors and weapons to the HOTAS. A Thrustmaster T16000M FCS HOTAS keeps George, the FCR, and weapon/sensor selection at your fingertips, and head-tracking — TrackIR 5, the Tobii Eye Tracker 5, or a VR headset like the Meta Quest 3 — is close to essential for slewing the IHADSS/TADS by looking where you want to aim. Rudder pedals handle anti-torque and pedal turns.
For hands-on FCR training in the Apache, consider booking a session with one of our attack aviation tutors. Working through FCR tactical scenarios with an experienced CPG or pilot accelerates learning faster than solo practice—and builds the crew coordination skills that make the difference between surviving and thriving in high-threat environments.
Sources & Further Reading
This guide synthesizes information from the following sources:
- Northrop Grumman: AN/APG-78 LONGBOW Fire Control Radar
- Lockheed Martin: LONGBOW Force-Multiplier Feature
- GlobalSecurity.org: AH-64D Longbow
- GlobalSecurity.org: AH-64 Apache Operations
- Aviators Database: AH-64D Longbow Technical Manual
- DCS Documentation: Fire Control Radar (FCR)
- Wikipedia: AN/APG-78 Longbow
- GlobalSecurity.org: FM 1-112 Attack Helicopter Operations
Disclaimer: This guide is intended for flight simulation education and training purposes. Tactics and procedures may differ from current classified military doctrine.