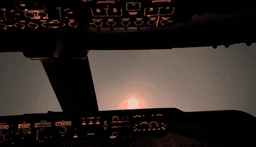
You have been flying ILS approaches everywhere. Every airport, every runway, every time. You dial in the frequency, arm the approach, watch the needles centre themselves, and the autopilot does most of the work. It is comfortable. It is repeatable. It works.
Then you plan a flight to somewhere interesting — a small island airport, a mountain strip, a field that only has one runway and no instrument approach — and you realise you have no idea how to land there. The approach plate says VOR or RNAV or, worse, nothing at all. There is no glideslope needle. There is no localizer. There is just a runway, somewhere ahead of you, and you are supposed to find it and land on it.
This is completely normal. Most sim pilots avoid visual approaches entirely. They pick airports with ILS, they fly the same routes, and they never develop the skill that real airline pilots use on a huge number of flights: looking out the window and landing the aeroplane by eye.
The good news is that visual approaches are not as hard as they seem. The skill gap between you and someone who does them confidently is smaller than you think. You just need references — things to look at, rules to follow, and a mental model for what "correct" looks like when there are no needles to chase.
This guide gives you all of that.
Why Visual Approaches Feel Hard
An ILS approach gives you two needles and tells you exactly where to be at every moment. One needle for left/right, one needle for up/down. Your job is to keep them centred. The system does the thinking — you just follow.
A visual approach gives you none of that. You are the glideslope. You are the localizer. You have to judge your own height, your own alignment, your own descent rate, using nothing but what you can see through the windscreen and a handful of instruments.
This feels like going from driving with GPS to driving without it. The first time is disorienting. You are not sure if you are in the right place. You do not know if you are too high or too low until it is obvious, and by then the correction feels urgent.
But here is the thing — before ILS became widespread, pilots landed aeroplanes for decades using little more than their eyes, a few radio aids, and some lights on the ground. The technique is well-understood. Once you learn what to look at and how to interpret it, visual approaches become natural. Some pilots even prefer them.
The actual skills you need are:
- Descent planning — knowing when to start down so you arrive at the right height
- Glideslope reference — using PAPI lights or the runway picture to judge your descent angle
- Alignment — keeping the runway centreline where it should be in your windscreen
- Speed and configuration management — getting the aircraft set up without autopilot mode reminders
- The flare — because you are hand-flying and there is no auto-land
None of these are mysterious. They are all learnable with practice. And once you can do them, you will find that visual approaches are more enjoyable than ILS approaches — because you are actually flying the aircraft, not monitoring an automation mode.
Real airline pilots fly visual approaches all the time. On a clear day, it can be faster than an ILS setup — one airline's 737 manual gives the time saved over "a long protracted arrival and approach procedure" as a reason to fly one. If they can do it with passengers in the back, you can do it in your sim.
Let us go through them.
What a Visual Approach Actually Is
A visual approach is an approach where you, the pilot, are responsible for navigating to the runway using visual references. ATC can clear you for a visual approach when you report the airport or the preceding traffic in sight, and from that point you are responsible for your own glideslope and your own alignment — and, if you were told to follow another aircraft, for a safe interval and wake turbulence separation behind it.
This does not mean you fly the entire approach with no instruments. In practice, a visual approach usually starts with instrument procedures — a STAR, radar vectors, or a published approach — that get you close to the airport at a reasonable altitude and heading. At some point you see the runway, and from there you take over visually.
The key distinction is who is providing the guidance:
| Approach Type | Lateral Guidance | Vertical Guidance | Who Provides It |
|---|---|---|---|
| ILS | Localizer needle | Glideslope needle | Ground-based radio |
| RNAV (GPS) | GPS course | VNAV or advisory GP | Aircraft FMS |
| VOR | VOR radial | Step-down fixes | Ground-based radio |
| Visual | Your eyes | Your eyes + PAPI | You |
How a Visual Approach Typically Unfolds
In real-world operations (and in MSFS with ATC or VATSIM), a visual approach usually goes something like this:
- ATC gives you a STAR or radar vectors toward the airport. You descend and decelerate on instruments as normal.
- At some point, you see the airport. You report "field in sight" to ATC.
- ATC clears you for the visual approach. "Cleared visual approach Runway 27."
- You take over. You navigate to the runway visually, managing your own descent and alignment. ATC still provides traffic separation unless they told you to follow preceding traffic.
- You land. Using PAPI, the runway picture, and hand-flying.
The transition from instruments to visual is the critical moment. Everything before step 3 is normal IFR flying. Everything after is the skill this guide teaches.
What Visibility Do You Need?
For ATC to clear you for a visual approach, you must have the airport or the preceding traffic in sight. In the US, the reported weather at the airport must also be a ceiling of at least 1,000 feet and visibility of at least 3 statute miles, and you proceed visually and clear of clouds. Below that, you need an instrument approach instead.
In MSFS 2024, you control the weather. When practising, start with unlimited visibility and work your way down. You will quickly discover that visual approaches become significantly harder when visibility drops below 8 km — not because the technique changes, but because you acquire your visual references later, giving you less time to set up.
There is also an important difference between a "visual approach" and a "VFR traffic pattern." A visual approach is an IFR procedure — you are still on an instrument flight plan, you are still talking to ATC, and you still have instrument procedures available as backup. A VFR traffic pattern is what GA pilots fly when operating under visual flight rules without a flight plan. In an airliner, you are almost always flying a visual approach, not a VFR pattern, even though the technique of flying a downwind-base-final sequence is similar.
PAPI and VASI — Your Glideslope Without ILS
The single most useful visual aid for landing without ILS is the PAPI — Precision Approach Path Indicator. It is a single row of four lights beside the runway, normally on the left side near the touchdown zone. These lights change colour depending on your approach angle, giving you a simple, instant readout of whether you are on the correct glideslope.
How PAPI Works
Each of the four PAPI light units is calibrated to a slightly different angle. When you are on the correct glideslope (typically 3 degrees), two lights appear red and two appear white. Deviate above and more lights turn white. Deviate below and more turn red.
| What You See | What It Means | Action |
|---|---|---|
| 4 white | Significantly too high | Reduce power, increase descent rate |
| 3 white, 1 red | Slightly too high | Slight power reduction |
| 2 white, 2 red | On glideslope | Maintain current descent |
| 1 white, 3 red | Slightly too low | Add power, reduce descent rate |
| 4 red | Significantly too low | Add power immediately, level off |
The unit nearest the runway is set to the highest angle, so it is the first to turn red as you sink. On the glidepath you therefore see the two lights nearest the runway red and the two outer lights white. Start descending on the PAPI only once you are lined up with the runway: its obstacle protection only extends about 10 degrees either side of the centreline and out to 3.4 NM.
VASI — The Older System
Before PAPI there was VASI — Visual Approach Slope Indicator. VASI uses bars of lights (usually two, a near and a far bar) instead of a single row of units. This is where the memory aid comes from: "Red over white, you're all right." Red far bar above white near bar — you are on the glideslope. The principle is the same: red and white combinations tell you your glideslope angle. You may still encounter VASI at older or smaller airports in MSFS 2024.
Finding PAPI in MSFS 2024
Most runways long enough for an airliner have PAPI lights. They are visible from about 5 miles in daylight and up to 20 miles at night, and become your primary glideslope reference during a visual approach. Look for them on the left side of the runway, roughly abeam the touchdown aiming point — a few hundred metres past the threshold, depending on the runway.
One important thing to understand: PAPI only works when you can see the runway. This is visual flying. If the visibility is poor enough that you cannot see the PAPI lights from a reasonable distance, you need an instrument approach, not a visual approach. PAPI is your glideslope needle for clear weather — and in clear weather, it works beautifully.
The 3-to-1 Rule — Descent Planning Without a Glideslope Needle
On an ILS approach, you intercept the glideslope and it tells you when to descend. On a visual approach, you need to plan your own descent. The 3-to-1 rule is the quickest way to do this.
The Rule
For every 1,000 feet of altitude you need to lose, you need 3 nautical miles of distance.
That is it. It works because a 3-degree glideslope — the standard angle for most approaches — descends approximately 300 feet per nautical mile. So if you need to lose 3,000 feet, you need about 9 nautical miles to do it in.
Quick Mental Math
- Take your altitude above the airport (in thousands of feet)
- Multiply by 3
- That is how many nautical miles out you need to start descending
Examples:
- 6,000 ft AGL → 6 × 3 = 18 NM
- 3,000 ft AGL → 3 × 3 = 9 NM
- 4,500 ft AGL → 4.5 × 3 = 13.5 NM
- 10,000 ft AGL → 10 × 3 = 30 NM
Adding a Buffer
The 3-to-1 rule assumes a clean descent at a constant angle. In practice, you also need to decelerate from approach speed to landing speed and extend flaps and gear, all of which take time and distance. Add about 10-15 percent to your calculated distance to account for configuration changes.
If the math says start descending at 18 NM, plan to start at 20 NM. Being slightly high is always better than being low — you can always add drag (gear, speedbrakes) to get down, but you cannot add altitude without going around.
How This Replaces the Glideslope Diamond
Think of the 3-to-1 rule as your mental glideslope needle. At any point during the descent you can check: "Am I approximately 300 feet lower for every nautical mile closer to the runway?" If you are at 3,000 feet and 10 NM out, you are on profile. If you are at 3,000 feet and 7 NM out, you are high — increase your descent rate or add drag. If you are at 3,000 feet and 15 NM out, you are low — reduce your descent rate.
Once you pick up the PAPI lights, they take over as your glideslope reference and the mental math becomes secondary.
Using the ND Range Ring
Both the A320 and the 737 draw the map on the Navigation Display to the range you select, so the edge of the display is a distance reference. You can use it in combination with the 3-to-1 rule for quick situational awareness.
For example, if you are at 3,000 feet AGL with a 10 NM range selected and the airport symbol is sitting right at the edge of the map, you know you need to lose 3,000 feet in 10 NM. The 3-to-1 rule says you need 9 NM — so you have 1 NM of margin. Start the descent now and you will arrive slightly high, which is the safe side.
This is not precision navigation — it is mental model building. The goal is to always have an approximate answer to "Am I roughly where I should be?" without doing complex calculations.
Setting Up the Visual — Flying the Pattern
In real-world airline operations, ATC often vectors you onto a long final for a visual approach. But sometimes — especially at smaller airports — you may need to fly a pattern. Yes, airliners can fly traffic patterns. It is not just for Cessnas.
The Standard Pattern
A visual pattern for a jet airliner is similar to a GA pattern but wider and higher:
- Downwind leg: Parallel to the runway, about 2 NM abeam, at 1,500 feet above the airport (vs 1,000 ft for GA)
- Base turn: Airbus times it — about 45 seconds after passing abeam the threshold from a 1,500 ft circuit (3 seconds per 100 ft, plus or minus 1 second per knot of head- or tailwind)
- Final: Aligned with the runway, descending on the PAPI glideslope
The wider pattern and higher altitude account for the airliner's higher approach speed and larger turn radius. You need more room to manoeuvre.
Pattern Entry from a STAR or Radar Vectors
Most of the time you will not fly a full rectangular pattern. Instead, ATC gives you vectors that position you on a roughly 45-degree intercept to the final approach course. From there you turn to align with the runway and begin your descent.
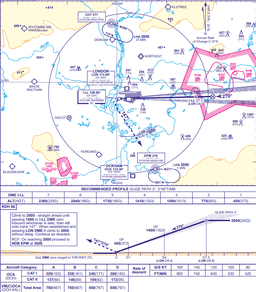
A STAR like the one above does the hard work of getting you from cruise altitude to the airport area at a sensible altitude and speed. The transition from STAR to visual approach happens when ATC says "cleared visual approach" — at that point, the STAR routing no longer matters and you navigate to the runway by eye.
The technique is the same regardless of how you get there:
- Get established on a heading that will intercept the extended runway centreline
- Begin descending using the 3-to-1 rule
- Acquire the PAPI lights and use them for glideslope
- Fly the final approach visually, making corrections to stay on PAPI and aligned with the centreline
When ATC Says "Cleared Visual Approach"
This clearance means you have the airport in sight (or the traffic you are following) and you are now responsible for:
- A safe interval and wake turbulence separation behind the aircraft you were told to follow, if any
- Your own navigation to the runway
- Your own glideslope management
You are still on an IFR flight plan, and ATC still separates you from other IFR traffic. You can still request vectors or an instrument approach if you lose sight of the airport — tell ATC as soon as possible if you do not want the visual. A visual approach has no published missed approach segment: if you go around, the tower will give you instructions.
Reading the Runway Picture
Before PAPI existed, pilots used the shape of the runway in the windscreen to judge their approach angle. This skill is still valuable — it gives you an additional reference alongside the PAPI lights and helps with alignment.
What a Correct Approach Looks Like
When you are on a 3-degree glideslope, the runway appears as a trapezoid in your windscreen. The threshold is at the bottom, the far end is at the top, and the sides converge toward the far end. The shape of this trapezoid tells you about your approach:
- Correct glideslope: The runway keeps the same trapezoid shape as you descend; it just grows larger.
- Too high (steepening): The runway appears to become longer and narrower — you are looking down at it more steeply.
- Too low (shallowing): The runway appears to shorten and become wider. You are looking at it from a shallow angle.
Alignment
If you are aligned with the centreline, the runway appears symmetrical in your windscreen — both sides of the runway converge evenly toward the far end.
If you are offset to one side, the runway appears skewed — one side is longer than the other. The side that appears shorter is the side you are offset toward. Correct toward the longer side.
Rate of Change
More useful than the static picture is how it changes. If the runway is growing in your windscreen, you are getting closer (good). If the aiming point — the spot on the runway where you are tracking toward — is moving up toward the horizon, your real aiming point is closer than it looks and you are going to land short of it (getting low). If it is moving down, away from the horizon, your real aiming point is further down the runway and you are going to land long (getting high).
The aiming point should stay fixed in your windscreen throughout the approach. If it does, your glideslope is constant. This is the same principle as the flight path vector on the PFD — the FPV shows where the aircraft is going, and the runway picture shows the same thing through the windscreen.
Flying a Visual Approach in the Fenix A320
The A320's avionics give you several tools that make visual approaches easier than they might seem. The trick is knowing which ones to use.
Using the Navigation Display
Your ND shows the runway on the map. Even without an ILS tuned, you can see the airport position and judge your distance and angle. Switch to ARC mode with a reasonable range (10-20 NM) and use the runway symbol as your lateral reference.
If the airport has a published approach that you have loaded in the MCDU, the approach course line will be visible on the ND even if you do not follow it. This gives you a visual reference for the extended centreline.
LOC Backup
Many airports without ILS still have a localizer (LOC-only approach). If one is available, tune it on the MCDU and press LS on the EFIS panel. Even if you are flying visually, having the LOC needle on your PFD gives you lateral backup — you can glance at it to confirm your alignment. You do not need to fly the full LOC approach; it is just a reference.
Hand-tuning a navaid on RAD NAV is a page most sim pilots never open until they need it, which is the worst moment to learn it. Radio Navigation Setup on our free browser A320 MCDU is the same entry — frequency, course, and the LS/FREQ field this backup depends on.
Managed vs Selected Speed
During a visual approach in the A320, you have a choice:
- Managed speed (magenta speed target): The FMGC targets the manoeuvring speed for your configuration and, once in landing configuration, VAPP. This works well if you have an approach loaded in the MCDU.
- Selected speed (blue speed target): You set the speed manually on the FCU. Use this when ATC gives you a speed or you want direct control over your speed profile.
Airbus's own visual-circuit technique uses managed speed, because that keeps the ground-speed mini protection working on final. To switch to selected speed instead, pull the speed knob on the FCU and dial in your target. The configuration sequence is the same either way:
- Downwind: at or below green dot, Flaps 1
- Base: Flaps 2 before you turn, then gear down and ground spoilers armed
- Final: Flaps 3, then Flaps FULL, at VAPP (VLS plus a 5–15 knot wind correction, computed by the FMGC from your landing weight)
When to Disconnect the Autopilot
Airbus's visual-circuit technique has you select both the autopilot and the flight directors off at the start of the downwind leg and fly the whole circuit by hand, with the bird. On a long straight-in visual, the usual compromise is to disconnect when:
- On final approach, established on the PAPI glideslope
- Configured with gear down and landing flaps
- Early enough to settle into manual control before the flare
The key is to disconnect when you are comfortable and have a clear visual picture — never so late that you are still adjusting to hand-flying in the flare.
The Flight Path Vector — Your Best Friend
The FPV (also called the bird or velocity vector) is the small circle with wings that appears on the PFD when you select it. It shows where your aircraft is actually going — not where it is pointed, but its track and flight path angle, computed from the inertial reference system.
To enable it: Press the HDG-V/S / TRK-FPA pushbutton on the FCU to select TRK-FPA. The bird appears and becomes your flight reference.
The FPV is incredibly useful for visual approaches because:
- Put the FPV on your aiming point and you are flying directly toward it
- Check its height against the pitch scale: Airbus describes a standard 3-degree path as the top of the bird's tail just below the horizon and the bottom of the bird just above the 5-degree nose-down mark
- If the FPV drifts left of the centreline, you are drifting left — correct right
- If the FPV is below your aiming point, you are descending too steeply — reduce descent rate
In an A320, the FPV replaces the ILS needles as your primary instrument reference during a visual approach. Airbus's rule is to change attitude first, then check the result on the bird. Look outside to confirm what you see, glance at the FPV to verify, correct as needed. This is the 70/30 split between outside and instruments described below.
Trim
Boeing 737: On a visual approach you are hand-flying, and hand-flying means managing trim. The key principle: trim for the speed you want, then use pitch to fine-tune. If you find yourself constantly pushing or pulling to maintain glideslope, you are fighting trim instead of flying the approach. Take a second to trim the pressure out, and the aircraft becomes much easier to control. After each configuration change (flaps, gear), re-trim once the speed stabilises.
Airbus A320: In Normal Law, the A320 auto-trims continuously whether the autopilot is engaged or not. You do not need to manually trim when hand-flying in Normal Law — the fly-by-wire system handles it, until auto-trim stops and flare law takes over close to the ground. Manual trim (via the trim wheels on the centre pedestal) is needed in Direct Law, which is an abnormal condition. This is one of the biggest differences between Boeing and Airbus: in the A320, you fly with the sidestick and the aircraft trims itself.
Energy Management on Final
Energy management is the hidden skill of visual approaches. On an ILS, the autopilot manages energy for you. On a visual approach, you are responsible for the balance between speed (kinetic energy) and altitude (potential energy).
The danger zone is being high and fast simultaneously. If you are high, you have excess potential energy. If you are also fast, you have excess kinetic energy. Fixing both at the same time is difficult — bleeding speed requires level flight or a climb, and descending converts altitude into speed.
Manage one at a time:
- If high and fast: Extend speedbrakes and/or gear early to dump energy. Do not push the nose down — that converts altitude into speed.
- If high and slow: This is actually fine. You can increase descent rate without gaining speed because you have energy margin in altitude but not speed.
- If low and fast: Reduce power and let the speed bleed in level flight, then resume descent at the correct speed.
- If low and slow: Add power and accept being low temporarily. Get the speed right first, then manage the glideslope.
The PAPI plus your airspeed indicator give you both halves of the energy equation. Check them together, not separately.
Configuration Sequence
The configuration sequence Airbus trains for a visual circuit in the A320:
- Downwind, at or below green dot: Flaps 1
- Before turning base: Flaps 2, then gear DOWN and ground spoilers armed
- Once the gear is down: Flaps 3, then Flaps FULL (checking VFE)
- By 500 ft above the airport at the latest: Flaps FULL, at VAPP, on glideslope, aligned
If you are not stable by 500 feet — correct speed, correct glideslope, correct alignment, configured — go around. No exceptions. (Aim to be stable well before that; 500 ft is the visual-conditions gate, 1,000 ft in cloud.)
Flying a Visual Approach in the PMDG 737
The same concepts apply in the 737 with Boeing-specific avionics. The workflow is slightly different but the technique is identical.
Setting Up a Backup Approach
Even when flying visually, load an approach into the FMC if one is available. RNAV approaches are especially useful because the FMC calculates the course line and altitude targets for you. You do not have to follow them exactly, but they give you references.
On the MCP (Mode Control Panel), you can set the course to match the runway heading. This puts a course reference line on your instruments even without a full approach loaded.
Using the Flight Path Vector
On the 737, the FPV is displayed by pressing the FPV switch on the EFIS control panel. It works like the A320's version — it shows your flight path angle vertically and your drift angle laterally, so it shows where the aircraft is going.
In Boeing aircraft, the FPV is particularly useful because the HUD (if fitted) integrates it into the head-up display, allowing you to keep your eyes outside while still seeing where the aircraft is tracking.
Speed Management
The 737 uses speed intervention and manual speed settings on the MCP:
- Downwind: Flaps 5, at flaps 5 manoeuvre speed
- Before turning base: Gear down, Flaps 15, speedbrake armed, start descent
- Final: Landing flaps (30 or 40), Vref + wind additive, landing checklist
This is the visual traffic pattern in Boeing's 737 training manual. The 737 has different flap schedules than the A320, but the principle is the same: slow down progressively, configure progressively, be stable by 500 feet above the airport at the latest.
Autopilot Disconnect
In the 737, clicking the autopilot disconnect button on the yoke (or your assigned control) disconnects both autopilots. The disengage lights flash and the warning tone sounds — press the button again to extinguish the lights and silence it.
When a manual landing follows an autopilot approach, Boeing's training manual suggests disengaging the autopilot and disconnecting the autothrottle 1 to 2 NM before the threshold, about 300 to 600 feet above the field, so you have time to settle into hand-flying before the flare. Earlier is fine — disconnect when you have the visual picture and are ready to hand-fly.
After disconnecting, immediately check your trim. The 737 uses a yoke, and the trim wheel on the centre pedestal should be adjusted so you feel no forward or aft pressure on the yoke. If you are fighting the yoke, use the thumb trim buttons on the yoke to trim the pressure out before focusing on the visual picture.
V-Speeds and the Speed Bugs
The 737's PFD shows reference speed bugs on the airspeed tape. For a visual approach, the key references are:
- Vref: Reference landing speed for your weight and flap setting. This is your target speed over the threshold.
- Vref + wind additive: With the autothrottle off for landing, add half the reported steady headwind component plus the full gust increment above the steady wind, with a minimum of Vref + 5. Boeing's limit is Vref + 20 knots or the landing flap placard speed minus 5 knots, whichever is lower; some airlines set a lower cap of their own. For example, with a reported headwind of 15 gusting 25, the additive is (15/2) + 10 = 17.5, so you fly about Vref + 18. Do not add anything for a tailwind.
- Flap manoeuvre speeds: The flap bugs on the tape give full manoeuvring capability for each flap setting — about 15 to 20 knots above the minimum manoeuvring speed. Fly at the bug for your current flaps until you select the next setting.
In the PMDG 737, you select the landing flap and Vref on the APPROACH REF page in the FMC; the gross weight there normally comes from the FMC itself. The bugs appear on the airspeed tape. Use them — they exist precisely for this situation.
Configuration Sequence
- Entering downwind at 1,500 ft, about 2 NM abeam: Flaps 5
- Abeam the threshold: start your timing for the base turn
- Before turning base: Gear DOWN, Flaps 15, arm the speedbrake, start descending
- Base and final: Landing flaps (30 or 40), landing checklist
- Stable by 500 ft above the airport at the latest: Flaps 30 (or 40), at Vref + additive, on glideslope
Get flight sim tips in your inbox
New guides, checklists, and tips — no spam. Unsubscribe any time.
Backup Approaches — VOR, RNAV, LOC-Only
Most airports without ILS still have some form of instrument approach. Understanding what is available gives you a safety net if the visual approach is not working out.
VOR Approach
The VOR approach uses a ground-based VOR station to provide lateral guidance along a specific radial to the runway. There is no glideslope — you descend in steps based on distance from the VOR, checking that you are at or above the published altitude at each step-down fix.
VOR approaches have higher minimums than ILS (typically several hundred feet higher than the 200-foot decision height of a Category I ILS), and they require more pilot workload because you are managing your own descent profile.
In MSFS 2024: VOR approaches are available at many airports. Load them through the world map or the FMC/MCDU. The course needle on your instruments provides lateral guidance, but you manage your own altitude on the step-downs.
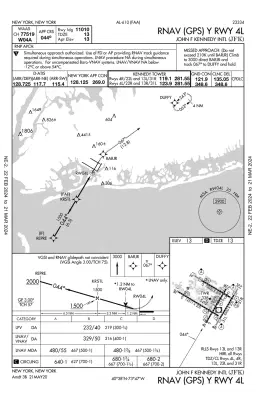
RNAV (GPS) Approach
RNAV approaches are the modern replacement for VOR approaches at airports without ILS. They use GPS to provide lateral guidance and, on many approaches, vertical guidance too (the LNAV/VNAV and LPV lines of minima).
An RNAV approach with LPV (Localizer Performance with Vertical guidance) is the closest thing to an ILS without actually being one. It uses WAAS/SBAS lateral and vertical guidance with sensitivities nearly identical to an ILS, and the FAA describes it as very similar to a Category I ILS.
There are several types of RNAV minimums, from least precise to most precise:
| Minimum Type | Lateral Guidance | Vertical Guidance | Minimums (vary by procedure) |
|---|---|---|---|
| LNAV | GPS lateral only | None (step-down, to an MDA) | Highest |
| LNAV/VNAV | GPS lateral | Usually barometric VNAV (or WAAS) | Lower, to a DA |
| LPV | GPS lateral (precise) | WAAS/SBAS vertical (precise) | Lowest, close to an ILS |
LPV flies almost identically to an ILS, but it needs SBAS-capable avionics. The A320 and 737 training manuals describe flying RNAV approaches with the FMS instead: FINAL APP mode on the A320, which shows a vertical deviation (V/DEV) scale on the PFD, and VNAV or — where installed — IAN on the 737, which gives ILS-like deviation displays while following the FMC glide path.
In MSFS 2024: RNAV approaches are widely available and are the most practical alternative when there is no ILS. Load the RNAV approach in your FMC/MCDU and the aircraft's FMS will provide descent guidance. Plan on the LNAV or LNAV/VNAV minima in the A320 and 737 unless your aircraft's own documentation says it can fly LPV.
LOC-Only Approach
Some runways have a localizer but no glideslope. This gives you lateral guidance (left/right of centreline) but you manage your own descent. LOC-only approaches are flown like VOR approaches — step-down altitudes based on distance — but with better lateral precision.
In practice: If a LOC-only approach is available, tune it. Even on a visual approach, having the localizer needle on your PFD confirms your lateral alignment. You can ignore the step-down altitudes and use PAPI for vertical reference instead.
Finding What Is Available
Before your flight, check what approaches are published for your destination:
- MSFS 2024 world map: Select the airport and look at available approaches
- Real-world charts: Sites like ChartFox or the FAA's DTPP provide real-world approach plates
- In the aircraft: The FMC/MCDU shows all available approaches when you select the arrival airport
If the airport has absolutely no published instrument approach, you are flying a pure visual approach. This means your only vertical reference is the PAPI and the 3-to-1 rule. It is perfectly doable — just make sure the weather is good enough.
Using a Backup Approach for the Visual
A practical technique that many airline pilots use: load an available instrument approach (RNAV, VOR, or LOC) into the FMC even when you intend to fly visually. This gives you:
- A course line on the ND showing the extended centreline
- Altitude targets at fixes as a descent cross-check
- A ready-made missed approach procedure if things go wrong
- Something to fall back on if visibility deteriorates
You are not flying the instrument approach. You are using its information as a supplement to your visual picture. Think of it as having a map open while navigating by landmarks — you probably will not need it, but it is there if you do.
To set this up, load the approach in the FMC/MCDU but do not arm the approach mode on the autopilot. (One airline's 737 manual goes further and has crews use an FMC approach for lateral and vertical guidance on visual approaches — partly so the FMC's missed approach procedure is available if they go around.) The FMC will display the course line and altitude targets on your ND without the autopilot trying to fly them.
Hand-Flying Technique
This is where the real skill lives. Everything up to this point is knowledge — descent planning, PAPI interpretation, approach setup. Hand-flying is the physical skill that makes it all work.
Pitch and Power
The fundamental relationship for approach flying is:
- Pitch controls speed. Raise the nose and you slow down. Lower the nose and you speed up.
- Power controls descent rate. Add power and you descend more slowly (or climb). Reduce power and you descend faster.
This is a simplification — in reality pitch and power affect both speed and descent rate — but as a mental model for final approach it works well. If you are fast, pitch up slightly. If you are sinking too fast, add a bit of power.
The target is to arrive over the threshold at your reference speed (Vref or Vapp), descending at about 700 feet per minute, aligned with the centreline. Small, early corrections keep you there. Large, late corrections mean something went wrong earlier.
Descent Rate Reference
On a standard 3-degree glideslope, the descent rate you need depends on your groundspeed. A quick rule of thumb: take your groundspeed, divide by 2, and add a zero. This gives you the approximate descent rate in feet per minute.
| Groundspeed | Descent Rate |
|---|---|
| 120 knots | ~600 fpm |
| 140 knots | ~700 fpm |
| 160 knots | ~800 fpm |
| 180 knots | ~900 fpm |
So if you are on final at 140 knots groundspeed and your vertical speed indicator shows -700 fpm, you are on a 3-degree path. If it shows -500 fpm, you are going to end up high. If it shows -1,000 fpm, you are descending too steeply.
Use this as a cross-check with the PAPI. If the PAPI says you are on glideslope and your VSI confirms the expected descent rate, you know both references are telling you the same thing.
Small Corrections Early
The most common hand-flying mistake on approach is making corrections too late, which means they need to be too large, which causes oscillations. If the PAPI shows you slightly high (3 white, 1 red), make a small correction immediately. Do not wait until you see 4 white — by then you need a large correction that will probably take you through the glideslope to the low side.
Think of it like steering a car. Small, frequent wheel inputs keep you in the lane. Jerking the wheel back and forth means you were not paying attention.
The 70/30 Split
During a visual approach, your eyes should be outside the cockpit about 70 percent of the time and on the instruments about 30 percent. The outside view gives you glideslope (PAPI), alignment (runway centreline position), and range (runway size in the windscreen). The instruments give you speed, altitude, descent rate, and the flight path vector.
Scan outside — check PAPI, check alignment, check runway picture. Glance inside — check speed, check FPV position, check altitude. Back outside. This rhythm should feel natural after a few approaches.
If you find yourself staring at the instruments, force yourself to look outside. The visual approach is visual. The instruments are backup confirmation, not primary guidance.
Crosswind Technique
When there is a crosswind, you need to account for drift on final approach. There are two methods:
Crab method: Point the nose into the wind to maintain a track aligned with the runway. The aircraft flies slightly sideways relative to the runway. In the flare, use rudder to align with the runway centreline (the "de-crab"). This is the standard airline technique for most conditions.
Wing-low method: Lower the upwind wing and apply opposite rudder to maintain alignment. The aircraft is always pointing down the runway. This works well in moderate crosswinds and is common in GA flying.
In an airliner, the crab method is standard. Maintain the crab angle throughout the approach and transition to runway alignment in the flare. The flight path vector on the PFD makes this easier — keep the FPV on the centreline regardless of where the nose is pointed.
A practical tip: in a crosswind, the runway will appear offset in your windscreen because you are crabbing. This is normal. Do not try to point the nose at the runway during the approach — that would mean you are drifting sideways. Instead, keep the FPV on the centreline and accept that the nose is pointing upwind. The transition to runway heading happens in the flare.
How much crab angle should you expect? As a rough guide, for every 10 knots of crosswind component, you need about 3-5 degrees of crab depending on your speed. In a 20-knot crosswind on final at 140 knots, expect 6-10 degrees of crab. This is clearly visible on the heading indicator — your heading will differ from the runway heading by that amount.
The Flare
The flare is the transition from the approach descent to the landing attitude just before touchdown. On a visual approach, you judge the flare by looking at the far end of the runway: when the threshold passes under the nose and out of sight, shift your eyes to the far end, and use the radio-altitude callouts for height.
The technique:
- Begin the flare at the height your aircraft's manual gives — about 30 feet in the A320, about 20 feet (main gear height) in the 737 — with a small pitch increase (Boeing: about 2-3 degrees)
- Bring the thrust levers smoothly to idle during the flare (the A320's "RETARD" call at 20 feet is a reminder)
- Keep the descent rate small and constant; do not try to hold the aircraft off
- Let it settle onto the main gear at the touchdown zone
- Lower the nose wheel gently — do not hold the nose up after landing
Common Flare Errors
Ballooning (flaring too high): You pull back too aggressively and the aircraft climbs instead of levelling off. If this happens, hold the pitch — do not push the nose down or you will slam into the runway. Let the aircraft decelerate and settle. If the balloon is large, go around rather than trying to salvage it.
Firm touchdown (flaring too late): You did not arrest the descent rate before the wheels hit. Late or weak flare inputs are what turn a firm landing into a hard one. The fix is to start the flare slightly earlier — and earlier still at a high-elevation airport, with a tailwind, or on an upsloping runway, all of which raise your descent rate. Use the radio-altitude callouts as your cue.
Cutting power too early: You pull the thrust levers to idle too far above the runway. This removes the energy you need for the flare. Power should come toward idle during the flare, not before it. On a visual approach, you are managing power all the way to touchdown.
Floating: The opposite of firm touchdown — you are too fast over the threshold and the aircraft does not want to touch down. It floats down the runway eating up landing distance. The fix is speed discipline on final. If you are fast over the threshold, the flare will be long. Nail your Vref/Vapp and the flare takes care of itself.
Common Mistakes
I'm always too high when I get to the airport
The fix: calculate the descent point with the 3-to-1 rule before you need it, not when the airport appears. Altitude to lose in thousands of feet × 3 = miles out, plus 10-15% buffer. If you forget and arrive overhead at 5,000 feet AGL, the rule cannot save you — it only works if you start in time.
I can't fly a visual approach without staring at the PFD
The fix: 70% of your attention outside, 30% on the instruments — the PAPI tells you more about your glideslope than any instrument can. It is tempting to stare at the PFD during a visual approach, especially if you are uncomfortable hand-flying, but the visual approach is defined by visual references. Force yourself to look up.
I keep arriving at the flare with the wrong flap setting
The fix: give yourself altitude-triggered callouts, because a visual approach has no procedure to prompt you. "Gear check at 2,000 feet AGL", "Full flaps by 1,500 feet". On an ILS the approach procedure prompts the configuration for you at specific points; on a visual approach nothing does, so the trigger has to be one you set.
My PAPI keeps swinging from 3 red to 3 white
The fix: make half the correction you think you need. If you see 3 red (slightly low), reduce the descent rate by 50-100 feet per minute — not 300 fpm. Wait a few seconds. The PAPI will respond. Small inputs, patience, and let the picture develop. This is the visual approach equivalent of chasing the ILS needles, and the cure is the same one.
I'm too high on final and S-turning to lose the altitude
The fix: stop S-turning. Add drag, accept a slightly steep path if you can stabilise by 1,000 AGL, or go around. S-turns on final are unstable, unpredictable and dangerous, and they put you out of alignment with the runway — so you are now fixing two problems instead of one. Your three options are:
- Extend gear and speedbrakes early to increase drag
- Accept a slightly steep approach if you can stabilise before 1,000 AGL
- Go around and try again
Going around is always an option. It is always the right call when the approach is not working.
I'm slightly low on the PAPI and it feels easier to stay there
The fix: if you see 4 red, add power and fly back up to the glideslope. Do not try to "save" the approach by accepting a below-glideslope path. A shallow approach keeps you closer to the terrain for longer and can put you at the threshold too low. The PAPI exists specifically to prevent controlled flight into terrain on approach. Respect it.
I know the approach is unstable but I don't want to go around
The fix: go around. If by 500 feet AGL you are not on speed, on the glideslope, aligned and fully configured, that is the decision, not a judgement call. The Flight Safety Foundation found unstabilised approaches were a causal factor in 66 percent of 76 approach-and-landing accidents and serious incidents it studied — on every kind of approach, not just visuals. There is no shame in it — real airline pilots go around, and it is a normal, expected procedure.
The cost of a go-around is five minutes of fuel and a bruised ego. The cost of a forced landing from an unstable approach is much higher.
Practice Airports in MSFS 2024
The best way to learn visual approaches is to practise at airports where you can see everything clearly and the terrain is forgiving.
Easy — Start Here
TNCM — Princess Juliana International, St Maarten The famous airport where jets pass low over the beach. It has a relatively short runway (2,300 metres), a 3-degree PAPI on Runway 10, and the approach to Runway 10 comes in over the sea. The visual references are excellent — you can see the runway from miles out over the water. The approach over the beach gives you a perfectly unobstructed view. An RNAV (GNSS) approach to Runway 10 is available as backup if you want to use one to get established, then transition to visual.
LFMN — Nice Côte d'Azur, France A step up from TNCM. Runways 04L and 04R have an ILS, but the Runway 22 approaches do not: an RNP or VOR procedure brings you in over the water, and the final segment is flown visually, with turns at low altitude before you line up. There are no approach lights on the 22 end, so the PAPI is your vertical reference. Practise the 22s.
Moderate — Build Confidence
LOWI — Innsbruck, Austria Innsbruck sits in the deep, east-west Inn valley, with high mountains either side. The LOC DME East approach brings you in from the east down the valley, but it is not an ILS, and the final part is flown visually — and landing on Runway 08 means a visual circle. You fly it by eye using the terrain as reference. Stunning scenery and genuinely challenging. Start with good weather and no wind.
LPMA — Funchal, Madeira One of Europe's most challenging airports. Part of the runway sits on a platform supported by pillars, with ocean on one side and mountains on the other. There are VOR/DME circling and RNP approaches, but the classic arrival to Runway 05 ends in a visual right turn onto a short final, following the curved approach lights. It demands confidence in hand-flying and speed management. Start in clear weather and be ready to go around.
Advanced — Test Yourself
VNLK — Lukla, Tenzing-Hillary Airport, Nepal
The famous Everest airport with a short (527 metres), upsloped runway (about 11.7%) at roughly 9,300 feet elevation, surrounded by mountain terrain. There are no instrument approaches — it is purely visual, and it is one-way: you land uphill and take off downhill. Not representative of airline operations, but outstanding for building visual judgment and commitment. Use a turboprop — most jets cannot operate here.
LFLJ — Courchevel, France
A mountain altiport with a dramatically sloping runway (about 18.6% gradient). No instrument approaches, no PAPI or approach lighting, and the runway is 537 metres long. Like Lukla, this is a one-way strip — land uphill, take off downhill. A superb exercise in visual judgment using terrain and the runway picture alone. Again, turboprop territory.
A Structured Practice Plan
Do not just fly visual approaches randomly and hope to improve. Structure your practice:
Session 1-3: Clear weather, long runway Fly to TNCM or LFMN in perfect conditions. Focus only on the PAPI and glideslope management. Do at least three approaches per session — the first will be rough, the third will be better. Use the go-around as a normal part of practice, not a failure.
Session 4-6: Add configuration management Same airports, still clear weather. Now focus on the full sequence: descent planning at distance, slowing and configuring, transitioning to visual, and landing. The goal is making the configuration changes feel routine so they do not distract from the visual picture.
Session 7-9: Add wind Start with 5-10 knots of crosswind and build up to 15-20 knots. Focus on maintaining alignment with the crab method and the transition at the flare. Notice how the PAPI still works perfectly in a crosswind — it does not care about wind, only your glideslope angle.
Session 10+: Add challenge Fly to LOWI, LPMA, or other challenging airports. Reduce visibility to 8-10 km. Try dawn and dusk approaches where the PAPI lights compete with ambient light. Fly night visual approaches where the PAPI is bright and obvious but your depth perception of the runway is reduced.
Practice Tips
- Save a flight state at 15 NM from the airport, configured in clean flight at a reasonable altitude. This lets you repeat the approach without flying the entire route each time.
- Use the replay function if available. Watching your approach from outside helps you see what you could not see from the cockpit — were you really on glideslope? Were you actually aligned?
- Fly the approach with autopilot first to see what the correct picture looks like. Then disconnect and try to replicate it by hand. This gives your brain a reference for "correct."
- Talk to yourself. Call out "PAPI 2 and 2" or "Slightly high, reducing" out loud. It sounds silly, but verbalising forces you to process what you are seeing instead of just staring.
When to Go Around
There is one rule that applies to every visual approach, in every aircraft, at every airport:
If you are not stabilised by 500 feet AGL, go around.
That 500-foot gate is the Flight Safety Foundation's for visual conditions, and Boeing's; in instrument conditions it is 1,000 feet. Stabilised means:
- At or near your target approach speed (Boeing accepts +10/-5 knots if the speed is trending back to target)
- On the PAPI glideslope (2 red, 2 white)
- Aligned with the runway centreline
- In landing configuration (gear down, landing flaps)
- Descent rate not exceeding 1,000 feet per minute
- Thrust appropriate to the configuration, and briefings and checklists done
If any one of these is not met at 500 feet, go around — and if the approach becomes unstable below that, go around immediately. Do not try to fix three things in the last 500 feet — it does not work.
Going around on a visual approach is the same procedure as on an instrument approach:
- TOGA — Apply go-around thrust
- Pitch up — Rotate toward the go-around attitude (about 15 degrees nose up in both types)
- Flaps — One step up at once: Flaps 15 in the 737, one stage in the A320
- Gear up — Once you confirm a positive rate of climb
- Tell ATC — "Going around" and follow their instructions
Every experienced pilot has gone around. Many have gone around multiple times in a single session. It is a skill, not a failure.
The Go-Around on a Visual Approach
A go-around during a visual approach is psychologically harder than during an instrument approach. On an ILS, the missed approach procedure is published and briefed. A visual approach has no missed approach segment, so unless you briefed one, you may not have a specific plan beyond "climb and figure it out."
Here is a simple framework for visual approach go-arounds:
- Apply go-around thrust and pitch up. This is the same in every approach type. Get the aircraft climbing.
- Fly runway heading. Unless ATC tells you otherwise, or you briefed a different go-around, maintain the runway heading until you have positive climb and are above pattern altitude. Terrain and obstacle clearance are yours until ATC assigns you an altitude.
- Contact ATC. Tell them you are going around. The tower will give you instructions — vectors, or back into the pattern for another attempt.
- Debrief what went wrong. Were you too high? Too fast? Too far off centreline? Understanding the problem prevents it on the next attempt.
- Set up again. There is no limit on the number of attempts. Fly the pattern again, adjust your technique, and try once more.
The second attempt is almost always better than the first, because you now know what the airport looks like and what went wrong.
Night Visual Approaches
Night visual approaches deserve a separate mention because they are significantly different from daytime visuals, even though the technique is the same.
At night, your depth perception is reduced. The runway lights are visible from far away, which is helpful for acquiring the field, but the lack of terrain features makes it harder to judge distance and altitude. The PAPI becomes even more important at night because it is often the only reliable vertical reference you have.
Two specific dangers at night:
The black hole approach: When the airport is surrounded by dark terrain (water, desert, unlit countryside) with no visible ground features between you and the runway, you lose all depth perception. The runway lights float in a black void. An absence of ground features creates the illusion that you are higher than you really are, so pilots have a natural tendency to fly too low in this situation. Trust the PAPI. If the PAPI says you are on glideslope, you are on glideslope, even if your brain says you are too high.
The bright city illusion: When the airport is surrounded by city lights, the ground features are visible but confusing. It can be difficult to pick out runway lights from streetlights, car headlights, and building lights. The approach lights (if the runway has them) help enormously here — they are a distinctive pattern of lights extending from the threshold that no other ground feature replicates. Learn to recognise them.
For both situations, the PAPI is your anchor. Find it, trust it, and use it for your glideslope. Cross-check with the 3-to-1 rule and your VSI. If anything looks wrong, go around.
Closing
Visual approaches are what separate a sim pilot who can operate systems from a sim pilot who can actually fly. They require you to look outside, judge distances, manage energy, and hand-fly the aircraft — all at the same time. They are, in many ways, the most satisfying type of approach because when you get it right, you know it was all you.
The ILS is a brilliant tool. But it is a crutch if it is the only way you can land. The best pilots are the ones who can land with ILS, without ILS, with RNAV, with VOR, with nothing but a PAPI and a pair of eyes.
Start with clear weather and a long runway. Fly the pattern. Watch the PAPI. Trust the 3-to-1 rule. Make small corrections. And if it is not working, go around and try again. That is how every pilot learned, and it is how you will learn too.