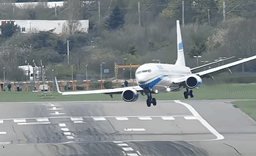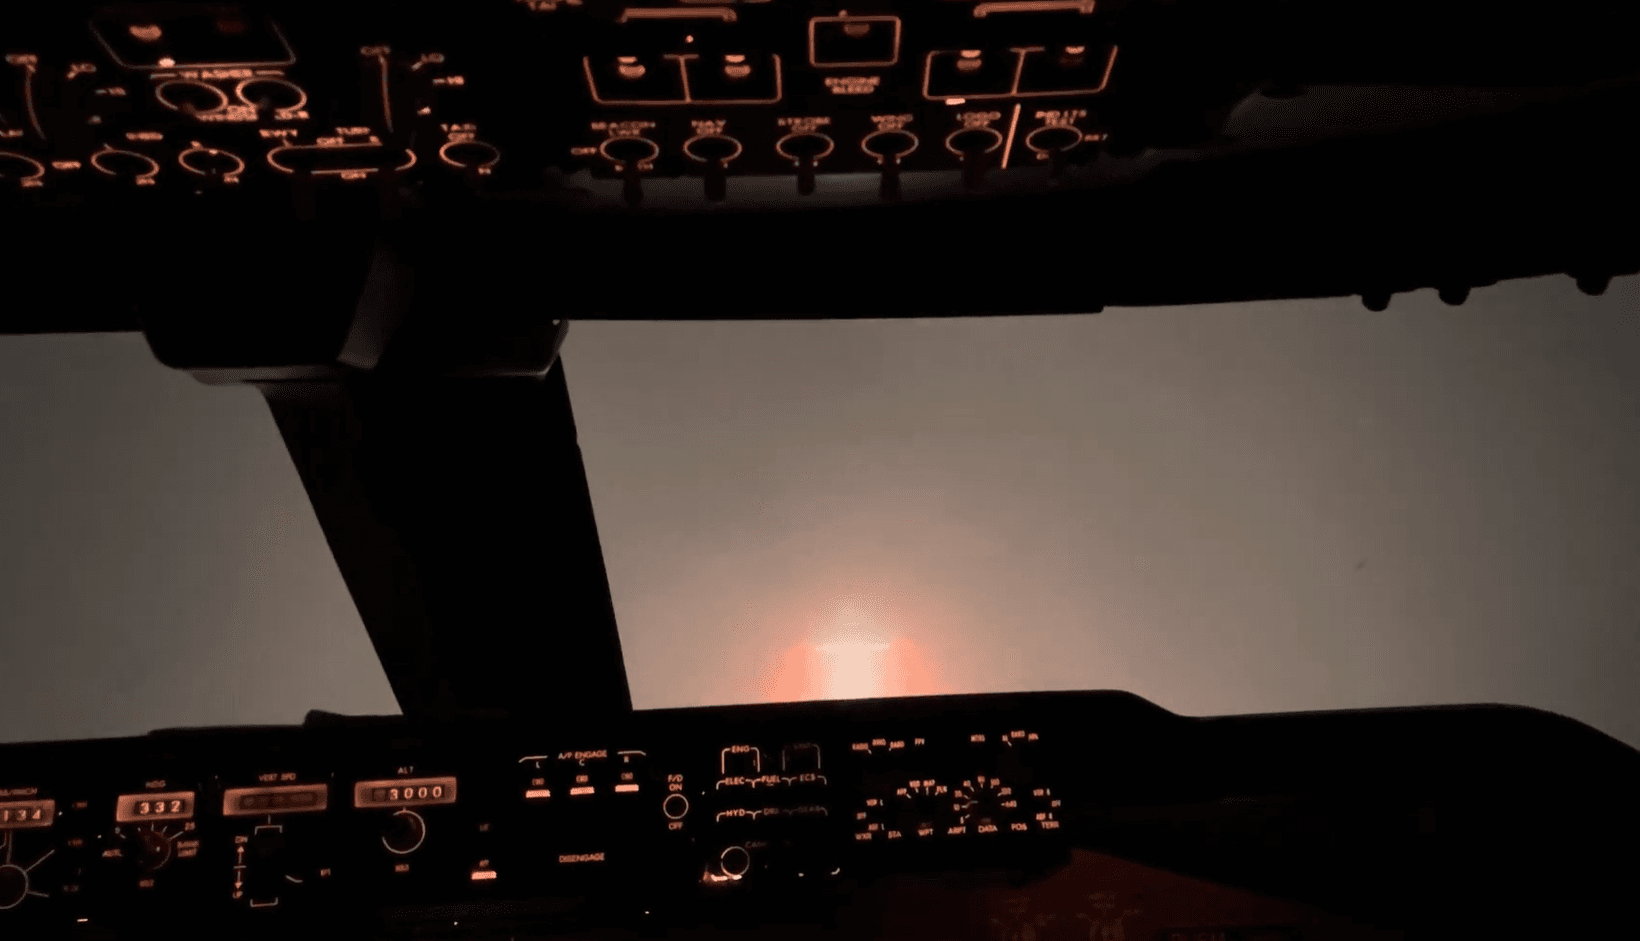
You've set up the ILS, intercepted the localiser, the glideslope is alive, you're tracking in nicely toward the runway. The autopilot is holding the needles perfectly. Then you hit 200 feet, the radio altimeter callout fires, the autopilot disconnects, and you're staring at a wall of fog with no idea where the runway is. You grab the sidestick or yoke, overcorrect, and either slam into the ground off-centre or go around in a panic.
Or maybe the autopilot stays connected but the aircraft flares too high, floats, then drops onto the runway with a bone-jarring thud. Or it lands but then immediately veers off the centreline during rollout.
These are not random failures. They are the predictable result of attempting an autoland without setting it up correctly. Autoland is not "press a button and the plane lands itself." It is a specific, certification-limited procedure that requires precise configuration, and if any piece is missing, it either will not engage or will disconnect at the worst possible moment.
This guide covers how autoland actually works, why yours keeps failing, and the exact step-by-step procedures for the PMDG 737 and the Airbus A320 (Fenix or default) in MSFS 2024.
The setup starts in the flight computer. Practise the MCDU and CDU work behind this procedure in our free A320 MCDU Trainer and 737 CDU Trainer — no sim needed.
What Autoland Actually Is
Autoland is not just "the autopilot flies the approach." The autopilot flies every ILS approach if you let it. What makes autoland different is that the autopilot continues flying the aircraft through the flare, touchdown, and rollout -- the phases where a normal ILS approach requires you to take over manually.
In a standard CAT I ILS approach, the autopilot tracks the localiser and glideslope down to your decision altitude (typically 200 feet above the runway). At that point, you look up from your instruments. If you can see the runway environment -- approach lights, runway lights, the threshold -- you disconnect the autopilot and hand-fly the landing. If you cannot see the runway, you go around.
Autoland removes the need to see the runway at 200 feet. The autopilot continues below decision altitude, commands the flare, manages the touchdown, and tracks the runway centreline during rollout. This is what allows aircraft to land in visibility so low that the pilots cannot see the runway until they are on it -- or in extreme cases, cannot see it at all.
But here is the critical part: autoland requires redundancy. If the autopilot fails during a normal approach at 1,000 feet, you just take over and hand-fly. No big deal. If the autopilot fails at 30 feet in zero visibility, you are in serious trouble. So autoland systems use dual (or triple) redundant autopilot channels that cross-check each other continuously. If one channel disagrees with the others, the system either disconnects the faulty channel and continues (fail-operational) or disconnects everything and lets you take over while there is still time (fail-passive).
This is why engaging both autopilots is not optional. It is the fundamental prerequisite. One autopilot gives you a coupled ILS approach. Two autopilots give you autoland.
ILS Categories Explained
Not all ILS approaches are created equal. The category of an ILS approach determines how low you can go and how little visibility you need. The categories are defined by ICAO and exist because the lower you want to go, the more precise the ground equipment, the aircraft systems, and the crew procedures need to be.
| Category | Decision Height | RVR (Runway Visual Range) | What It Means |
|---|---|---|---|
| CAT I | 200 ft (60 m) | 550 m (1,800 ft) | Standard ILS. Hand-fly from minimums. |
| CAT II | 100 ft (30 m) | 300 m (1,000 ft) | Low visibility. Autoland typically required. |
| CAT IIIa | Below 100 ft (30 m) or no DH | Not less than 175 m (ICAO) / 700 ft (FAA) | Very low visibility. Autoland required. |
| CAT IIIb | <50 ft or no DH | 75 m (250 ft) | Near-zero visibility. Autoland with rollout guidance. |
| CAT IIIc | No DH | No RVR minimum | Zero visibility. Theoretical -- no airports certified for this. |
When You Would Actually Use Each
CAT I is your everyday instrument approach. Cloud base is 300-400 feet, visibility is a couple of kilometres. You fly the ILS down to 200 feet, look up, see the runway, disconnect, and land normally. This is the vast majority of ILS approaches in the real world and in sim.
CAT II is for days when the weather is genuinely bad. The cloud base is between 100 and 200 feet, and you can only see about 300 metres ahead. You need the autoland system because you will not see the runway until you are at 100 feet or lower, and that does not leave enough time to safely take over and hand-fly.
CAT IIIa is heavy fog. You might see the runway lights just before or at touchdown, or you might only see them when you are already on the ground. The autoland does everything through touchdown.
CAT IIIb is the practical limit for most operations. The visibility is so low that you might not see the centreline lights even after landing. The autoland system needs to provide rollout guidance -- keeping you on the centreline after touchdown using the localiser signal or other guidance. This is the lowest category you will typically use in sim.
CAT IIIc is zero-zero: no decision height, no visibility requirement at all. In theory, you could land in conditions where you never see anything outside the cockpit. No airport in the world is currently certified for CAT IIIc operations. It exists as a specification but not as a practical reality.
What Determines the Category You Can Use
Three things must all be capable of the same category for you to use it:
-
The airport/runway ILS installation. Not every ILS is CAT III capable. The ground equipment for CAT III is more precise, has more redundancy, and requires a protected area around the ILS antennas (critical and sensitive areas) to prevent signal interference. Many major airports have CAT III capability on at least one runway, but not all runways.
-
The aircraft. The aircraft must be equipped and certified for the category. Both the PMDG 737 and Fenix A320 are capable of CAT IIIb in MSFS. But the aircraft must be correctly configured -- dual autopilot, correct autobrake setting, and so on.
-
The crew/procedures. In the real world, pilots need special training and currency for CAT II/III operations. In the sim, the "crew" is you, and the "procedure" is what this guide teaches.
The effective category is the lowest of these three. If the airport has CAT III but you only have one autopilot engaged, you are limited to CAT I. If you have dual autopilot but the airport only has CAT I ILS, you are limited to CAT I. All three must align.
Prerequisites for Autoland
Before diving into aircraft-specific procedures, here is what must be true for any autoland to work:
1. The Airport Must Have a CAT II/III Capable ILS
You cannot autoland on an RNAV (GPS) approach. You cannot autoland on a VOR approach. You cannot autoland on an ILS that is only certified to CAT I. The ground equipment must support the category you are attempting.
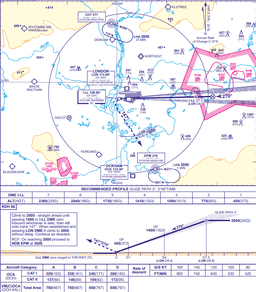
In MSFS 2024, most major international airports have at least one CAT III ILS. Good airports to practice at include EGLL (London Heathrow), EHAM (Amsterdam Schiphol), EDDF (Frankfurt), KJFK (New York JFK), KATL (Atlanta), and KSFO (San Francisco). Check the approach plate for the runway -- it will say "ILS CAT II/III" or similar.
2. Dual Autopilot Must Be Engaged
This is the number one reason autolands fail in sim. You must engage both autopilot channels. In the 737, this means pressing both CMD A and CMD B. In the A320, this means pressing both AP1 and AP2. One autopilot gives you a normal coupled approach. Two autopilots give you autoland capability.
3. The ILS Frequency Must Be Correctly Tuned
The ILS frequency must be tuned, and the inbound course must be set correctly. In most cases, the FMS/MCDU handles this automatically when you have the ILS approach in your flight plan. But if it is not auto-tuning, you need to set it manually. A wrong frequency or wrong course will prevent the localiser and glideslope from capturing properly.
4. Autobrake Must Be Set
For autoland, the autobrake should be set (typically to a specific setting -- we will cover this per aircraft). This is part of the autoland logic and may be required for the full autoland annunciation.
5. Wind Must Be Within Limits
Autoland has wind limitations. If the crosswind or tailwind exceeds the certified limits, the autoland system may not perform safely. General limits:
| Condition | Typical Limit |
|---|---|
| Crosswind (737 autoland) | 20 knots |
| Crosswind (A320 autoland) | 20 knots (CAT II/III) |
| Tailwind | 10 knots |
| Headwind (737 autoland) | 25 knots |
These are approximate and vary by operator. In the sim, the autoland system does not refuse to engage based on wind, but if the crosswind is too high, you will see poor rollout performance -- the aircraft drifting off the centreline after touchdown.
PMDG 737 Autoland: Step by Step
This is the complete procedure for performing an autoland in the PMDG 737 in MSFS 2024. The sequence assumes you are already established in cruise or descent and have your arrival airport and ILS approach programmed into the FMC.
Setting Up the Approach
Step 1: Verify the ILS approach is in the FMC.
On the CDU, go to DEP ARR (press the DEP ARR button), select your destination airport arrivals, and verify you have an ILS approach selected for a CAT II/III capable runway. If you selected an RNAV approach, change it to the ILS. This matters because the FMC auto-tunes the ILS frequency when the approach is loaded.
Step 2: Verify the ILS frequency and course.
Check the CDU NAV RAD page (or look at the PFD). The ILS frequency should be auto-tuned to the correct frequency for your approach. The inbound course should match the runway heading. For example, if you are landing runway 27L at Heathrow, the frequency should be 109.50 and the course should be 269 degrees.
If the frequency is not set, enter it manually on the NAV RAD page. The frequency goes on the left side (LOC), and the course is entered on the adjacent line.
Step 3: Set the decision height.
On the MCP (mode control panel), set the decision height using the MINS selector. For a CAT IIIb approach, many operators set this to a radio altitude of 50 feet, or even "NO DH" (in the PMDG 737, you rotate the MINS knob to RADIO and set it to the appropriate value for your category). For practice, a setting of 50 feet radio altitude works well for CAT IIIa, and some operators use a DH as low as 0 feet for CAT IIIb with an alert height of 50 feet.
Step 4: Set the autobrake.
Set the autobrake selector to at least 2 or 3 for an autoland. The autobrake is part of the autoland certification and provides automatic braking after touchdown. For a CAT III approach in low visibility, setting autobrake 3 is a reasonable choice -- you want the aircraft to stop in a reasonable distance since you may not be able to see taxiways or the end of the runway.
Step 5: Complete the approach checklist.
Gear down, flaps set (typically flaps 30 or flaps 40 for landing), speedbrake armed. These are standard approach items but they matter for autoland because the system expects a landing configuration.
Engaging Dual Autopilot
This is the critical step that most people miss or do wrong.
Step 6: Engage CMD A and CMD B.
On the MCP, you will see two autopilot engage buttons: CMD A (left) and CMD B (right). For a normal approach, you would only have one engaged. For autoland, you must press both.
The timing matters. You should engage the second autopilot before you intercept the localiser. The recommended point is when you are established on the approach and below about 1,500 feet AGL on the glideslope. Some pilots engage both autopilots early in the approach; others wait until they are established on the localiser. Either way, both must be engaged before the autoland modes activate.
When both autopilots are engaged, look at the Flight Mode Annunciator (FMA) at the top of the PFD. You should see "CMD" displayed in both the left and right autopilot positions.
Step 7: Verify the AUTOLAND status annunciation.
With both autopilots engaged on an ILS approach, the PFD should display an autoland status. On the PMDG 737, look for one of these annunciations:
- LAND 3 -- Fail-operational autoland. Two autopilots, three inertial sources, and the associated sensors are all operating normally. If a single channel fails, the remaining channels continue the autoland. This is the annunciation you should normally see with both autopilots engaged and no faults, and it is what certifies the aircraft to CAT IIIb. In the PMDG 737 it typically appears below 1,500 ft RA once the second channel couples.
- LAND 2 -- Fail-passive autoland. A failure has occurred and redundancy is reduced, but the system is still capable of an automatic landing and rollout in fail-passive mode -- if another channel disagrees, both autopilots disconnect. LAND 2 certifies the aircraft to CAT IIIa rather than CAT IIIb. If you see LAND 2 instead of LAND 3, a fault has downgraded the system.
If you see neither LAND 2 nor LAND 3, something is wrong. The most common reasons:
- Only one autopilot is engaged
- You are not on an ILS approach (check your approach type)
- The ILS frequency is not tuned
- You are too far from the localiser for the system to confirm autoland capability
Do not continue below 1,000 feet without a valid LAND 2 or LAND 3 annunciation. If the system has not confirmed autoland capability by then, treat it as a CAT I approach and be prepared to hand-fly from 200 feet.
Flying the Approach
Step 8: Localiser capture.
As you intercept the localiser beam, the FMA will change from your heading mode (HDG SEL or LNAV) to LOC. This means the autopilot is now tracking the localiser. Monitor the deviation -- it should settle to centred or very nearly centred.
Step 9: Glideslope capture.
As you intercept the glideslope from below (never from above -- always intercept the glideslope from below), the FMA will change the vertical mode from your altitude hold or V/S to G/S. The aircraft will now follow the glideslope down.
At this point, the approach is essentially automated. Your job is to monitor. Watch the localiser and glideslope deviations on the PFD. Watch your airspeed. Listen for callouts.
Step 10: Below 1,500 feet RA -- FLARE and ROLLOUT arm.
As you descend through approximately 1,500 feet radio altitude, you should see FLARE and ROLLOUT appear as armed modes on the FMA (typically shown in white or a secondary colour, depending on the PFD configuration). This confirms the autoland system is ready to execute the flare and rollout phases.
If FLARE and ROLLOUT do not appear armed, the autoland will not complete. Check your LAND 2/LAND 3 status.
Step 11: Monitor through 1,000 feet.
At 1,000 feet RA, the radio altimeter callout should sound ("one thousand"). Verify:
- Speed is stable (VREF + wind correction)
- Localiser and glideslope are centred (within one dot)
- LAND 2 or LAND 3 is still displayed
- FLARE and ROLLOUT are armed
- Gear is down and locked
- Flaps are at landing setting
This is your last comfortable decision point. If anything is wrong, go around now.
Step 12: The callouts -- 500, 200, 100, 50, 30, 20, 10.
The radio altimeter will call out your height above the runway. Here is what you should be monitoring at each:
| Callout | What to Check |
|---|---|
| "Five hundred" | Stable approach check. Speed, config, glideslope. |
| "Approaching minimums" | Verify LAND 2/3 still active. Prepare for decision. |
| "Minimums" | In CAT III, no action needed if LAND 2/3 is active. In CAT II, look for visual references. |
| "One hundred" | System should be solid. Hands near controls but not on them. |
| "Fifty" | FLARE mode should activate. Nose begins to pitch up. |
| "Thirty" | Flare in progress. Thrust begins to retard. |
| "Twenty" | Close to touchdown. |
| "Ten" | Seconds from touchdown. |
| "Retard" | Thrust levers should be at idle (auto-throttle retards). Move them to idle if they have not moved. |
Step 13: Flare and touchdown.
At approximately 50 feet RA, the FLARE mode activates (changes from armed to active on the FMA). The autopilot begins to pitch the nose up and the auto-throttle retards the thrust levers toward idle. The aircraft floats briefly and touches down.
You do not need to do anything during the flare. Keep your hands near the controls but do not touch them. Any manual input on the yoke or thrust levers during autoland will confuse the system or cause it to disconnect.
Step 14: Rollout.
After touchdown, the ROLLOUT mode activates. The autopilot uses the localiser signal (and possibly the IRS) to track the runway centreline. The autobrake activates. The spoilers deploy automatically (if armed).
Step 15: After touchdown -- manual actions.
Here is what you do manually after an autoland touchdown:
- Thrust reversers: Deploy them manually. The autoland does not deploy thrust reversers. Pull the thrust levers into reverse and apply reverse thrust. You can use full reverse, then reduce to idle reverse at about 60 knots.
- Monitoring rollout: Watch the centreline tracking. If the aircraft drifts significantly, be ready to take over with rudder pedals.
- Disconnect autopilot: Once the aircraft is below about 60 knots and decelerating normally, you can disconnect the autopilot (press the AP disengage button on the yoke or the MCP). Some pilots leave it engaged until they reach taxi speed.
- Autobrake: The autobrake handles deceleration. If you need more braking, press the brake pedals manually (this deactivates autobrake). If the autobrake is too aggressive, you can deactivate it by pressing the autobrake switch or tapping the brake pedals.
PMDG 737 Autoland Summary
The key sequence to remember:
- ILS approach loaded, frequency tuned, course set
- Decision height set on MCP
- Autobrake set (2 or 3)
- Gear down, flaps landing, speedbrake armed
- CMD A and CMD B both engaged (this is the one you will forget)
- Verify LAND 2 or LAND 3 on PFD
- Verify FLARE and ROLLOUT armed below 1,500 ft
- Monitor -- hands off until after touchdown
- Deploy reversers manually after touchdown
- Disconnect AP below 60 knots
Airbus A320 Autoland: Step by Step
The A320 approach to autoland is philosophically different from the 737. The Airbus flight control law system is more automated by design, and the FMA (Flight Mode Annunciator) tells you explicitly what category of approach the aircraft is configured for. The A320 procedure uses the MCDU (Multifunction Control and Display Unit) more heavily for setup.
This procedure applies to the Fenix A320 in MSFS 2024. The default Asobo A320 has a simplified systems model and may not fully replicate all autoland functionality.
Setting Up the Approach
Step 1: Verify the ILS approach in the MCDU.
On the MCDU, go to the F-PLN (Flight Plan) page and verify you have an ILS approach selected for your destination. The approach type should show "ILS" followed by the runway designator. If you have an RNAV approach selected, you need to change it.
Press the ARRIVAL key (or access ARRIVAL through the flight plan) and select the correct ILS approach. The MCDU will auto-tune the ILS frequency and set the inbound course when the approach is active in the flight plan.
Step 2: Set up the PERF APPR page.
Press the PERF key on the MCDU and navigate to the APPR phase page. Here you need to enter:
- QNH: The barometric pressure setting (this should already be set on the BARO knob on the FCU, but verify it matches here).
- TEMP: The temperature at the destination.
- MAG WIND: The magnetic wind direction and speed at the destination.
- TRANS ALT: The transition altitude (should auto-fill from the database).
- VAPP: The approach speed (calculated automatically based on weight, but verify it is reasonable).
- DH / MDA: This is critical. For a CAT III approach, enter the decision height. For CAT IIIa, enter "50" on the DH line. For CAT IIIb, you may enter "NO" (which sets no decision height) or a low value. Press the line select key next to DH and type your value.
The DH setting determines what the aircraft announces as "MINIMUMS." For CAT III, this is a radio altitude value, not a barometric altitude.
Step 3: Verify the ILS frequency and course.
On the MCDU RAD NAV page, verify the ILS frequency and course are correct. They should be auto-tuned from the flight plan. The frequency appears on the left side and the course on the right. If they are blank or wrong, enter them manually.
Step 4: Set the autobrake.
On the A320, the autobrake panel is on the centre pedestal. For a CAT III autoland, set autobrake to MED or, if available in the Fenix, use the BTV (Brake To Vacate) system. BTV allows you to select a specific exit taxiway on the MCDU and the aircraft calculates the braking required to reach taxi speed by that point. It is a more refined system than the fixed autobrake settings. If BTV is not available or you are not familiar with it, autobrake MED is a good default.
Step 5: Set landing configuration.
Gear down, flaps set to FULL (flap lever in the "FULL" detent -- this gives you flaps 4 / configuration FULL, which is the standard landing configuration for autoland). The A320 can autoland in CONF 3 as well, but CONF FULL is standard. Speedbrake should be armed (the speedbrake lever should be in the ARM detent).
Engaging Dual Autopilot
Step 6: Engage AP1 and AP2.
On the FCU (Flight Control Unit), press both autopilot pushbuttons: AP1 (left) and AP2 (right). In normal flight, only one is engaged. For autoland, both must be active.
When both are engaged, the FMA (the bar across the top of the PFD) will update to show the approach category. This is where the A320 is more explicit than the 737 -- the FMA tells you directly what category of approach you are configured for.
Step 7: Read the FMA.
After engaging dual AP on an ILS approach, the FMA will display one of the following in the approach capability line (fifth column, far right):
- CAT 1 -- Only single autopilot engaged, or system limitation. You are limited to CAT I minimums (200 ft DH).
- CAT 2 -- Dual autopilot engaged but a system downgrade is present. CAT II minimums (100 ft DH).
- CAT 3 SINGLE -- Fail-passive autoland. Dual AP engaged, system healthy, but in fail-passive mode. If one AP fails, both disconnect and you take over.
- CAT 3 DUAL -- Fail-operational autoland. Full redundancy. If one AP fails, the other continues the autoland.
You want to see CAT 3 SINGLE or CAT 3 DUAL for a full autoland. If the FMA shows CAT 2 or CAT 1 when you expected CAT 3, something is limiting the system. Common causes:
- Only one autopilot engaged (press the other one)
- An ECAM caution or fault affecting a system needed for CAT III (check the ECAM)
- The ILS is not a CAT III installation (the FMA reflects the aircraft-side capability, but ground limitations may also apply)
- The approach is not an ILS (RNAV, VOR, or LOC-only approach selected)
Flying the Approach
Step 8: Intercept the localiser.
The A320 captures the localiser in LOC mode (or LOC* while capturing). The FMA lateral mode will show LOC with a green engagement bar once captured. If you were in NAV mode (managed lateral navigation), the aircraft will sequence through the approach waypoints and intercept the localiser automatically.
Step 9: Intercept the glideslope.
The glideslope captures below the localiser capture. The FMA vertical mode shows G/S (or G/S* while capturing). Once captured, the aircraft follows the glideslope down.
At this point, verify:
- FMA shows LOC in the lateral column (green, active)
- FMA shows G/S in the vertical column (green, active)
- FMA shows CAT 3 SINGLE or CAT 3 DUAL in the capability column
- Both AP1 and AP2 are engaged (shown on the FMA)
- Managed speed is active (speed dashes or target speed shown in magenta on the PFD)
Step 10: Below 400 feet RA -- LAND mode.
This is an A320-specific mode that does not exist in the 737. At approximately 400 feet radio altitude, the FMA changes from LOC/G/S to LAND. This indicates the autoland system has taken over. The LAND mode integrates localiser, glideslope, and radio altimeter data to guide the aircraft to touchdown.
When LAND appears on the FMA, the approach is fully committed to autoland. The autopilot will not disconnect by itself unless it detects a fault.
Step 11: Below 40 feet RA -- FLARE mode.
At approximately 40 feet radio altitude, the FMA changes from LAND to FLARE. The autopilot begins the flare manoeuvre -- pitching the nose up and reducing the descent rate for touchdown. The autothrust retards the thrust levers to idle (you will hear the "RETARD" callout).
On the A320, the "RETARD" callout is your cue to verify the thrust levers are at idle. If autothrust is working correctly, they will move to idle automatically. If they do not, move them to idle manually. This is a standard callout in the Airbus and you will hear it on every landing, autoland or not.
Step 12: Touchdown and ROLLOUT mode.
After touchdown, the FMA changes from FLARE to ROLLOUT. The autopilot maintains runway centreline tracking using the localiser and nose wheel steering commands. The ground spoilers deploy (if armed), autobrake activates, and the aircraft decelerates.
The A320 Callouts
The Airbus callout sequence during approach and landing:
| Callout | Altitude (RA) | What Happens |
|---|---|---|
| "Two thousand five hundred" | 2,500 ft | Initial altitude awareness. |
| "One thousand" | 1,000 ft | Approach stability check. Verify speed, config, track. |
| "Five hundred" | 500 ft | Final stability gate. If not stable, go around. |
| "Four hundred" | 400 ft | LAND mode should engage (FMA changes to LAND). |
| "Three hundred" | 300 ft | Monitoring. |
| "Two hundred" | 200 ft | CAT I decision height. For CAT III, continue. |
| "One hundred" | 100 ft | CAT II decision height. For CAT III, continue. |
| "Minimum" | At your set DH | Check: LAND or FLARE on FMA. If no autoland, go around. |
| "Fifty" | 50 ft | Aircraft entering ground effect. Close to flare. |
| "Forty" | 40 ft | FLARE mode activates. Nose pitches up. |
| "Thirty" | 30 ft | Flare in progress. |
| "Twenty" | 20 ft | Close to touchdown. |
| "Ten" | 10 ft | Seconds from touchdown. |
| "Retard" | ~10 ft | Thrust levers to idle. Verify or move manually. |
After Touchdown -- Manual Actions
Thrust reversers: Deploy manually by pulling the thrust levers past the idle gate into reverse. The A320 does not auto-deploy reverse thrust. Use reverse until about 70 knots, then stow.
Rollout monitoring: The autopilot tracks the centreline. If the aircraft drifts, you can take over with rudder pedals and nose wheel tiller, but try to let the system work unless it is clearly not tracking.
Disconnect autopilot: Press the sidestick takeover pushbutton (the red button on the sidestick) or press either AP pushbutton on the FCU. Do this once you are at taxi speed or have cleared the runway.
BTV (if used): If you set Brake To Vacate, the system will decelerate you to reach taxi speed at your selected exit. Monitor the progress on the ND (Navigation Display) which shows the stopping point prediction.
A320 Autoland Summary
- ILS approach loaded in MCDU, frequency and course verified
- PERF APPR page completed (DH set for your category)
- Autobrake set (MED or BTV)
- Landing configuration (gear, flaps FULL, speedbrake armed)
- AP1 and AP2 both engaged
- FMA shows CAT 3 SINGLE or CAT 3 DUAL
- LAND mode engages at 400 ft RA
- FLARE mode at 40 ft RA
- ROLLOUT mode after touchdown
- Deploy reversers manually, disconnect AP at taxi speed
Fail-Passive vs Fail-Operational: What These Terms Actually Mean
You will see these terms in the context of autoland, and they describe what happens when something goes wrong during the approach. Understanding the difference tells you what to expect if the system has a fault below decision height.
Fail-Passive
A fail-passive autoland system monitors its own performance. If it detects a discrepancy between the dual autopilot channels -- one channel says the aircraft should pitch up while the other says pitch down, for example -- it disconnects both autopilots. The system "fails" by becoming "passive" (going away). It does not make the situation worse by continuing with a faulty signal.
When a fail-passive disconnect happens, the aircraft is left in a neutral state. The autopilot does not command any aggressive pitch or roll changes on its way out. It just lets go. You, the pilot, then have to take over and either land visually (if you can see the runway) or go around.
The critical point: a fail-passive system is designed so that even if it disconnects at the worst possible moment (say, 30 feet above the runway), the aircraft will be in a flyable state. You might touch down firmly, but the system will not have pitched you into the ground.
In the 737: LAND 2 is fail-passive. If either autopilot channel disagrees during the flare or rollout, both disconnect and you take over.
In the A320: CAT 3 SINGLE is fail-passive. Same concept -- dual AP monitoring each other, both disconnect on disagreement.
Fail-Operational
A fail-operational system has enough redundancy that if one channel fails, the remaining channel(s) can continue the autoland safely. The system "fails" but remains "operational."
This requires at least three independent sources of information (triple redundancy). If one disagrees with the other two, that one is voted out, and the remaining two continue. You lose redundancy (you are now in a fail-passive state with the remaining channels) but the autoland continues.
In the 737: LAND 3 is fail-operational and is the normal annunciation with both autopilots engaged and all systems healthy (it certifies the aircraft to CAT IIIb). If a fault reduces redundancy, the system downgrades to LAND 2 -- fail-passive, certified to CAT IIIa. So on a clean approach you want to see LAND 3; a drop to LAND 2 means something has failed.
In the A320: CAT 3 DUAL is fail-operational. With two independent autopilots (one per FMGC) backed by redundant flight augmentation computers, radio altimeters and other sensors, the system can lose one channel and continue the autoland.
What to Do If You Get a Downgrade
If the FMA category downgrades during the approach (e.g., CAT 3 DUAL drops to CAT 3 SINGLE, or CAT 3 drops to CAT 2), you need to decide whether to continue based on the new minimums.
- CAT 3 to CAT 2: Your new decision height is 100 feet. You must be able to see the runway environment at 100 feet to continue. If you cannot, go around.
- CAT 3 to CAT 1: Your new decision height is 200 feet. Same principle.
- LAND mode to no LAND mode (below 400 ft in the A320): This is an autopilot disconnect. Go around.
- LAND 2 to no autoland (in the 737, below 200 ft): Take over and go around if you cannot see the runway. If you can see it, land manually.
The golden rule: if you lose autoland capability and cannot see the runway, go around. Do not try to salvage the approach by hand-flying in zero visibility. That is how people crash.
Setting Up Weather for Practice
You will not learn autoland by practising in clear skies. The whole point is landing when you cannot see anything, so you need to create the right weather conditions.
MSFS 2024 Weather Settings
In MSFS 2024, you can set custom weather from the World Map or from within the flight. Here is how to create appropriate conditions for each category:
CAT II Practice (DH 100 ft, RVR 300 m):
- Cloud layer 1: Overcast at 150-200 feet AGL
- Visibility: Set to 300-400 metres (about 0.2 miles)
- Wind: Light or calm for your first attempts
CAT IIIa Practice (DH 50 ft, RVR 200 m):
- Cloud layer 1: Overcast at 50-100 feet AGL
- Visibility: Set to 200 metres (about 0.12 miles)
- This is thick fog. You should barely see the approach lights before touchdown.
CAT IIIb Practice (No DH, RVR 75 m):
- Cloud layer 1: Overcast at 0-50 feet AGL (ground-level fog)
- Visibility: Set to 75 metres (about 250 feet)
- You should not see the runway at all until you are on rollout, and even then only the nearest lights.
Zero-zero Practice (pure autoland test):
- Cloud layer 1: Overcast at ground level
- Visibility: Set to 25-50 metres
- You will see nothing. The entire approach, landing, and rollout will be done purely on instruments. This is the ultimate test of your autoland setup.
Tips for Weather Setup
- Fog is your friend. Low visibility and a low cloud base together create the most realistic CAT III conditions. Just setting low visibility without a cloud layer will give you a weird situation where you can see straight down but not forward.
- No turbulence initially. Start with calm conditions so you can verify the autoland works before adding complication. Once you have it working reliably, add 5-10 knots of crosswind to practice rollout in a crosswind.
- Set weather before you start the flight. Changing weather mid-flight sometimes causes glitches in MSFS weather rendering.
Good Airports for Practice
| Airport | ICAO | Why |
|---|---|---|
| London Heathrow | EGLL | CAT IIIb on multiple runways. Real-world autoland hub. |
| Amsterdam Schiphol | EHAM | CAT III on several runways. Well-modelled in MSFS. |
| Frankfurt | EDDF | CAT III. Major hub with excellent ILS. |
| Paris CDG | LFPG | CAT III. Multiple runway configurations. |
| JFK New York | KJFK | CAT III on 4L/22R and others. |
| Atlanta | KATL | CAT III. Long runways, good for rollout practice. |
| Denver | KDEN | CAT III. Long runways, typically calm conditions. |
| Dubai | OMDB | CAT III. Flat terrain, no terrain complications. |
Choose airports with long runways and flat terrain for your first attempts. Terrain near the airport (like San Francisco's approach over the bay or Innsbruck's mountain approaches) adds complexity you do not need while learning autoland.
Get flight sim tips in your inbox
New guides, checklists, and tips — no spam. Unsubscribe any time.
Troubleshooting Autoland Failures
Here is a systematic guide to every common autoland failure and how to fix it.
"AUTOLAND" or "LAND 2/3" Never Appears
Cause: Dual autopilot not engaged.
Fix: Engage both CMD A and CMD B (737) or both AP1 and AP2 (A320). This is the cause in 90% of cases where autoland does not appear.
Cause: Not on an ILS approach.
Fix: Check your approach type. If you selected RNAV, GPS, VOR, or LOC-only approach, the autoland system will not arm. You need a full ILS approach with both localiser and glideslope.
Cause: ILS frequency not tuned.
Fix: Check the NAV RAD page (737 CDU) or RAD NAV page (A320 MCDU). The ILS frequency must be set. If the approach is in your flight plan, it should auto-tune, but sometimes it does not (especially if you modified the approach or the database has an issue). Enter the frequency manually.
Autopilot Disconnects at 200 Feet
Cause: The approach is set up as CAT I only.
This is the most frustrating failure because it happens at the worst moment. At 200 feet, the aircraft reaches standard CAT I minimums. If the autoland system is not active (because of any of the reasons above), the autopilot reaches what it considers the minimum safe altitude for a coupled approach and disconnects, expecting you to hand-fly from there.
Fix: Verify LAND 2/3 (737) or CAT 3 SINGLE/DUAL (A320) is displayed before you reach 1,000 feet. If it is not showing, fix the issue before continuing the approach.
Aircraft Drifts Off Runway During Rollout
Cause: Crosswind exceeding autoland limits.
Fix: Check the wind. If the crosswind component exceeds the autoland limit (around 20 knots on both the 737 and A320), the rollout guidance may not maintain centreline. Reduce the crosswind in weather settings for practice, or be prepared to take over with rudder pedals after touchdown.
Cause: Localiser signal degradation.
In MSFS, this is less of an issue than in real life, but if you are landing at a poorly modelled airport or one without proper CAT III ILS modelling, the localiser signal may not be precise enough for rollout guidance. Try a major airport like EGLL or EHAM.
LAND Mode Never Engages (A320)
Cause: Not below 400 feet RA.
LAND mode engages at approximately 400 feet radio altitude. If you are above that, you will still see LOC/G/S on the FMA. Be patient.
Cause: The approach is not an ILS with glideslope.
A localiser-only approach (LOC approach without glideslope) will not trigger LAND mode. You need the full ILS with both localiser and glideslope.
Cause: AP downgrade before reaching 400 feet.
If a system fault caused the FMA to downgrade to CAT 1 before reaching 400 feet, LAND mode will not engage for autoland. You will need to hand-fly from 200 feet.
FMA Shows Wrong Category
Cause: Aircraft system fault.
Check the ECAM (A320) or EICAS (737) for any cautions or faults. Even a minor system issue -- like an IRS misalignment or an air data computer discrepancy -- can cause the autoland system to downgrade.
Cause: Only one autopilot actually engaged.
Sometimes you think you pressed both AP buttons but one did not engage (maybe you pressed it too quickly and it did not register, or there was a fault that prevented it from engaging). Look at the FMA and verify both AP channels are shown as active.
Glideslope Not Captured
Cause: Too high on the approach.
If you are above the glideslope when the localiser captures, the autopilot will track the localiser but not capture the glideslope from above. You need to be at or below the glideslope altitude for your distance from the runway. If the glideslope is alive (the diamond/pointer is visible but above centre), you are too low, and the system will capture it as you approach from below. If the diamond is below centre, you are too high.
Fix: Descend to an altitude that puts you below the glideslope and let the system capture from below. A general rule: the glideslope is roughly 300 feet per nautical mile from the runway. At 10 miles, you should be at or below 3,000 feet AGL. At 5 miles, at or below 1,500 feet AGL.
Cause: Intercepting the localiser at too steep an angle.
If your intercept angle to the localiser is greater than about 30 degrees, the capture may be rough and the glideslope capture may be delayed or missed. Ideally, intercept the localiser at an angle of 30 degrees or less.
Cause: Speed too high.
If you are screaming in at 250 knots with flaps up, the aircraft is not in a position to track the glideslope. Slow to approach speed and get configured (gear down, flaps set) before glideslope intercept.
Common Mistakes -- The Complete List
After troubleshooting, here is every common mistake compiled into one place, ranked by how often people make them.
1. Only Engaging One Autopilot
This is the classic error. Repeat after me: autoland requires two autopilots. One autopilot gives you a coupled ILS approach down to CAT I minimums. Two autopilots give you autoland. If you only press CMD A (737) or AP1 (A320), you will get a perfectly good ILS approach that disconnects at 200 feet and leaves you staring at fog.
2. Trying Autoland on a Non-ILS Approach
RNAV (GPS) approaches, VOR approaches, LOC-only approaches, and visual approaches do not support autoland. The autoland system specifically requires the ILS localiser and glideslope signals. If your approach is anything other than ILS, autoland will not arm and will not engage.
There is one exception: some newer aircraft may support GLS (GBAS Landing System) autoland, but this is not commonly implemented in MSFS add-ons.
3. Not Setting the Correct Decision Height
If you set your DH to 200 feet for a CAT III approach, the "MINIMUMS" callout will fire at 200 feet -- which is CAT I minimums. You will panic, think you need to go around, and disconnect the autopilot. Set the DH to 50 feet (CAT IIIa) or NO DH (CAT IIIb) for a CAT III approach.
Conversely, if you set DH to 0 or NO DH for a CAT I approach (without autoland), you will fly through 200 feet with no callout and potentially crash because you were waiting for a callout that never came.
4. Touching the Controls During Autoland
During an autoland, keep your hands near the controls but not on them. In the 737, any significant force on the yoke will disconnect the autopilot. In the A320, the sidestick is less sensitive to unintentional inputs because of the sidestick priority system, but deliberate inputs will still override the autopilot.
Do not "help" the autopilot. Do not try to correct a perceived drift. Do not move the thrust levers during the flare (except for the Airbus "RETARD" callout, where you confirm the thrust levers are at idle). The system knows what it is doing. Let it work.
5. Not Having the ILS Frequency Set
This should be automatic if the approach is in your flight plan, but it is not always. If you changed the approach, modified the flight plan, or manually flew to the approach without programming it in the FMC/MCDU, the ILS frequency may not be tuned. Always verify on the NAV RAD (737) or RAD NAV (A320) page.
6. Intercepting the Glideslope from Above
The glideslope should always be intercepted from below. If ATC vectors you above the glideslope or you descend too late, you may intercept a false glideslope (a spurious signal above the correct one) or the autopilot may not capture the glideslope at all. If you find yourself above the glideslope, descend to below it and intercept from below, or ask for re-vectors.
7. Not Arming the Speedbrake
If the ground spoilers are not armed, they will not deploy on touchdown. This means reduced deceleration and a longer rollout. In low visibility, a longer rollout is dangerous because you may not see the end of the runway. Always arm the speedbrake before the approach.
8. Forgetting to Deploy Thrust Reversers
The autoland system does not deploy thrust reversers. This is always a manual action. After touchdown, pull the thrust levers into reverse. In very low visibility, the combination of no reversers and mild autobrake can result in the aircraft using a surprising amount of runway.
9. Landing Too Fast
If your approach speed is too high, the flare will be shallow, the float will be long, and the aircraft may touch down too far down the runway. Verify your approach speed is correct for your landing weight. In the A320, the managed speed (VAPP) should handle this automatically. In the 737, check the CDU approach reference page for your VREF and add the appropriate wind correction (half the headwind component plus the full gust factor, up to a maximum additive of about 15 knots).
10. Wrong Approach Configuration
Each aircraft has a specific landing configuration for autoland. In the 737, this is typically Flaps 30 or Flaps 40. In the A320, it is typically CONF FULL (Flaps 4). If you are in the wrong configuration, the autoland system may not engage properly or the approach speed may be incorrect.
Quick Reference: 737 vs A320 Autoland Comparison
| Feature | PMDG 737 | Airbus A320 (Fenix) |
|---|---|---|
| Engage dual AP | CMD A + CMD B | AP1 + AP2 |
| Autoland annunciation | LAND 2 / LAND 3 | CAT 3 SINGLE / CAT 3 DUAL |
| Fail-passive mode | LAND 2 | CAT 3 SINGLE |
| Fail-operational mode | LAND 3 | CAT 3 DUAL |
| LAND mode engages at | Not a separate mode; FLARE arms at ~1,500 ft | 400 ft RA |
| FLARE mode engages at | ~50 ft RA | ~40 ft RA |
| ROLLOUT mode | Yes, after touchdown | Yes, after touchdown |
| "Retard" callout | At ~25 ft (thrust retard begins) | At ~10 ft (thrust retard begins) |
| Thrust reversers | Manual deployment | Manual deployment |
| Typical landing flaps | Flaps 30 or 40 | CONF FULL (Flaps 4) |
| Decision height for CAT IIIa | 50 ft (or per operator) | 50 ft (or per operator) |
| Autobrake setting | 2 or 3 | MED or BTV |
Putting It All Together: A Practice Flight
Here is a concrete practice scenario. Fly this exact flight to test your autoland skills.
Flight: London City (EGLC) to London Heathrow (EGLL). Short hop, about 25 nautical miles. This gives you time to set up without a long cruise.
Runway: EGLL 27L (ILS CAT III capable, frequency 109.50, course 269).
Weather setup:
- Cloud layer: Overcast at 75 feet AGL
- Visibility: 100 metres
- Wind: 270/05 (light headwind on runway 27)
- No precipitation (fog only)
The flight:
- Depart EGLC and climb to about 3,000 feet.
- Program the EGLL ILS 27L approach into your FMC/MCDU.
- Get radar vectors or self-position to intercept the ILS 27L localiser at about 10-12 miles out, at or below 3,000 feet.
- Before intercepting:
- Set DH to 50 feet (or NO DH for full CAT IIIb practice)
- Set autobrake (3 for 737, MED for A320)
- Gear down, flaps to landing setting
- Arm speedbrake
- Engage both autopilots
- Intercept the localiser. Verify LOC capture on FMA.
- Intercept the glideslope from below. Verify G/S capture on FMA.
- Verify LAND 2/3 (737) or CAT 3 SINGLE/DUAL (A320).
- Hands off. Monitor the approach. Listen to callouts.
- Watch the FMA transitions: LOC/G/S to LAND (A320) to FLARE to ROLLOUT.
- After touchdown: deploy reversers, monitor rollout, disconnect AP at taxi speed.
If it works, congratulations -- you just did a CAT IIIb autoland. If it did not work, go back through the troubleshooting section and figure out which step was missing.
Once you can do this reliably in calm conditions, start adding 10-15 knots of crosswind and see how the rollout changes. Then try different airports. Then try it in the other aircraft (if you practised in the 737, try the A320, and vice versa).
Final Thoughts
Autoland is not difficult once you understand what the system needs. The procedure is actually simpler than a manual landing -- you set things up correctly, let the system do its job, and then take over for the parts it cannot do (reversers, taxi). The difficulty is in the setup, not the execution.
The single most important thing you will take away from this guide is this: engage both autopilots. Every other step is standard approach procedure that you should already be doing. The only thing that transforms a normal ILS approach into an autoland is pressing that second autopilot button. Do that, verify the LAND 2/3 or CAT 3 annunciation, and the system handles the rest.
If you want to go deeper on the underlying ILS system, read our ILS approach guide which covers the fundamentals of localiser and glideslope tracking, approach plates, and hand-flying an ILS -- all skills that complement your autoland knowledge.
Now go set the visibility to 75 metres and put it on the centreline.