Short answer: F2T2EA stands for Find, Fix, Track, Target, Engage, Assess: the six steps of dynamic targeting, often called the "kill chain" (JP 3-60, Joint Targeting, 31 January 2013). You detect a target, fix its precise location, keep it under observation, decide how to engage it, strike, then assess the effect before you re-attack or move on.
You've learned the systems. You can drop a bomb on a coordinate. But in a dynamic mission, you find yourself reacting instead of executing—jumping straight to weapons release without a clear process, then wondering whether the target is actually dead.
The difference between a competent attack pilot and someone who just knows how to pickle weapons is workflow. A systematic process that keeps you ahead of the mission instead of constantly catching up.
The Kill Chain: F2T2EA
Military aviation uses the F2T2EA framework for dynamic targeting: Find, Fix, Track, Target, Engage, Assess. It is generally credited to General John Jumper, who pushed it in the U.S. Air Force in the late 1990s as a way to compress the time between spotting an emerging target and striking it. Whatever its exact provenance, the sequence is what matters: it gives you a logical order for prosecuting a target.
Work the steps in order and never skip one. Doctrine notes that they can run iteratively and in parallel (you are usually still tracking while you set up the attack), but skip a step and you create problems downstream: attacking the wrong target, missing the target entirely, or wasting ordnance on something already destroyed.
Let's walk through each phase using ground attack as our example.
Phase 1: Find
Objective: Identify that a target exists and roughly where it is.
Before you can attack anything, you need to know it's there. In CAS scenarios, this often comes from external sources:
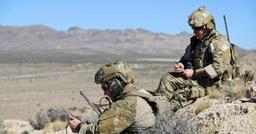
- JTAC reports: "Enemy armour moving south through grid square GB 12 34"
- Intel briefings: Pre-planned targets identified before the mission
- Reconnaissance: Other aircraft or drones spotting enemy activity
- Your own sensors: Targeting pod, radar, or visual search
The Find phase answers: "Is there something worth attacking, and approximately where?"
What This Looks Like in Practice
You're orbiting in a holding pattern. The JTAC calls: "Viper 1-1, Overlord. We have enemy vehicles moving through the valley. Stand by for 9-line."
You now know a target exists. You don't know the exact location yet—that comes next.
Common Mistakes
- Fixating on the first contact: Multiple targets may exist. Don't lock onto the first thing you see without considering the broader picture.
- Assuming the target is still there: Time passes between the report and your arrival. Situations change.
Phase 2: Fix
Objective: Determine the precise location of the target.
Finding tells you a target exists somewhere in an area. Fixing narrows that to a specific point you can navigate to and attack.
In CAS, the Fix phase typically involves:
- Receiving coordinates: The JTAC provides MGRS grid or lat/long (Line 6 of the 9-line)
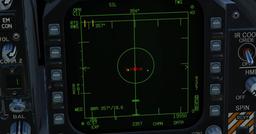
- Sensor refinement: Slewing your targeting pod to the reported area and identifying the exact target
- Visual confirmation: "I see three vehicles at the treeline"
The Fix phase answers: "Exactly where is this target?"
Coordinate Systems Matter
Different systems use different coordinate formats:
- MGRS (Military Grid Reference System): "GB 123 456" — common in NATO operations
- Lat/Long: Degrees, minutes, seconds or decimal format
- Bullseye: Bearing and distance from a pre-briefed reference point
Know what format your JTAC uses and ensure your navigation system is set accordingly. A coordinate format mismatch puts your weapons in the wrong place.
Common Mistakes
- Accepting approximate coordinates as precise: "Somewhere around GB 12 34" isn't the same as "GB 123 456"
- Not confirming the fix: If coordinates don't match what you're seeing, clarify before proceeding
Phase 3: Track
Objective: Maintain awareness of the target's position and status until engagement.
Targets move. Situations change. Between fixing the target and releasing weapons, you need to maintain situational awareness.
Tracking involves:
- Maintaining sensor lock: Keeping your targeting pod or radar on the target
- Monitoring for changes: Is the target moving? Have friendlies entered the area?
- Updating your picture: The target you fixed three minutes ago may not be where you expect
Mobile vs. Static Targets
Static targets (buildings, parked vehicles, fixed positions) require minimal tracking—they're not going anywhere. Mobile targets require continuous attention.
For a moving convoy:
- Where is it now?
- Where will it be when my weapon arrives?
- Is it approaching an area I can't strike (civilian structures, friendly positions)?
When Tracking Fails
If you lose track of the target:
- Don't guess. Re-establish positive identification.
- Inform the JTAC: "Overlord, Viper 1-1, lost visual on the target"
- Reacquire before proceeding
Releasing weapons on a target you've lost track of is how blue-on-blue incidents happen.
Phase 4: Target
Objective: Select and configure the appropriate weapon for the target.
Now you know what and where. The Target phase involves selecting the right tool for the job and setting it up for delivery.
Consider:
- Target type: What are you attacking? Armoured vehicles need different weapons than infantry in the open.
- Collateral concerns: How close are friendlies or civilians? What's the blast radius?
- Terrain: Is the target in a valley, on a ridgeline, behind terrain that affects approach angles?
- Weather and visibility: Can you use laser-guided weapons, or do you need GPS guidance?
Weapon Selection
A simplified decision matrix:
| Target Type | Suggested Weapons |
|---|---|
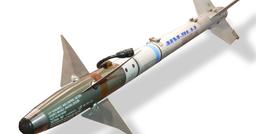
| Armoured vehicles | Mavericks, LGBs, gun (for light armour) |
| Infantry in open | Rockets, cluster munitions, gun |
| Fortified positions | LGBs, JDAMs, heavy ordnance |
| Moving vehicles | Gun, rockets, Mavericks |
| Danger close | Smallest effective munition, delivered as precisely as you can |
"Danger close" is not a weapon restriction — it is a risk decision. Joint doctrine defines it as ordnance delivery inside the 0.1 percent probability-of-incapacitation distance for that weapon, and it is authorised when the supported ground commander passes his initials through the JTAC, accepting the risk. Unguided bombs are used danger close in the doctrinal examples; a precision weapon simply makes the risk easier to accept.
Setting Up the Weapon
Each weapon type has its own pre-release configuration:
- Laser-guided: Set the correct laser code, confirm the designator is operational
- GPS-guided: Enter or verify target coordinates
- Unguided: Configure fuzing, release mode, delivery parameters
- Gun: Ensure correct ammunition selected, gunsight mode configured
Don't rush this. A weapon set up wrong misses or malfunctions.
Phase 5: Engage
Objective: Deliver the weapon to the target.
This is the phase everyone focuses on—but it's only one part of the workflow. Without the preceding steps, engagement is just hoping your weapon lands somewhere useful.
The Attack Run
The engagement typically follows this sequence:
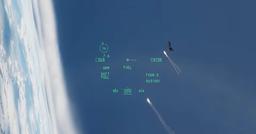
- Call inbound: "Overlord, Viper 1-1 is IP inbound"
- Establish attack geometry: Approach from the briefed direction, at the correct altitude and speed
- Acquire the target: Transition from navigation to attack—eyes on target, sensor locked
- Confirm target and friendlies: One last check before release
- Receive clearance: "Viper 1-1, cleared hot" under Type 1 or Type 2 control — under Type 3 the clearance is "cleared to engage", given once for the whole engagement
- Release weapons: Execute the delivery
- Egress: Follow the briefed egress direction, call "Off target, egress east"
Types of Control
Joint doctrine defines three types of terminal attack control, and how much autonomy you have depends on which one you are under:
- Type 1: the JTAC must visually acquire both the attacking aircraft and the target for every attack, and clears each pass individually — "cleared hot". It is used when watching your run-in and checking your attack geometry is the best available way to reduce the risk to friendlies. That makes it the most restrictive type, but it is not reserved for danger close, and danger close does not require it.
- Type 2: the JTAC still controls each individual attack and still calls "cleared hot" for each pass, but one or more of these is true — the JTAC cannot see the aircraft at weapons release, the JTAC cannot see the target, or you cannot acquire the mark or target before release. Night, weather, standoff weapons and high-altitude deliveries are the usual reasons.
- Type 3: the JTAC grants clearance for multiple attacks within a single engagement, subject to stated restrictions — time window, geographic limits, permitted run-in headings, a specific target set. After you read the restrictions back, the clearance call is "cleared to engage", not "cleared hot", and you attack within those bounds without asking again each pass.
Know which type you're operating under. Type 1 and 2 both need a clearance call for every pass. Type 3 gives you the widest latitude, so you carry more of the identification burden yourself — but in all three types the JTAC retains abort authority and can call you off at any point.
Get flight sim tips in your inbox
New guides, checklists, and tips. No spam. Unsubscribe any time.
Phase 6: Assess
Objective: Determine the effect of your attack and decide on next steps.
This is Battle Damage Assessment (BDA)—the step most pilots skip or rush through. But without assessment, you don't know whether the mission succeeded.
BDA Components
According to military doctrine, BDA consists of three elements:
- Physical Damage Assessment (PDA): What observable damage occurred? Destroyed? Damaged? Missed?
- Functional Damage Assessment (FDA): Is the target still operationally capable? A damaged tank might still shoot.
- Target System Assessment (TSA): What's the overall effect on the enemy's capability? This matters more at command level.
For a CAS pilot, you're primarily doing PDA: Did my weapon hit? What's the visible result?
How to Assess
Immediate observation: As you egress, what do you see?
- Direct hit with secondaries (fire, explosions)
- Hit, target appears damaged
- Hit, effect unclear
- Miss (you can see the impact crater away from target)
Sensor review: Circle back with your targeting pod if safe. Get a close look at the target area.
JTAC feedback: "Good hits, good hits" or "Target still moving, reattack"
Recording: If possible, capture footage. Post-mission review reveals things you missed in the moment.
The Re-attack Decision
Based on your assessment, you and the JTAC decide:
- Target destroyed: Move on. No further action needed.
- Target damaged but functional: Consider reattack with remaining ordnance.
- Target missed: Reacquire, diagnose what went wrong, attempt again if ordnance permits.
- Assessment unclear: May need another asset to confirm (reconnaissance, persistent surveillance).
Don't assume one weapon run solved the problem. Real-world data from conflicts shows that initial BDA is often optimistic—targets reported destroyed are later found to be damaged but operational.
Target Marking Methods
Throughout this workflow, target marking helps you identify exactly what to hit. Common marking methods include:
Smoke
Ground forces throw coloured smoke grenades near the target. Simple, visible, no special equipment needed.
Limitations: Wind disperses smoke quickly. Enemy can throw matching smoke to confuse you. Coloured smoke is a daylight mark — at night the equivalent job is done with white or red phosphorus rounds, illumination, or an IR pointer.
Laser Designation
A laser designator (ground-based or airborne) illuminates the target. Laser-guided weapons home on the reflected energy.
Key brevity terms:
- LASER ON: Directive call to start lasing
- LASING: The designator is firing the laser, in response to "laser on"
- SPOT: Acquisition of the reflected laser energy
- NEGATIVE LASER: Laser energy has not been acquired
- CEASE LASER: Stop designation (often after weapon impact)
Critical: Ensure your weapon's laser code matches the designator's code. Mismatched codes mean the weapon never guides.
IR Pointer
An infrared laser visible through night vision devices. The JTAC points the beam at the target; you see it through your NVGs or targeting pod in IR mode.
Limitations: IR pointers cannot guide weapons—they only mark. You still need to deliver accurately on your own.
Procedure: doctrine has IR marks initiated 20 to 30 seconds before time on target, or whenever the aircrew asks for one. The brevity is "sparkle" for the mark, "contact sparkle" once you can see the IR energy and tell the friendly end of the beam from the target end, and "cease sparkle" to have the JTAC turn the beam off. That last call is also a useful check: if the sparkle you were watching does not go out, you were looking at the wrong beam.
Talk-On
No physical mark—the JTAC verbally guides your eyes to the target using sequential visual references.
"From your position, look at the river bend... follow the road north... see the compound with the red roof? Target is the vehicle in the courtyard."
Talk-ons require good communication and shared understanding of the terrain. They're slower but work when other marking methods aren't available.
Putting It Together: A Complete Workflow
Here's how F2T2EA flows in a typical CAS scenario:
FIND: "Viper 1-1, Overlord. Enemy armour reported in sector 3."
FIX: JTAC provides 9-line. You copy coordinates: GB 456 789. You slew your targeting pod and confirm: "Contact, three vehicles at the treeline." (Sensor acquisition is "contact"; save "tally" for an actual visual sighting.)
TRACK: You orbit, maintaining sensor lock. "Target stationary. Friendlies confirmed south, 800 metres."
TARGET: You select an AGM-65 Maverick. Armoured target, sufficient standoff, precision guidance. You lock the seeker on the lead vehicle.
ENGAGE: "Viper 1-1, in from the west." — "Viper 1-1, cleared hot." — "Rifle." Weapon away. "Off target, egress north."
ASSESS: You circle back with the pod. Lead vehicle destroyed, burning. Second vehicle appears damaged. Third vehicle moving south. "Overlord, Viper 1-1. One destroyed, one damaged, one mover heading south. Request re-attack on mover."
That's the complete workflow. Each phase leads to the next. Nothing is skipped.
Why Workflow Matters
Without a systematic process:
- You attack targets you haven't properly identified
- You release weapons without confirming friendly positions
- You assume targets are destroyed without verification
- You waste ordnance on targets already dead
- You miss targets that are still operational
The kill chain keeps you disciplined. It ensures every attack is deliberate, confirmed, and assessed.
The pilots who execute clean, effective attacks aren't just good stick-and-throttle operators. They're good at workflow—moving methodically through the phases, never skipping steps, always knowing where they are in the process.
Practicing the Workflow
You can drill this process even in simple training scenarios:
- Set up a target area in the mission editor with multiple targets
- Brief yourself on the target location and plan your approach
- Execute the full kill chain: Find (search the area), Fix (identify exact target), Track (maintain awareness), Target (select weapon), Engage (deliver), Assess (confirm effect)
- Record and review: Watch your track file. Did you skip any steps? Where did you rush?
Better yet, fly with a human JTAC who can run you through realistic scenarios. The back-and-forth communication under pressure builds the workflow into habit.