You take off in your Viper, push north, and your radar shows one contact at 40 miles. That's all you know. One blip. Meanwhile, a four-ship of bandits is flanking you from the east, and a friendly flight is about to merge with the same group you're targeting. You have no idea about any of it. You're flying blind, and you don't even know it.
Now imagine the same scenario with a properly configured datalink. Your datalink display shows the full picture: your wingman's radar tracks, AWACS-provided contacts, friendly positions, and hostile groups with bearing, range, and altitude. You see the eastern flankers. You see the friendlies. You call out "I'll take the western group" and deconflict without a single confused radio call.
That's the difference datalink makes. It takes you from a lone wolf guessing at the battlespace to a networked element operating with genuine situational awareness. On servers like Hoggit, Enigma's Cold War, or any serious multiplayer environment, understanding datalink is what separates pilots who contribute from pilots who cause friendly fire incidents.
What Is Link 16?
Link 16 is a tactical data exchange network used by NATO forces. In DCS, it's the system that lets aircraft share track information — radar contacts, your own position, IFF data — with other members of your flight and with AWACS.
The hardware that makes this work is called MIDS (Multifunctional Information Distribution System). Think of MIDS as the radio, and Link 16 as the protocol it speaks. When you "turn on datalink" in DCS, you're enabling MIDS and configuring your Link 16 network settings.
In DCS you don't hand-assign low-level network addresses. What you actually configure is your flight position (1–4 in the Viper, A–D in the Hornet) and the MIDS channels (Viper) or network number (Hornet) that your flight shares. Get those to match across the flight — and give each aircraft a different position — and the system knows whose tracks to accept and display.
Here's the critical thing: datalink is not magic. It only works when everyone in the flight configures it correctly, and it only shows you what someone else's sensors have detected. If nobody is looking east, datalink won't show you what's coming from the east.
Prerequisites: INS Alignment
This catches more people than anything else. Your datalink will not function until your Inertial Navigation System is fully aligned and in NAV mode. The system needs to know where you are in space before it can place you — or anyone else — on a shared tactical picture.
F-16C
During startup, the INS alignment takes roughly 8 minutes for a full ground align. Watch the DED INS page — it will cycle through ALIGN status and eventually show NAV. Only then will your DLNK page actually do anything useful. If you selected a stored heading alignment (STOR HDG), you'll get NAV faster, but the alignment quality depends on being parked at the correct coordinates.
F/A-18C
The Hornet's INS alignment is initiated via the UFC. Set the INS knob to GND or CV (for carrier alignment) and wait for alignment quality to reach FINE or better on the HSI/AMPCD. The alignment takes approximately 4-8 minutes depending on method. Until the system shows aligned status, your datalink pages will be blank or unreliable.
Bottom line: If you rush through startup and skip straight to taxiing, your datalink won't work. Wait for NAV mode. Use the alignment time to set up your other systems.
MIDS/Link 16 Setup on the F-16C Viper
The Viper's datalink setup lives on the DED (Data Entry Display) and is managed through the ICP.
Step 1: Open the DLNK Page
Press the LIST button on the ICP, then select ENTR to open DLNK Page 1. Toggle the DCS right to SEQ to step through the three DLNK pages. You'll see network status (Page 1), MIDS radio and channel options (Page 2), and flight management (Page 3).
Step 2: Set Your Channels and Flight Position
The Viper doesn't ask you to type in a personal "station number." The two things you actually configure — and coordinate with your flight — are:
- MIDS channels (Fighter / Mission / Surveillance): Set on DLNK Page 2. Everyone in your flight must use the same Fighter channel to see each other, and the Surveillance channel is what pulls in AWACS. If your channels don't match your flight's, you'll see nothing from them.
- Own Flight Position: Set on DLNK Page 3, this is your slot in the flight (1–4). Every aircraft in the flight must have a different position. If two jets pick the same position, their symbols collide and the picture breaks.
Use the DCS rocker switch on the ICP to move between fields, type values on the keypad, and press ENTR to confirm each entry. One aircraft should be marked as flight lead via the Flight Lead Identifier on Page 2.
Step 3: Understand Flight Members and Track Numbers
You don't enter each wingman's address by hand. On DLNK Page 3 the Flight Member Track Numbers are pre-set — leave them alone. As long as every aircraft is on the same MIDS channels and each has a unique Own Flight Position, your flight members populate automatically and you'll receive their tracks. Aircraft outside your flight that share data appear as donors, labelled by callsign rather than by a number you assign. If a wingman picked the wrong channel or position, you simply won't see their data.
Step 4: Enable MIDS
On the DLNK page, you need to ensure the MIDS radio is turned ON. Look for the MIDS option — toggle it on using the appropriate DCS command. If MIDS is off, you'll have the page configured perfectly and still see nothing.
Also make sure the MIDS LVT knob on the right console (Avionics Power Panel) is set to ON (not OFF or ZERO). This is the physical power switch for the MIDS terminal.
Step 5: Verify on the HSD
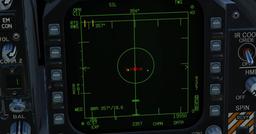
Once MIDS is enabled and your flight position and channels are set, switch to your HSD (Horizontal Situation Display) on an MFD — this is where the Viper draws its datalink picture. (The Viper has no page called "SA"; that term belongs to the Hornet.) You should see your own aircraft symbol at the centre, and if your wingmen are configured correctly, their position symbols will appear. If they don't, double-check that everyone is on the same MIDS channels and holds a unique flight position.
MIDS/Link 16 Setup on the F/A-18C Hornet
The Hornet handles datalink setup differently, primarily through the HSI DATA sublevel and dedicated MIDS pages.
Accessing the MIDS Setup
On the AMPCD or an MFD, navigate to the HSI display and then select the DATA sublevel. From here you can access the MIDS/Link 16 configuration pages.
SURV Page
The SURV (Surveillance) page controls what datalink information you receive and display. This is where you configure:
- Which networks you're monitoring
- What track types to display (friendly, hostile, unknown)
- Filtering options for decluttering the display
PPLI Page
PPLI (Precise Participant Location and Identification) covers your own position broadcast and the receipt of friendly positions. This is how you show up on other people's displays, and how their positions show up on yours — it happens automatically once MIDS is on and you're aligned.
You don't type in a personal station number. Your place in the flight is set by flight position, and the Hornet labels flight members with letters in the centre of their symbol: your jet is A, wingman 2 is B, 3 is C, and 4 is D. Aircraft outside your flight that feed you data are donors — the Hornet supports your flight members plus up to seven fighter-to-fighter donors.
Fighter-to-Fighter Track Sharing
The Hornet supports fighter-to-fighter (F/F) datalink, which allows direct sharing of radar tracks between Hornets without needing AWACS as a relay. When you designate a target with your radar, that track can be pushed to your wingman's display.
To enable this, ensure MIDS is powered on (the MIDS knob on the right console must be in the ON position), and the appropriate data sharing options are enabled on the SURV page.
This is particularly powerful in the Hornet because you can combine your own radar tracks with datalinked tracks from your wingman, effectively doubling your sensor coverage.
Reading the HSD: F-16C
The Viper shows its datalink picture on the HSD (Horizontal Situation Display) — a moving-map "God's eye view" of the battlespace. (There is no "SA page" in the Viper; that name is Hornet-specific.) Learning to read the HSD quickly is a core combat skill.
Symbology
The HSD uses standardised symbols based on identification:
| Symbol | Meaning |
|---|---|
| Blue/Green circle or semicircle | Friendly (PPLI — confirmed friendlies on the network) |
| Red hostile symbol (filled) | Hostile (confirmed by IFF or AWACS declaration) |
| Yellow/Amber symbol | Unknown (not yet identified) |
| Upward-pointing chevron | AWACS-provided track (surveillance track) |
| Diamond | Non-cooperative target — radar contact without IFF response |
Donor Tracks vs Own-Sensor Tracks
This distinction matters. On the HSD, tracks come from two sources:
- Own-sensor tracks: Contacts your own radar has detected. These are the most reliable and up-to-date.
- Donor tracks: Contacts shared by your team members or AWACS via datalink. These are only as good as the donor's sensor — if their radar lost the contact 30 seconds ago, the track is 30 seconds stale.
The HSD typically distinguishes these with different symbol styles. Own-sensor tracks appear more prominent or filled, while donor tracks may appear as outlines or with a different marker. Pay attention to this: a stale donor track could lead you to a position where the bandit used to be, not where it is now.
Stale Track Indicators
Tracks on the HSD age over time. If a contact hasn't been updated by any sensor for a period, the symbol may:
- Change to a less prominent style
- Display a small time indicator
- Eventually drop off the display entirely
If a track looks stale, don't trust it for targeting. Use it for general awareness ("there was a group somewhere in that area") but get your own radar on the bearing to confirm before committing.
Range Scaling and Declutter
Use the cursor/range knob to zoom the HSD in and out. Common settings:
- 80-120nm: Good for the big picture. See the entire battlespace.
- 40-60nm: Tactical range. Good for managing your specific engagement.
- 20nm or less: Close-in merge picture. Used for deconfliction in the furball.
The HSD can get cluttered on busy servers with many participants. Use the declutter options (cycle through by pressing the appropriate OSB) to strip away layers of information until you can read the display clearly.
Reading the SA Page: F/A-18C
The Hornet's situational awareness display works similarly but has some Hornet-specific conventions.
SA Page and HAFU Symbols
The Hornet uses HAFU (Hostile, Ambiguous, Friendly, Unknown) symbology. These are standardised NATO tactical symbols:
| Symbol Shape | Meaning |
|---|---|
| Full circle | Friendly |
| Full diamond | Hostile |
| Square | Unknown |
| Half-circle / half-diamond | Ambiguous (partial identification) |
The filling and colouring of these symbols indicates the identification confidence. A filled red diamond is a confirmed hostile. An unfilled square is an unknown that nobody has identified yet.
Track Correlation
One of the Hornet's strengths is automatic track correlation. When your own radar detects a contact that matches a datalink track, the system can correlate them into a single, high-confidence track. This is powerful because:
- The datalink provides coarse position from AWACS
- Your radar provides precise range, bearing, and closure rate
- The correlated track is better than either source alone
When a track is correlated, you'll see a single symbol rather than two overlapping ones. If your radar and datalink disagree on a contact's position, you may see two separate symbols close together — this usually means one source is stale or inaccurate.
Combining Radar Data with Datalink
The optimal workflow in the Hornet is to use datalink for awareness and radar for prosecution:
- Check the SA page for the big picture — where are the threats, where are friendlies?
- Point your radar toward the threats shown on datalink.
- Use your own radar to refine the tracks, get precise targeting data, and confirm identification.
- Engage with your own-sensor data while keeping the SA page up on a second MFD for the broader picture.
Running two MFDs is standard practice: one with the radar display (attack radar) and one with the SA page. This gives you both the close-in targeting picture and the wide-area awareness simultaneously.
IFF: Identify Friend or Foe
This is not optional. Friendly fire is the single most common problem on multiplayer servers. On Hoggit, on Enigma's Cold War, on every PvP server — the majority of "whoops" moments happen because someone shot a contact they hadn't identified.
IFF is an electronic interrogation system. You send a coded signal, and friendly aircraft respond with the correct reply. If you get a response, the contact is friendly. If you don't, the contact is not necessarily hostile — they might just have their transponder off, or be an AI flight that isn't configured for IFF.
F-16C IFF Procedure
- Point your radar at the contact — you need a radar track (cursor on the contact).
- Press TMS Up (short) to designate the target if you haven't already.
- Use the IFF interrogate command. On the F-16C, with a target bugged, the IFF interrogation is triggered by pressing the IFF IDENT button or the appropriate HOTAS command.
- Read the response. A friendly response changes the target symbology — the contact will show a friendly symbol or a positive IFF indicator. No response means "unknown," not "hostile."
Important: IFF interrogation has limited range. Don't try to IFF a contact at 80 miles — get within 40nm or so for reliable results. Also note that IFF only tells you "this is a friendly transponder." It doesn't tell you the aircraft type or what they're doing.
F/A-18C IFF Procedure
- Designate the target on your radar display (select it as L&S or DT2).
- Press the IFF interrogation button (Sensor Select Switch Depress (castle switch inward) or the appropriate HOTAS binding).
- Check the response on the radar display. A positive IFF response will show a friendly HAFU symbol change on the contact.
The Hornet also supports automatic IFF interrogation in certain radar modes. When you hook a target in TWS, the system may automatically interrogate the contact.
What the Responses Mean
| Response | Meaning | Action |
|---|---|---|
| Positive (friendly symbol) | Confirmed friendly | Do NOT shoot. Track and avoid. |
| No response | Unknown | Do NOT shoot yet. Get AWACS declaration or visual ID. |
| Hostile (after AWACS declaration) | Confirmed hostile | Cleared to engage per ROE. |
The cardinal rule: if you cannot positively identify a contact, do not shoot. "I didn't get a response" is not the same as "it's hostile." Get a BOGEY DOPE from AWACS, or merge for a visual identification.
Working with AWACS
AWACS (Airborne Warning and Control System) is a force multiplier, and on most DCS multiplayer servers, an AWACS aircraft is airborne providing radar coverage. Even if nobody is actively controlling AWACS (i.e., it's AI-only), it still feeds data to your Link 16 network.
What AWACS Provides via Datalink
- Surveillance tracks: AWACS radar coverage extends far beyond your own radar range. Contacts detected by AWACS appear on your SA page as surveillance tracks.
- Track identification: AWACS can declare contacts as friendly, hostile, or unknown. These declarations update the symbology on your SA page.
- Early warning: You'll see threats on your SA page long before your own radar picks them up, giving you time to plan and manoeuvre.
BOGEY DOPE vs Datalink Picture
BOGEY DOPE is a radio call — you key up on the AWACS frequency and ask for the nearest threat. AWACS responds with bearing, range, altitude, and aspect (hot, cold, flanking). This is a voice-based, single-snapshot answer.
Datalink picture is continuous and automatic. You don't have to ask for it. Every few seconds, AWACS pushes updated track data to your network. The SA page updates in near-real-time.
Use both. BOGEY DOPE is great for a quick sanity check or when you need specific information ("BOGEY DOPE, single group, bearing 090"). The datalink picture is your continuous background awareness.
Reading AWACS Tracks on Your SA Page
AWACS-provided tracks typically appear with a slightly different symbology than your own-sensor tracks. They may show as:
- Chevrons or upward-pointing arrows
- Smaller or less prominent symbols
- With a "surveillance" indicator
Remember that AWACS tracks are less precise than your own radar tracks. AWACS is looking at the battlespace from far away — the position data might be accurate to within a few miles, but it's not targeting-quality data. Use AWACS tracks to point your radar in the right direction, then refine with your own sensors before engaging.
Get flight sim tips in your inbox
New guides, checklists, and tips. No spam. Unsubscribe any time.
Practical Multiplayer Tips
Coordinate Channels and Flight Positions Before Takeoff
This is the single most important thing you can do. Before anyone starts engines, agree on your shared MIDS channels (Viper) or network number (Hornet), and hand out a unique flight position to each pilot:
| Pilot | Flight Position |
|---|---|
| Flight Lead | 1 (Viper) / A (Hornet) |
| Wingman 2 | 2 / B |
| Wingman 3 | 3 / C |
| Wingman 4 | 4 / D |
The exact channel numbers don't matter — just make sure everyone in the flight uses the same ones and that no two pilots claim the same position. On organised servers like Enigma's Cold War, channel and network assignments are usually published in the briefing materials.
Deconflict Targets Using the SA Page
Once your datalink is working, use it to assign targets. "I'll take the western group, you take the eastern pair" becomes possible because everyone can see the same picture. This prevents the classic problem of an entire flight dogpiling the same bandit while three others sneak through unengaged.
Call out using clock positions or cardinal directions relative to the bullseye: "I'm targeting the group BULLSEYE 270 for 45." Your wingman confirms on their SA page and adjusts.
When to Trust the SA Page (And When Not To)
Trust it for:
- General threat awareness (how many groups, rough positions)
- Friendly positions (PPLI data is usually reliable)
- Early warning of new threats appearing
Don't trust it for:
- Precise targeting (always refine with your own radar)
- Altitude data on surveillance tracks (can be inaccurate)
- Stale tracks that haven't updated in over 30 seconds
- Anything in a high-jamming environment
Common Datalink Failures and Troubleshooting
Problem: SA page is empty.
- Check INS alignment status — is it in NAV mode?
- Is the MIDS LVT knob ON (F-16) or MIDS knob ON (F-18)?
- Did you enable MIDS on the DLNK/DATA page?
Problem: You can see AWACS tracks but not your wingman.
- Verify both aircraft are on the same MIDS channels (Viper) or network number (Hornet).
- Ensure each aircraft holds a unique flight position (no duplicates).
- Check that your wingman's MIDS is actually on.
Problem: Wingman shows up but their tracks don't appear.
- The wingman may not have you listed as a team member (the sharing goes both ways).
- Their radar might not be active or in a mode that shares tracks.
Problem: Tracks appear and then vanish repeatedly.
- This is often a network/server issue. DCS multiplayer datalink can be inconsistent.
- Check if the disappearing tracks are from a single donor — they may be cycling their radar.
Common Mistakes
Even experienced DCS pilots make these errors. Check yourself against this list:
-
Not waiting for INS alignment. You rush to the runway, get airborne, and wonder why your SA page shows nothing. Your INS needs to reach NAV before datalink functions. Every time.
-
Mismatched channels or duplicate flight positions. Your flight is on the wrong Fighter channel, or two pilots both set themselves as position 2. Either way you go invisible to each other. Double-check channels and positions by reading them back over comms.
-
Not checking IFF before shooting. You see a contact on the SA page marked unknown, your radar locks it, you fire. It was a friendly whose transponder was off. Always interrogate. Always.
-
Trusting stale tracks. A track on the SA page shows a bandit at your 2 o'clock. You turn to engage. But that track is 45 seconds old and the bandit has already turned south. Use stale data for awareness, not for commitment.
-
Forgetting to turn on MIDS. You configure every channel and flight position perfectly, but the MIDS radio itself is off. The physical knob matters as much as the software page.
-
Ignoring the SA page entirely. Some pilots get so focused on their radar display that they never check the SA page. You lose the big picture. Discipline yourself to scan the SA page every 15-20 seconds, the same way you'd scan instruments.
-
Not coordinating before takeoff. You jump on a server, join a flight, and start taxiing without agreeing on datalink channels, flight positions, frequencies, or formations. The result is four aircraft flying independently in the same airspace — worse than useless, because you now assume coordination that doesn't exist.
-
Flying without AWACS awareness. Even if you don't use voice comms with AWACS, the AI AWACS is feeding your SA page. If you see surveillance tracks appearing, that's AWACS giving you free information. Pay attention to it.
The core principle is simple: datalink gives you awareness, but it requires discipline. Configure it correctly, verify it works, check it regularly, and never trust it blindly. It's a tool, not a replacement for your own sensors and judgement.