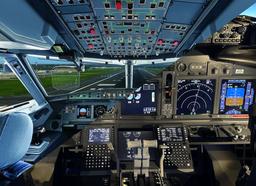
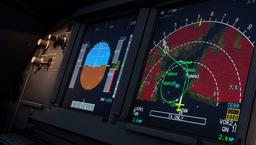
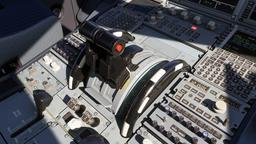
You've mastered the cold and dark startup. You can program the MCDU, fly a SID, and land an ILS approach without breaking a sweat. So now what?
Now things break.
Not yet comfortable with the MCDU? Before you tackle failures, nail the basics on our free A320 MCDU Trainer — guided scenarios for INIT, route entry, and performance setup in your browser, no sim required.
The Fenix A320 simulates over 200 individual failures — from a single fuel pump giving up to a complete dual-engine flameout. It's one of the most comprehensive failure systems in any flight simulator addon, and most people never touch it. That's a shame, because handling emergencies is where you stop being someone who follows checklists and start becoming someone who actually understands the aircraft.
This guide walks you through four failure scenarios that every sim pilot should practice. For each one, we'll cover exactly how to set it up in the Fenix EFB, what the aircraft does when it fails, what the ECAM tells you to do, and — just as importantly — the psychology of keeping your head when a red warning fills the screen and a siren is screaming at you.
A note on realism: Everything in this guide is for flight simulation. The procedures are based on real A320 ECAM flows and Airbus documentation, but this is not real-world pilot training. Real emergencies involve crew coordination, company SOPs, and split-second decisions with lives at stake. In the sim, you get to pause, restart, and try again. Use that luxury.
How the Fenix Failure System Works
Before we break anything, let's understand how to break things deliberately. The Fenix A320 gives you two ways to trigger failures:
Method 1: Manual Failures via the EFB
Open the EFB (the tablet on the left side of the cockpit) and navigate to the Failures app. You'll see a categorised list of every system on the aircraft — electrical, engines, hydraulics, flight controls, navigation, and more.
Click on any item to set it up. You get two options:
- Failed — the component breaks immediately when you press "Apply Changes"
- Arm Failure Condition — sets a trigger so the failure happens at a specific moment
Armed failures are where the real training value lives. You can trigger a failure based on:
| Trigger | What It Does | Best For |
|---|---|---|
| Above IAS | Fails when you exceed a speed | Cruise failures |
| Above Alt AMSL | Fails above a set altitude | Climb-out scenarios |
| Below Alt AMSL | Fails below a set altitude | Approach emergencies |
| After Event | Fails at V1, on takeoff, or on landing | Engine failures at the worst moment |
| After Time | Fails after a set number of seconds | Surprise factor |
The EFB uses colour-coded indicators — green means healthy, orange means armed, red means failed. You can filter the list to show only armed or failed items.
Method 2: Random Failures via the MCDU
For a more realistic experience, go to MCDU MENU → Config → Random Failures. Here you can configure:
- Whether failures are limited to survivable ones (you can still make it to a divert airport) or include catastrophic failures
- Whether to use realistic failure rates or an accelerated rate where failures are significantly more likely to occur
This is excellent for long flights where you want genuine surprise. You won't know what's going to fail or when. But for learning, stick with the EFB method — you need to know what's coming so you can study the correct response.
The Maintenance System
After a failure, you don't need to reload the aircraft. Go to MCDU MENU → Config and use the maintenance function. This simulates a maintenance team coming to fix the aircraft, resetting any failures so you can go again immediately.
Before You Start: Understanding ECAM Philosophy
The A320's ECAM (Electronic Centralised Aircraft Monitor) is fundamentally different from how Boeing handles emergencies. In a Boeing, the crew grabs the Quick Reference Handbook and works through a paper checklist. In an Airbus, the aircraft tells you what to do.
When something fails, the ECAM:
- Displays the failure title on the upper ECAM screen in red (warnings) or amber (cautions)
- Lists the required actions underneath, in blue (automatic) or white (manual, requiring pilot input)
- Shows affected systems on the lower ECAM synoptic page
- Generates a STATUS page with implications for landing (approach speed corrections, landing distance, systems lost)
Your job is to follow the ECAM actions from top to bottom, pressing the CLR button after each completed procedure to move to the next one. The aircraft has already diagnosed the problem and is telling you the fix. You just need to execute it — calmly, accurately, and in order.
But there's a critical exception: memory items. For a handful of specific emergencies, the situation is so time-critical that you must act from memory before reading the ECAM. We'll encounter two of them in this guide.
| A320 Memory Items |
|---|
| Crew Incapacitation |
| Stall Recovery / Stall Warning at Lift-Off |
| Windshear / Windshear Ahead |
| TCAS Resolution Advisory |
| EGPWS Pull Up |
| Loss of Braking |
| Emergency Descent (Rapid Decompression) ← covered below |
| Unreliable Speed Indication ← covered below |
Scenario 1: Engine Failure After V1
This is the scenario every pilot trains for first, because it combines high workload with low altitude and no room for hesitation. You're accelerating down the runway, you've passed V1 (the speed beyond which you're committed to fly), and an engine quits.
Setting It Up
- Open the EFB → Failures app
- Find Eng 1 failure (or Eng 2 — try both eventually)
- Select Arm Failure Condition
- Choose After Event → V1
- Press Apply Changes
Now set up a normal flight. Program the MCDU, get your takeoff speeds, taxi to the runway. The failure will trigger the instant you pass V1.
What Happens
The moment the engine fails, several things hit you simultaneously:
- Asymmetric thrust — the aircraft yaws towards the dead engine. With full takeoff thrust on one side and nothing on the other, the yaw is significant
- ECAM warnings —
ENG 1(2) FAILappears in amber on the upper ECAM - Master Caution — the amber MASTER CAUT light illuminates with a single chime
- Performance loss — you've lost roughly half your thrust. The aircraft can still fly and climb, but everything happens more slowly
The Psychology: Aviate, Navigate, Communicate
Here's where most sim pilots go wrong. The engine fails, and they immediately look at the ECAM. They start reading procedures while the aircraft is 50 feet off the ground, drifting off the runway centreline, with the gear still down.
Don't do this.
The golden rule, drilled into every real-world pilot, is: Aviate, Navigate, Communicate — in that order.
-
Aviate — fly the aircraft. Control the yaw with rudder. Maintain runway heading. Rotate at VR, pitch to 12.5° (the SRS flight director will guide you). Positive rate — gear up. This is your only job until the aircraft is climbing safely.
-
Navigate — once you're established in a stable climb, maintain the SID or runway heading as appropriate. You can engage the autopilot to free your brain for the ECAM work, but you must stabilise and trim the rudder first — use the beta target on the PFD to centre the sideslip indicator, then the autopilot will handle single-engine flight well.
-
Communicate — in the real world, you'd tell ATC. In the sim, you can skip this, but if you're on VATSIM, declare an emergency.
Do not touch the ECAM until you are above 400 feet AGL, in a stable climb, with the aircraft cleaned up. This is not optional — it's the standard Airbus procedure. The ECAM actions can wait. The ground cannot.
The ECAM Procedure
Once you're stable and above 400ft, work the ECAM:
| Step | Action | Why |
|---|---|---|
| 1 | ENG MODE SEL → IGN | Switches to continuous ignition for automatic relight |
| 2 | THR LEVER (affected) → IDLE | Reduces fuel flow to the dead engine |
| 3 | Wait 30 seconds | Allows automatic relight attempt |
| 4 | If no relight: ENG MASTER (affected) → OFF | Secures the engine — shuts fuel valves |
| 5 | Press CLR on ECAM | Clears the procedure, shows STATUS page |
The STATUS page will tell you your new limitations: maximum altitude, approach speed corrections, and any systems you've lost with that engine.
What to Do Next
Fly a single-engine approach. Once trimmed, the aircraft handles it well — the autopilot compensates for asymmetric thrust, and the flight directors give you accurate guidance. Land normally, but be aware your go-around performance is significantly reduced. Commit to the landing.
Practice tip: Run this scenario 5 times. The first time, you'll fumble. By the fifth, your scan pattern — fly the aircraft, check the climb, then work the ECAM — will be automatic. That's the goal.
Scenario 2: Engine Fire
An engine failure is bad. An engine fire is worse. The engine isn't just dead — it's burning, and you need to shut it down, isolate it, and discharge a fire extinguisher, all while keeping the aircraft flying. The ECAM procedure is longer, the stakes feel higher, and the continuous warning chime adds genuine stress.
Setting It Up
- Open the EFB → Failures app
- Find Eng 1 fire extinguished with 1 bottle (start with this — it's extinguishable)
- Choose when to trigger it:
- After Event → Takeoff for a departure fire
- Above Alt for a cruise fire
- After Time for a surprise
- Press Apply Changes
Once you're comfortable with extinguishable fires, try Eng 1 inextinguishable fire. This forces you to discharge both bottles and deal with a fire that won't go out — which changes your landing priority dramatically.
What Happens
ENG 1(2) FIREappears in red on the upper ECAM — this is a Level 3 warning, the highest priority- Master Warning — the red MASTER WARN light flashes with a continuous repetitive chime (CRC). This is loud and deliberately stressful
- Fire warning lights — the
ENG FIREpushbutton on the overhead FIRE panel illuminates red, and so does theFIRElight beside that engine's master switch on the centre pedestal
The Psychology: The Siren Problem
The continuous chime is designed to demand your attention, and it works. In the sim, your first instinct will be to make it stop. That instinct is correct — but the way you make it stop matters.
Do not press random buttons to silence the alarm. Pushing the ENG FIRE pushbutton as part of the procedure silences the aural warning, but its red light stays on until the fire is actually out, whatever position the pushbutton is in. If you push it too early, before securing the engine, you've done the steps out of order and may miss critical actions.
Take a breath. The fire isn't going to destroy the aircraft in the next 10 seconds. You have time to do this properly.
Real-world pilots describe fire procedures as requiring "deliberate haste" — move with purpose but not with panic. Every action gets a crosscheck: you say what you're about to do, confirm it's the right action, then do it. In the sim, say it out loud. "Engine master one — confirm — off." It sounds silly alone in your room, but it builds the habit of verification.
The ECAM Procedure
Engine fire is not a memory item, but Airbus states: "Do not wait to apply the engine fire procedure." Work through the ECAM immediately:
| Step | Action | Why |
|---|---|---|
| 1 | THR LEVER (affected) → IDLE | Reduces fuel feeding the fire |
| 2 | ENG MASTER (affected) → OFF | Closes fuel valves, shuts down the engine |
| 3 | ENG FIRE P/B (affected) → PUSH | Silences the aural fire warning, arms fire bottles, closes LP fuel valve, hydraulic and bleed valves, cuts FADEC power, deactivates IDG — fully isolates the engine |
| 4 | Wait 10 seconds | Allows engine windmilling to slow, improving extinguisher effectiveness |
| 5 | AGENT 1 → DISCH | Discharges first fire bottle into the engine nacelle |
| 6 | Wait 30 seconds | Check if FIRE warning clears |
| 7 | If fire persists: AGENT 2 → DISCH | Discharges second (and final) fire bottle |
What the ENG FIRE pushbutton actually does (all of this happens with one press):
- Silences the aural fire warning
- Arms the fire extinguisher squibs
- Closes the low-pressure fuel valve
- Closes the hydraulic fire shut-off valve
- Closes the engine bleed valve
- Closes the pack flow control valve
- Cuts FADEC power
- Deactivates the IDG (Integrated Drive Generator)
It's the "isolate everything" button. That's why it's guarded — you don't want to push it accidentally.
Extinguishable vs. Inextinguishable
If the fire goes out after AGENT 1, the FIRE warning clears, the red fire lights go out, and you continue with a normal single-engine diversion. If you set up an inextinguishable fire, the warning persists after both agents. In that case, you need to land as soon as possible — the nearest suitable runway becomes your only priority.
Scenario 3: Rapid Decompression
You're at FL370, halfway through a cruise, and the cabin altitude starts climbing rapidly. The oxygen masks drop. The ECAM goes red. This is one of the most dramatic emergencies in aviation, and it's one of the A320's memory item scenarios — meaning you act first, read later.
Setting It Up
- Open the EFB → Failures app
- Find Rapid decompression
- Arm it with Above Alt AMSL → 30000 (or whenever you want the surprise)
- Press Apply Changes
Alternatively, use After Time with a long delay so you forget it's coming.
What Happens
CAB PR EXCESS CAB ALTappears in red — Level 3 warning- Master Warning with continuous chime
- Cabin altitude climbs rapidly — visible on the ECAM PRESS page
- In the real aircraft, there would be a loud bang, fog in the cabin from condensation, and loose items flying around. The sim gives you the warnings and instruments — you have to imagine the chaos.
The Psychology: Time of Useful Consciousness
This scenario has a real-world physiological constraint that makes it uniquely urgent. At FL370, a rapid decompression gives you roughly 15-30 seconds of useful consciousness without supplemental oxygen. That's not a typo — rapid decompression cuts the normal time of useful consciousness by roughly half compared to a slow leak. After those seconds are up, hypoxia degrades your thinking, your vision narrows, and you lose the ability to act rationally — often without realising it.
In the sim, you won't experience hypoxia. But you should still treat this with the urgency it demands, because the habit matters. When the warning fires:
- Mask first. Before anything else. Before looking at the ECAM. Before talking to ATC. Mask on, oxygen flowing, communication established through the intercom.
- Then descend. Every second at high altitude is a second your passengers are breathing thin air. The passenger oxygen masks deploy automatically at 14,000ft cabin altitude (you can deploy them earlier), but the chemical oxygen generators in the cabin only last about 13-22 minutes. You need to be at a breathable altitude before they run out.
This is why rapid decompression has memory items — there's no time to read.
The Memory Items
These are done entirely from memory, before touching the ECAM:
Your actions (as PF — Pilot Flying):
| Step | Action |
|---|---|
| 1 | CREW OXY MASKS → ON, establish intercom communication |
| 2 | SPEED BRAKES → FULL |
| 3 | Thrust → IDLE |
| 4 | Pitch for maximum appropriate speed, target FL100 |
PM (Pilot Monitoring) actions — do these yourself in the sim:
| Step | Action |
|---|---|
| 1 | SIGNS → ON (seatbelt signs) |
| 2 | ENG MODE SEL → IGN (continuous ignition — engines can flame out in thin air) |
| 3 | Notify ATC — EMERGENCY DESCENT |
| 4 | SQUAWK → 7700 |
| 5 | If cabin altitude exceeds 14,000ft: PAX OXY MASKS MAN ON → PUSH |
The Descent
You're aiming for approximately 7,000 ft/min descent rate — idle thrust, full speedbrake, high speed. The autopilot can handle this; dial FL100 (or your Minimum Off-Route Altitude if terrain is higher) into the FCU, pull the altitude knob, and let the aircraft descend.
Why FL100? Below 10,000 feet, the atmospheric pressure is sufficient for normal breathing without supplemental oxygen. It's the universal "safe altitude" for decompression events.
Once level at FL100, work through the remaining ECAM actions and plan your diversion. Check the STATUS page for any system limitations caused by whatever broke the pressure vessel.
Practice Tip
The memory items are the hard part. Run through them on the ground — sit in the cockpit, say the items out loud, touch the switches. Do this five times before you even attempt the scenario in flight. When the warning fires at FL370, your hands should know where to go without your brain having to search.
Scenario 4: Unreliable Airspeed
This is the most psychologically challenging emergency on this list. There's no bang, no fire, no obvious drama. Instead, your instruments start lying to you — and you might not immediately realise it.
Unreliable airspeed scenarios have caused real-world accidents, most notably Air France 447 in 2009, where pitot tube icing led to conflicting airspeed indications that the crew couldn't resolve. The A320's procedures for this scenario were significantly revised after that accident.
Setting It Up
- Open the EFB → Failures app
- Find Pitot blocked Capt (or F/O, or Standby — or multiple for maximum confusion)
- Arm with Above Alt AMSL or After Time
- Press Apply Changes
For a more advanced scenario, block two pitot sources simultaneously. This makes it harder to identify which indication is correct.
What Happens
The symptoms depend on which pitots are blocked and when:
- Speed indications diverge — Captain's PFD shows one speed, F/O's shows another
NAV ADR DISAGREEmay appear in amber — or it may not. If all pitots are blocked identically (rare but possible), the ECAM may show nothing at all- Autopilot disconnect — the flight control laws may degrade as the aircraft detects conflicting air data
- Stall warnings or overspeed warnings may trigger — and they may be false. This is the dangerous part: the aircraft might tell you you're about to stall when you're actually flying too fast, or vice versa
The Psychology: When Your Instruments Lie
Every other emergency on this list has a clear signal: an engine stops, a fire starts, the cabin depressurises. You know what's wrong, and the ECAM tells you what to do.
Unreliable airspeed is different. The problem is uncertainty. You can't trust your primary flight instrument — the one you've been scanning every few seconds for the entire flight. Your training, your instincts, and your scan pattern all rely on speed indications being accurate. When they're not, you can find yourself chasing airspeed — pitching up because the display says you're too fast, which makes you actually slow, which triggers a stall warning, which makes you pitch down...
The Air France 447 crew entered this spiral. They had three minutes at altitude with degraded instruments and couldn't establish basic aircraft control. The Airbus procedure now exists specifically to break that spiral.
The antidote is brutally simple: ignore the airspeed. Fly pitch and power.
An A320 at a given weight, in a given configuration, at a given altitude, will fly at a predictable speed if you set a known pitch attitude and a known thrust setting. You don't need the airspeed indicator to fly the aircraft. You need pitch (attitude indicator — driven by ADIRS, not pitot tubes) and power (N1 gauges — always reliable).
The Memory Items
Unreliable airspeed is one of the A320's memory items. Act first:
| Step | Action | Why |
|---|---|---|
| 1 | AP → OFF | The autopilot is using bad data — disconnect it |
| 2 | FD → OFF | The flight directors are using bad data too — remove them from your scan |
| 3 | A/THR → OFF | Autothrust is chasing an airspeed that might be wrong |
| 4 | Set pitch and thrust from memory | See table below |
Pitch and Thrust Reference Values
These values give you a safe, flyable speed without needing the airspeed indicator:
| Flight Phase | Configuration | Pitch | Thrust (N1) |
|---|---|---|---|
| After takeoff | Gear up, Flaps 1 | ~15° | TOGA/FLX |
| Climb | Clean | ~5° | CLB detent |
| Cruise (below FL240, mid-weight) | Clean | ~2° | ~60% N1 |
| Cruise (FL300+, mid-weight) | Clean | ~2° | ~80% N1 |
| Approach | Config 3 / Full | ~3-4° | ~55% N1 |
These are approximate — the exact values depend on weight and altitude. The QRH (Quick Reference Handbook) has detailed tables, and the Fenix models this accurately.
After the Memory Items
Once you're flying on pitch and power:
- Crosscheck all three airspeed sources — Captain PFD, F/O PFD, and the Standby instruments (the small round instruments in the centre of the main instrument panel). The standby instruments have their own independent pitot source.
- Identify which ADR is faulty — if two sources agree and one disagrees, the odd one out is wrong
- Turn off the faulty ADR —
ADR 1,2, or3switch to OFF on the overhead panel - If all sources are suspect — turn all ADRs OFF. This activates the BUSS (Back-Up Speed Scale) on both PFDs. BUSS derives speed from angle of attack rather than pitot pressure, so it works even with completely blocked pitots. Note: BUSS only functions below FL250 — it cannot account for Mach effects at higher altitudes, so descend first if you're above that level.
Practice Tip
This scenario rewards repeated practice more than any other. The first time, you'll be overwhelmed — the conflicting indications, the possible stall warning, the urge to chase the speed tape. By the third attempt, you'll have the memory items down, you'll trust pitch and power, and the scenario becomes manageable. That transformation from confusion to confidence is exactly what real pilots experience in the simulator.
The Psychology of Emergency Response
All four scenarios share a common thread: the difference between a good response and a bad one is rarely technical knowledge. It's emotional regulation.
Startle Effect
When a failure triggers — especially one you've armed and forgotten about — your body reacts before your brain does. Heart rate spikes. Attention narrows. Fine motor control degrades. This is the startle effect, and it's the same reaction real pilots experience.
In the sim, you can use this to your advantage. Every time you practice a failure and feel that jolt of surprise, you're training your brain to recognise the startle response and move past it faster. The first engine fire might leave you frozen for 5 seconds. By the tenth, you're reaching for the throttle before the chime finishes its first cycle.
The 5-Second Rule
When a warning fires, give yourself 5 seconds before doing anything. Not 5 seconds of doing nothing — 5 seconds of assessing:
- What is the aircraft doing right now? (Is it flying? Is it turning? Is it descending?)
- What does the ECAM say? (Red or amber? What system?)
- Is this a memory item situation? (Learn the list — see above)
Those 5 seconds prevent reactive mistakes — pressing the wrong fire button, pulling the wrong engine master, or pitching into a stall because a false warning scared you.
Slow Is Smooth, Smooth Is Fast
Every action in an emergency should be deliberate. Call out what you're about to do before you do it — even when you're alone in the sim. "Engine master one — confirm — off." This verbal callout forces your brain to verify the action before your hand executes it. It adds 2 seconds per action. It prevents you from shutting down the wrong engine, which is an error that has caused real-world accidents.
Building Confidence Through Repetition
The real value of the Fenix failure system isn't the adrenaline rush — it's the confidence that comes from having seen the scenario before. When you've handled 20 engine fires, the 21st doesn't scare you. You've seen the ECAM, you know the flow, and your hands know where to go.
That confidence is the entire point of simulator training — real and virtual alike.
What to Practice Next
Once you're comfortable with these four scenarios, the Fenix gives you plenty more to explore:
- Dual hydraulic failure — combine Blue and Green system leaks for degraded flight controls
- Alternate law / Direct law — the Fenix can simulate degraded flight control laws, removing the normal protections that prevent stalls and overstress
- Landing gear gravity extension — arm a gear-locked-up failure and practice the gravity gear extension procedure
- Dual engine failure — the ultimate scenario. Both engines gone. You're a glider now.
- Random failures — once your individual procedures are solid, switch to the MCDU random failure mode and deal with whatever the aircraft throws at you
The Fenix A320 has over 200 failures available. You won't run out of things to break.