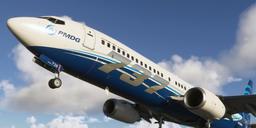
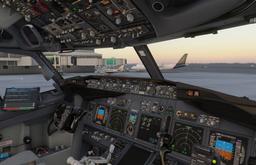
Dead cockpit. Nothing works. You just dropped serious money on the PMDG 777-300ER — arguably the most expensive addon in Microsoft Flight Simulator — and you're sitting at gate B22 at JFK staring at a wall of blank screens and unlabelled switches thinking "what have I got myself into."
Everyone who flies this aircraft starts exactly here.
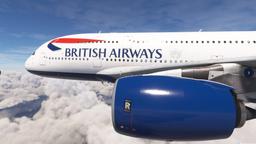
Here's the thing about the Triple Seven: it earns that price tag. Two GE90-115B engines — which held the world record for commercial jet engine thrust until the 777X's GE9X took it — three independent hydraulic systems, a fault-tolerant air data inertial reference unit, a triple-channel autopilot for CAT III autoland, an FMC built for Atlantic step climbs, and a fuel jettison system for the day it all goes wrong. The 777-300ER is Boeing's long-haul workhorse widebody. It was built for 14-hour ocean crossings, and the cockpit doesn't let you forget that for a second.
This guide walks you from that dead cockpit to ready for takeoff. Every switch, in order, with the reasoning behind it. Follow it top to bottom and you'll get airborne — and more importantly, you'll actually understand what you just did.
Quick note: this is written for MSFS 2024, but the PMDG 777 is sold with both MSFS 2020 and MSFS 2024 versions in the one purchase. The guide covers the 777-300ER, though the startup on the -200ER and -200LR is virtually the same. The -200ER comes with a choice of GE90-94B, PW4090 or Rolls-Royce Trent 800 engines, and the -300ER's longer fuselage means tail strikes are a bigger worry during rotation. But the switches, FMC pages, and sequence? Essentially the same.
Affiliate disclosure: This guide contains affiliate links. If you purchase through these links, SimTuts earns a small commission at no extra cost to you. We only recommend products we genuinely believe improve the flight sim experience.
Before You Touch Anything: Flight Planning
Long-haul flights live or die on planning. Don't skip this.
SimBrief is your best friend here. Generate an OFP (Operational Flight Plan) for your route. You'll want:
- Route — waypoints and airways
- Cruise altitude (and step climbs if you're going far enough)
- Fuel figures — block fuel, trip fuel, reserves
- Weights — ZFW and payload
- V-speeds and takeoff data (SimBrief calculates these, or use the performance tool on PMDG's Universal Flight Tablet if you want to be precise)
Loading the aircraft happens inside the sim. Fuel and payload are set from the CDU (MENU, then FS ACTIONS, then FUEL and PAYLOAD) or from PMDG's Universal Flight Tablet, which also pulls your SimBrief plan and handles ground connections, doors and service vehicles. The PMDG Ops Center you installed with the aircraft is a desktop app — it keeps the 777 updated and adds liveries, but you don't use it mid-flight.
Write down your ZFW, block fuel, cost index, and cruise altitude. You'll need all of them for the FMC.
Phase 1: Electrical Power
Everything starts here. No power, no aircraft.
Step 1: Battery Power
Find the battery switch on the overhead electrical panel.
- Battery switch — push it ON
The cockpit stirs. You'll hear an electrical hum, a few instruments flicker on, and the overhead panel lights up with warning lights. Don't worry about those — the aircraft is just complaining that it has no real power source yet. Battery alone isn't enough to run much of anything.
Step 2: Standby Power — Leave It Alone
If you've come from the 737 you'll go looking for a standby power switch next to the battery. On the 777 there isn't one in the normal flow. The STANDBY POWER switch lives on the overhead maintenance panel, is marked for ground operation only, and sits guarded in AUTO — where it transfers the standby buses to battery if normal AC power is lost. Check the guard is closed and move on.
Step 3: External Power (GPU)
First make sure ground power is actually connected: in the PMDG 777 that's the CDU (MENU, FS ACTIONS, GROUND CONNECTIONS) or the Universal Flight Tablet. The ground crew won't connect anything until the wheel chocks are set. The 777 has two external power receptacles, PRIMARY and SECONDARY, each with its own switch and AVAIL light.
- PRIMARY EXT PWR — push ON when AVAIL is lit
- SECONDARY EXT PWR — push ON as well if its AVAIL is lit
Now we're talking. The six main displays — both PFDs, both NDs, the upper EICAS and the lower-centre multifunction display — all start their boot sequence. The overhead lights up fully. You'll see a wall of amber and white lights, which looks alarming the first time but is completely normal. Everything's just reporting status.
Step 4: Bus Ties and Generators
Check that the bus tie switches are in AUTO (they usually are by default), and the generator switches are on:
- BUS TIE (L) — AUTO
- BUS TIE (R) — AUTO
- GEN CTRL (L and R) and BACKUP GEN (L and R) — ON (their OFF lights stay lit until the engines run)
The bus ties let power flow between the left and right main buses so the GPU feeds both sides of the cockpit.
The Overhead Panel at First Power
Yeah, it's a lot of lights. Don't panic. The 777's overhead is massive compared to a 737 or A320 — widebody cockpit, more systems — but most switches are already where they need to be from the cold-and-dark state. The lights extinguish one by one as you work through the startup. Think of it as a progress bar.
Phase 2: ADIRU Alignment
Start this now. Seriously, right now. Alignment is the most time-sensitive item in the entire startup.
This is where the 777 differs most from older Boeings. There are no rows of IRS mode selectors. The 777 has one Air Data Inertial Reference Unit (ADIRU) with a single ON/OFF switch. It is built internally fault-tolerant and fully redundant, and it's backed up by a separate SAARU (Secondary Attitude and Air Data Reference Unit), which can supply attitude and air data but not navigation position. The FMC needs the ADIRU aligned before it has inertial navigation, and on PMDG's realistic setting that takes about ten minutes. Everything else you're about to do fits into that window, which is why it goes first.
Step 5: ADIRU Switch ON
Find the ADIRU switch on the overhead, on the first panel of the flow alongside the flight computer switches.
- ADIRU switch — push ON
The EICAS shows the memo ADIRU ALIGN MODE, and attitude and heading drop off the PFDs until alignment is done. The aircraft must not move until it finishes.
PMDG models this properly. Try to fly before alignment finishes and you'll have no heading, no attitude on the PFDs and no FMC navigation. It's a mistake you only make once.
You've got options, set in the CDU under MENU, PMDG SETUP, then the IRS OPTIONS page of the simulation settings:
- REALISTIC — about 10 minutes, during which the aircraft can't be moved.
- FAST (30 SEC) — still makes you respect the alignment, without the wait.
- INSTANT — just as it says.
If you're still learning the startup flow, use a faster setting. No shame in it. Once you're comfortable, try the realistic timing and you'll notice something satisfying: the alignment finishes right around the time you've finished programming the FMC.
When you're 7 hours over the Pacific with no ground-based navaids, redundancy in the inertial platform matters. The 777 builds that redundancy inside the one ADIRU, with the SAARU as an independent backup for the flight instruments.
Phase 3: Overhead Panel Scan
The ADIRU is aligning, GPU is providing power. Now work through the overhead panel. The flow runs top to bottom, left to right, so nothing gets skipped.
Step 6: Hydraulic System
Three independent hydraulic systems on the 777: Left, Centre, and Right. They're built differently:
- Left and Right — each has an engine-driven primary pump and an electric demand pump
- Centre — two electric primary pumps (C1 and C2) and two air-driven demand pumps
For now, set the panel to its preflight state:
- L and R ENG primary pumps — ON (their FAULT lights stay on until the engines run)
- C1 and C2 ELEC primary pumps — OFF
- All demand pump selectors — OFF
You'll bring the electric and air pumps in just before engine start, in a specific order (Step 28).
Unlike the A320's colour-coded Green/Blue/Yellow system, the 777 names its systems by position. Flight control components are spread across all three, so that any one system can still give adequate controllability. That kind of redundancy is exactly what ETOPS over oceans demands.
Step 7: Fuel Pumps
Fuel panel on the overhead:
- All fuel pump switches — OFF for now
The real procedure leaves them off until Before Start (Step 28). When the APU runs it gets its fuel automatically — the left forward pump runs on its own when the APU selector is on.
Step 8: Window Heat and Probe Heat
Window heat stops icing and fogging on the cockpit windows:
- Window heat (L side, L fwd, R fwd, R side) — all ON
And probe heat? Go looking for it and you won't find it. The 777 has no probe heat switches: the pitot probes heat automatically on the ground as soon as either engine is running (at reduced power, to avoid overheating) and at full power in flight. The angle-of-attack sensors heat whenever an engine is running, and the TAT probe in flight only. Nothing for you to do.
While you're on this part of the panel:
- Wing anti-ice — AUTO
- Engine anti-ice — AUTO
Step 9: Passenger Signs and Lights
- Seatbelt signs — ON (or AUTO)
- No smoking / No electronics — as your airline does it (AUTO or ON)
- NAV lights — ON
- Logo lights — your call (illuminates the tail, looks great at night)
- Wing lights — your call (handy for night walkaround checks)
Step 10: Air Conditioning
Simpler than the A320 here — no flow selector knob. Pack switches go to AUTO and the system handles airflow itself.
- Pack switches (L and R) — AUTO (OFF if you're using a ground air-conditioning unit)
- Trim air — ON
- Recirc fans (upper and lower) — ON (OFF with a ground air-conditioning unit)
- Equipment cooling — AUTO
- Outflow valve switches — AUTO, landing altitude selector pushed IN
The packs need bleed air, which you don't have yet from the GPU alone. Once you start the APU, they'll come online on their own.
Step 11: Bleed Air
- Isolation valve switches — AUTO
- Left engine bleed — ON
- Right engine bleed — ON
- APU bleed — AUTO (it stays there; the valve looks after itself)
Step 12: Fire Protection
Quick scan:
- Both engine fire switches — in, fire lights out
- APU fire switch — in
- Cargo fire ARM switches — OFF, DISCH light out
Nothing to change. Move on.
Phase 4: FMC Programming
The FMC is the brain of the operation. Navigation, performance calculations, fuel predictions, thrust management — it all runs through here. If you've used a 737 CDU before, the 777's FMC will feel familiar but with more depth. More pages, more options, and long-haul features like step climbs and cruise-altitude planning.
There are three CDUs — left, right and centre — all driving the same flight plan, so program from whichever side you prefer.
For a proper deep-dive into FMC programming, we've got a separate FMC Programming Guide. What follows here covers the essentials.
Step 13: POS INIT (Position Initialisation)
Hit the INIT REF key on the CDU, then select POS INIT (line select key 6R on the IDENT page).
- Enter your position into SET INERTIAL POS — normally that's the GPS position, or in the PMDG you can copy LAST POS into it
- Enter the reference airport and gate if you want the cross-check
This is the position the ADIRU aligns to, so it isn't optional: the ADIRU needs a present-position entry to finish aligning. It takes five seconds.
The 777's CDU is close enough to the 737's that the page flow transfers directly, and our free browser 737 CDU trainer is the nearest unit you can practise on without loading a sim: POS INIT — Aligning the IRS is this exact step.
Step 14: ROUTE Page
Press RTE (or find it through INIT REF).
| Field | What to Enter | Example |
|---|---|---|
| ORIGIN | Departure ICAO | KJFK |
| DEST | Arrival ICAO | EGLL |
| FLT NO | Your flight number | BAW178 |
| CO ROUTE | Company route (if saved) | — |
After entering origin and destination, hit ACTIVATE (prompt at 6R) then EXEC to confirm. Now you can enter airways and waypoints.
Building the route manually:
- First waypoint or airway goes on line 1L
- For airways — airway name on the left, exit waypoint on the right of the same line
- Keep adding down the page
- NEXT PAGE if your route spills over (it usually will on long-haul)
Or just uplink from SimBrief. In the PMDG 777, ROUTE REQUEST on the RTE page pulls your SimBrief plan straight in; load it, ACTIVATE, EXEC, then accept the PERF INIT uplink and request wind data from the RTE DATA page. Honestly, for a 777 doing KJFK-EGLL with a route that's 40+ waypoints, manual entry is painful. Use the uplink.
Step 15: DEPARTURES Page
From the ROUTE page or DEP/ARR key:
- Pick your departure runway
- Pick your SID
- Pick the transition if there is one
- EXEC to confirm
The FMC builds the departure into your route — waypoints, altitude constraints, speed restrictions, everything.
If steps 14 and 15 are where you usually stall, ROUTE Page Basics drills the same sequence on the CDU trainer — free, with feedback on each entry rather than a silent refusal — and the Premium SID & STAR: KJFK → KBOS adds the departure and arrival on top.
Step 16: PERF INIT (Performance Initialisation)
Press INIT REF, then PERF INIT page.
| Field | What to Enter | Example |
|---|---|---|
| ZFW | Zero Fuel Weight (thousands) | 195.2 |
| RESERVES | Reserve fuel | 8.5 |
| COST INDEX | 0-9999 | 85 |
| CRZ ALT | Cruise altitude | FL350 |
| STEP SIZE | Step climb increment (optional) | — |
ZFW is your aircraft weight without fuel — grab it from your SimBrief OFP or the FS ACTIONS payload page. The 777-300ER's empty weight in a typical three-class layout is around 168,000 kg and its maximum zero fuel weight is about 237,700 kg, so a loaded ZFW usually lands somewhere between 190,000 and 235,000 kg depending on passengers and cargo.
Cost Index on the 777 goes from 0 to 9999, which is a much wider range than you may be used to. Some rough guidelines:
- Long-haul economy operations: 50-100
- Long-haul premium: 80-150
- Don't overthink it — 85 works fine if you're not sure
CRZ ALT — take it from your OFP. For a typical transatlantic flight that's somewhere in the FL350-FL390 band depending on weight. Heavier = lower.
Step 17: THRUST LIM Page
INIT REF, then the THRUST LIM page. (The 737 calls this page N1 LIMIT; the 777 doesn't.)
Here's where you set your takeoff thrust:
- Full rated thrust — TO, maximum everything
- Assumed temperature — enter a temp higher than actual OAT in the SEL field to trick the engine controls into reducing thrust
- Fixed derates — TO 1 and TO 2, if your aircraft's options include them (in the PMDG they're an FMS option under PMDG SETUP)
For a standard departure with a decent runway length, assumed temperature is the way to go. Reduces wear and noise. Just make sure the assumed temp is higher than the actual outside temperature (otherwise it won't do anything).
Step 18: TAKEOFF REF Page
INIT REF, then TAKEOFF REF.
| Field | What to Enter | Example |
|---|---|---|
| FLAPS | Takeoff flap setting | 5 |
| CG | Centre of gravity (%) | 25.0 |
| V1 | Decision speed | 149 |
| VR | Rotation speed | 154 |
| V2 | Takeoff safety speed | 161 |
Flap settings for takeoff:
| Flap Setting | Slat Position | Flap Position | When You'd Use It |
|---|---|---|---|
| 1 | Midrange (sealed) | Retracted | Not a valid takeoff setting — Flap 1 is a slats-only configuration used for manoeuvring, not takeoff. Only 5, 15, and 20 are valid for takeoff. |
| 5 | Midrange (sealed) | 5° | Light weight, plenty of runway |
| 15 | Midrange (sealed) | 15° | A common middle choice |
| 20 | Midrange (sealed) | 20° | Heavy weight or shorter runway |
Flaps 5 gives you better climb performance but eats more runway. Flaps 15 gets you off the ground sooner with a slightly shallower initial climb. Your performance calculation picks the setting; don't pick it by habit.
V-speeds: don't guess them. They shift a lot with weight, temperature, altitude, wind and flap setting, and a 777-300ER can weigh up to about 351 tonnes at takeoff. Take them from SimBrief or the tablet's performance tool and enter them — or select the FMC's own — on this page.
Once you've entered the CG, the FMC works out the stabiliser takeoff setting and shows it next to the CG entry. Write it down or remember it — you'll set it with the trim switches later.
Phase 5: MCP (Mode Control Panel) Setup
The MCP sits above the main instrument panel, between the two windscreens. Your primary autopilot interface.
Step 19: Flight Directors
- F/D (Flight Director) — ON on both sides (captain and first officer)
Flight director bars appear on both PFDs. They'll give you pitch and roll guidance through takeoff and climb.
Step 20: Autothrottle
- A/T ARM switches (L and R) — ARM
Armed and ready. It doesn't take over yet — the autothrottle engages when you push a TO/GA switch on the takeoff roll.
Step 21: MCP Speed
- IAS/MACH window — set V2
That's the standard 777 setup, and your before-start checklist will ask you for it.
Step 22: MCP Heading
- HDG/TRK window — set to your runway heading
The 777 uses LNAV for FMC-guided lateral navigation, and you can arm it (and VNAV) on the ground now. Either way, set the heading bug to runway heading as a backup.
Step 23: MCP Altitude
- ALTITUDE window — set your initial cleared altitude (whatever ATC or the SID gives you)
The aircraft won't climb above this value until you dial in something higher. Forgetting to update it after getting a higher clearance is a classic embarrassment — levelling off at 5,000 feet when you've been cleared to FL350.
Step 24: Course Setting
The 777 MCP has no course knobs. If a departure needs a VOR course, you set it on the CDU's NAV RAD page. For an RNAV departure there's nothing to do.
Get flight sim tips in your inbox
New guides, checklists, and tips — no spam. Unsubscribe any time.
Phase 6: APU (Auxiliary Power Unit)
You've been at this for a few minutes now — overhead scan, FMC, MCP. If you're using realistic alignment timing, you're probably about halfway through. Good time to get the APU going.
Step 25: APU Start
The APU selector is on the overhead electrical panel:
- APU selector — rotate to START, then let go
It springs back to ON by itself and the automatic start sequence runs. The APU FAULT light should go out.
Wait for:
- APU RUNNING memo on EICAS
Go refill your coffee.
Step 26: APU Bleed Air
You already left the APU bleed switch in AUTO during the overhead scan, so there's nothing to push. With the packs in AUTO, they come online on APU air by themselves. You've got cabin air now.
Step 27: Disconnect GPU
The APU generator handles electrical power and the APU supplies bleed air now, so you don't need the ground unit anymore:
- EXT PWR — OFF (press to disconnect)
The aircraft is self-sufficient. Then release the ground connections from the CDU or tablet.
Phase 7: Before Engine Start
Step 28: Hydraulic and Fuel Pumps
Now bring in the rest of the hydraulic pumps — in this order:
- Right demand pump — AUTO first, and wait for its FAULT light to go out
- C2, C1 and left demand pumps — AUTO
- C1 and C2 primary pumps — ON
Why the order? Pressurise the right system first. If you don't, hydraulic fluid transfers from the centre system into the right one and overfills it.
Then the fuel:
- Left and right fuel pumps — ON
- Centre fuel pumps — ON only if there's actually fuel in the centre tank
Step 29: Beacon On
- Beacon — ON
Tells ground crew that engines are about to start. In the real world, nobody walks near the aircraft with the beacon flashing.
Step 30: Request Pushback
If you're at a gate, start your pushback. PMDG's own tutorial uses the MSFS default pushback (or an alternative tool you prefer).
You can start engines during the push — normal airline procedure, saves time.
Step 31: Verify Fuel Control Switches
Centre pedestal, find the two fuel control switches (sometimes called engine start levers or cutoff switches):
- Fuel control 1 — verify CUTOFF
- Fuel control 2 — verify CUTOFF
You'll move these to RUN during the start sequence. But not yet.
Phase 8: Engine Start
The 777's normal start is autostart, and it's less hands-on than you might expect. With the AUTOSTART switch on, you select START and move the fuel control switch to RUN — and the engine's EEC introduces fuel and ignition at the right N2, monitors the start, and aborts on its own for a hot start, hung start, no EGT rise or compressor stall. Your job is to watch it, and one thing in particular it does not watch for you: oil pressure.
Which engine first? There's no fixed rule. PMDG's tutorial says the engines can be started in either order, L then R or R then L; your airline's procedure decides. We'll do the right engine first here.
Step 32: Start Engine 2 (Right Engine)
- AUTOSTART switch — verify ON (OFF light out)
- Start selector 2 — rotate to START
The starter air valve opens and the engine begins dry motoring on APU air. Show the secondary engine display on the lower MFD so you can watch N2 and oil pressure.
- Fuel control switch 2 — RUN
With autostart, move it straight to RUN. The EEC holds the fuel and ignition until the right N2, then lights the engine. Now watch it carefully:
| Parameter | What to watch |
|---|---|
| N2 | Steady rise toward idle |
| EGT | Rises after light-off and stays below the red start limit line |
| Oil pressure | Must start rising — autostart does not monitor it |
| Start selector | Returns to NORM by itself near idle N2, when the starter cuts out |
- Wait for stable idle.
Hot start or hung start? Autostart catches these on the ground: it cuts fuel and ignition, motors the engine, and retries. If the third attempt fails it aborts and shows ENG AUTOSTART on EICAS.
No oil pressure? That one's yours. Fuel control switch to CUTOFF.
Step 33: Start Engine 1 (Left Engine)
With engine 2 stable at idle:
- Start selector 1 — START
- Fuel control switch 1 — RUN
- Same monitoring as before
- Wait for stable idle
Step 34: Verify Both Engines
Both engines running and settled:
- N1 and N2: stable, matching each other
- EGT: comfortably within limits
- Oil pressure: normal, both sides
- No unexpected amber or red EICAS messages
- Fuel flow: stable and symmetric
That's a good start. Two GE90s at idle — you can feel the hum even through the sim.
Phase 9: After Engine Start
Engines are alive. Now get the aircraft ready to move.
Step 35: APU Off
Engines are providing bleed air and electrical power now, so the APU can take a rest:
- APU selector — OFF
Turning it off closes the APU bleed valve and starts the shutdown, so the APU bleed switch itself stays in AUTO. You'll hear it spool down. From here the engines supply the electrics, hydraulics and bleed air.
Step 36: Packs and Air Conditioning
- Verify Pack L and Pack R — AUTO (now running on engine bleed)
- Verify isolation valves — AUTO
Cabin air is now running on engine bleed. Nothing to change, just confirm.
Step 37: Anti-Ice
Probe heat already sorted itself out — it came on automatically when the first engine started. Anti-ice depends on conditions:
- Engine anti-ice — AUTO or ON when the total air temperature is 10°C or less and icing conditions exist or are anticipated; switch it on as each engine starts if that's the case
- Wing anti-ice — leave in AUTO. It only works in flight; the system inhibits it on the ground
Step 38: Flight Controls Check
Put the flight controls (FCTL) synoptic on an MFD, then:
- Full left, full right on the control wheel — ailerons and spoilers deflect
- Full forward, full back on the column — elevators move
- Full left rudder, full right rudder — rudder swings (hold the tiller still so the nose wheel doesn't move)
The 777 is a fly-by-wire aircraft — Boeing's first — but it feels nothing like the A320. You keep a conventional control column and wheel that are backdriven by the autopilot. There are no cables to the control surfaces; your inputs go through the Primary Flight Computers (PFCs), which command hydraulic actuators. In pitch the computers fly a C* law and give you speed stability, so you still trim for every speed change as you would in a 737. And unlike Airbus, Boeing lets the pilot push through the protections with enough force. Anyone coming from the A320 will need a flight or two to readjust.
Make sure everything moves correctly and in the right direction on the synoptic.
Hardware note: The 777 uses the same yoke-based controls as the 737, so the same gear works for both. A Honeycomb Alpha yoke maps directly to the real thing — push/pull for pitch, rotation for roll. The Honeycomb Bravo throttle quadrant gives you a proper dual-lever setup with reversers, which matters more on the 777 than you'd expect — the GE90s produce so much thrust that taxi requires a very light touch. And rudder pedals are genuinely valuable here. The 777's wide-track main gear and tiller steering make ground handling a proper skill, especially on tight taxiway turns. For a force-feedback step up, MOZA's AY210 yoke base with the MFY yoke loads the column with real control forces, the MTQ throttle quadrant takes a swappable Boeing-style lever module, and the MRP rudder pedals give you the fine pedal and tiller authority that wide-track gear demands.
Step 39: Trim Set
Set the stabiliser trim to whatever the FMC TAKEOFF REF page told you:
- Stabiliser trim — set with the pitch trim switches on the control wheel (push both halves together; on the ground they move the stabiliser directly). Read the value on the stabiliser position indicators on the aisle stand, where a green band shows the acceptable takeoff range. Rudder and aileron trim — zero.
Get this right. On a heavy widebody, wrong trim means enormous control forces during rotation — and on a 300-tonne aircraft, "enormous" is not an exaggeration.
Step 40: Flaps Set
Move the flap lever to your takeoff setting (5, 15, or 20):
- Check the upper EICAS — flap indicator should show the correct position
- Leading edge slats should be at their midrange takeoff position
Step 41: Autobrake
- Autobrake — set to RTO (Rejected Takeoff)
If you abort the takeoff at high speed, RTO mode slams on maximum braking automatically. Always set this for departure.
Step 42: Transponder
Centre pedestal:
- Dial in your assigned squawk code
- Set mode to TA/RA (Traffic Advisory / Resolution Advisory) when you enter the runway
Phase 10: Taxi
Step 43: Release Parking Brake
- Release the parking brake (handle on the centre pedestal)
Step 44: Taxi to the Runway
A few things to know about taxiing a 777:
- Speed: keep it to about 20 knots on the straights, and 10 knots or less for any real turn. The main gear tracks inside the nose wheels in a turn, so oversteer past the centreline before you turn in. Cut the corner and you'll put the inside main gear in the grass.
- Thrust: The GE90s produce a lot of thrust at low settings. Nudge the levers up just enough to get rolling, then pull back toward idle. On flat ground, she'll roll along happily.
- Nose wheel steering: Tiller gives you up to 70 degrees for tight turns. Rudder pedals handle gentle corrections.
- Brakes: Tap them early in the taxi to make sure they're working. You'd be surprised how often this gets skipped.
Step 45: Before Takeoff
While you're taxiing out:
- FMC route check — pull up the LEGS page. Make sure there are no route discontinuities (they show up as a ROUTE DISCONTINUITY line with box prompts). If you spot one, copy the waypoint below the gap into the boxes to close it.
- EICAS — should be clean. No amber, no red.
- Recall check — press CANC/RCL to surface any hidden messages.
- PFD speed tape — V1, VR, V2 bugs should all be visible.
- MCP altitude — still matches your cleared altitude? Good.
Phase 11: Lineup and Takeoff
Step 46: Approaching the Runway
Cleared to line up:
- Runway turnoff lights — ON
- Strobe lights — ON
- Transponder — TA/RA
- Landing lights — ON (all of them) when cleared for takeoff
Step 47: Lined Up on the Runway
On the centreline, brakes held. Deep breath.
PFD — quick scan:
- Speed tape near zero
- Altitude shows field elevation
- QNH correct
- Flight director bars showing
- V-speed bugs visible
MCP — quick scan:
- Altitude: initial cleared altitude
- Heading: runway heading
- A/T ARM: on
- Both flight directors: on
Step 48: Takeoff Roll
Cleared for takeoff. Here we go.
- Release brakes
- Advance the thrust levers smoothly to about 55% N1, check both engines are accelerating evenly, then push a TO/GA switch — the autothrottle takes the levers the rest of the way to your selected takeoff thrust
| Setting | How | When |
|---|---|---|
| Full thrust (TO) | Select TO on THRUST LIM, then TO/GA switch | Short runways, heavy, when you need everything |
| Derated (TO 1 / TO 2) | Set on THRUST LIM, then TO/GA switch | Where your performance calculation allows it |
| Assumed temp | Set in THRUST LIM, then TO/GA switch | Engine life, noise reduction |
- Autothrottle catches and holds target N1
- Check the FMA at the top of both PFDs — the autothrottle mode should read THR REF
- Both engines producing symmetric thrust? Good.
- 80 knots — check the airspeed and cross-check that both PFDs agree. Last easy point to stop.
- V1 — callout. You're committed now. Whatever happens, you're going flying.
- VR — pull back smoothly. And I mean smoothly. The 777 is not a 737. Don't yank. Make one smooth, continuous rotation toward about 15 degrees of pitch, at roughly 2 degrees per second. Don't snatch it up to 10 degrees and hold it there waiting to lift off — that's the classic tail-strike technique. The -300ER has a long fuselage and will happily scrape its tail on the runway if you get aggressive. It's not a great sound.
- Positive rate — gear up.
- Follow the flight director bars. They know where to go.
Step 49: Initial Climb
You're airborne. Now:
- At the thrust reduction point set on TAKEOFF REF, the thrust reference changes from takeoff to climb. If you're not in VNAV, press CLB/CON on the MCP for climb thrust.
- LNAV — if you armed it on the ground it engages on its own; otherwise press it. The aircraft picks up the SID and follows the lateral route.
- VNAV — same again: armed on the ground, it engages at 400 feet. Vertical profile management — climb speeds, altitude constraints, thrust.
- Flap retraction as speed builds:
| Speed | Action |
|---|---|
| Flap retraction speed (PFD shows it) | Retract one detent at a time: takeoff setting → 5 → 1 → UP |
| Manoeuvre speed (UP) | Flaps fully clean |
- At transition altitude, switch baro from QNH to STD (the BARO selector on the EFIS control panel).
You're flying. LNAV follows the SID, VNAV manages climb speed and thrust, and the 777 is accelerating toward cruise. For long-haul, the FMC handles step climbs, optimal speed changes, and fuel predictions from here on out. Sit back, monitor, and enjoy the view.
Common Mistakes and How to Avoid Them
Forgetting ADIRU Alignment
Your PFDs have no heading or attitude. The FMC can't navigate. The ND shows no position.
Check the overhead. If the ADIRU switch is still off, push it ON, enter the position on POS INIT and wait. The whole point of doing Step 5 first is that everything else happens while it aligns.
Wrong Weight Units in the FMC
V-speeds look insane — either way too high or terrifyingly low. Fuel predictions make no sense.
The FMC's weight unit (kg or lbs) doesn't match what SimBrief gave you. If your OFP says 195,000 kg and the FMC is expecting pounds, your performance data is completely wrong. The PMDG sets the unit under PMDG SETUP (the WEIGHT UNITS display option); make it match your OFP.
No Route Activation
You spent ten minutes programming the route, but the FMC seems to be ignoring all of it. LNAV won't engage.
You forgot to press EXEC. The Boeing FMC doesn't apply changes until you explicitly execute them — that glowing EXEC light on the CDU is waiting for you to press it. Unlike some aircraft where changes happen in real time, Boeing wants you to confirm.
Engine Start with No Bleed Source
You rotate the start selector to START and... nothing. N2 sits there. Starter isn't turning.
The engine starter needs pneumatic air to spin. That normally comes from the APU, though a ground air cart or the other running engine will also do. If the APU isn't running and you haven't got external air, there's nothing to turn the starter. Fire up the APU first, then try again. (Autostart spots this too — insufficient starter air is one of the faults it aborts for.)
Forgetting to Set Trim
Rotation feels like arm wrestling. The aircraft either refuses to pitch up or lurches nose-high violently.
You didn't set the stabiliser trim. On a widebody at takeoff weight, the wrong trim setting creates control forces that are genuinely frightening. Set it to the FMC's computed value on the TAKEOFF REF page. Precisely. Don't occasionally skip this step thinking it'll be fine.
Rotating Too Aggressively
You pull back at VR like it's an F-16 and hear a sickening scrape. The tail just hit the runway.
The 777-300ER is a long aircraft. Rotate in one smooth motion toward 15 degrees, about 2 degrees per second. The tail sits far behind the main gear, which is why the -300ER's main gear trucks lock during takeoff to lever the aircraft up on its heels for extra tail clearance, and many airframes carry a tail skid. Treat the rotation like you're easing a bus around a corner, not launching a fighter.
The Complete Checklist at a Glance
Electrical Power:
- Battery — ON
- PRIMARY / SECONDARY EXT PWR — ON (if ground power is available)
- Bus ties — AUTO
- Generator control and backup generators — ON
- ADIRU — ON, then POS INIT (do this immediately — alignment takes ~10 minutes)
Overhead Panel (while the ADIRU aligns): 6. Hydraulics — engine primary pumps ON, C1/C2 and demand pumps OFF 7. Fuel pumps — OFF until Before Start 8. Window heat — ON (all four) 9. NAV lights — ON, seatbelt signs — ON
FMC: 10. POS INIT — enter or confirm inertial position 11. RTE — origin, destination, airways, waypoints, ACTIVATE, EXEC 12. DEPARTURES — runway, SID, transition 13. PERF INIT — ZFW, reserves, cost index, CRZ ALT 14. THRUST LIM — derate or assumed temperature 15. TAKEOFF REF — flaps, CG, V-speeds, note trim value
MCP: 16. Flight directors — ON (both) 17. A/T ARM — ARM (both) 18. IAS/MACH — V2 19. Altitude — set initial cleared altitude 20. Heading — set runway heading
APU: 21. APU — START, wait for APU RUNNING 22. APU bleed — AUTO 23. EXT PWR — OFF (disconnect GPU)
Before Start: 24. Hydraulics — right demand pump AUTO first, then the rest 25. Fuel pumps — ON 26. Beacon — ON 27. Pushback 28. Fuel control switches — verify CUTOFF
Engine Start: 29. Autostart — ON; start selector — START; fuel control — RUN 30. Watch N2, EGT and oil pressure to stable idle 31. Repeat for the other engine
After Start: 32. APU selector — OFF 33. Packs — verify AUTO/running 34. Anti-ice — as required 35. Flight controls — check 36. Trim — set for takeoff 37. Flaps — set for takeoff 38. Autobrake — RTO
Taxi and Takeoff: 39. Transponder — TA/RA 40. Landing lights, strobe — ON at runway 41. Thrust levers — ~55% N1, then TO/GA 42. At VR — rotate smoothly toward ~15° 43. Positive rate — gear up 44. LNAV, VNAV — engaged (armed on the ground, or press after takeoff) 45. Retract flaps on schedule
What to Learn Next
Getting airborne is just the start. The 777's real depth shows up after departure.
VNAV descent planning — the FMC calculates a top-of-descent point and builds a full descent profile with speed and altitude constraints. Learning the difference between VNAV PATH (following the computed profile) and VNAV SPD (chasing speed targets without a path) makes or breaks your arrivals. Long-haul descents start from much higher altitudes than domestic flights, so getting this right takes practice.
Oceanic procedures — NAT tracks, CPDLC, strategic lateral offsets, equal time points. The 777 was designed for this stuff: you load the NAT track waypoints into the FMC like any other, and your OFP gives you the ETPs. Once you've done your first North Atlantic crossing with proper procedures, domestic flights feel boring.
Autoland — the 777's autopilot has three channels: left, centre and right. There are only two engage switches on the MCP, but pushing either engages every available channel, and on an approach the EICAS shows LAND 3 when all three are working for a fully redundant automatic landing. Setting up and monitoring an autoland is a whole procedure on its own, and it's deeply satisfying when it works.
ETOPS planning — a twin-engine airliner flying more than 60 minutes from an adequate airport (at one-engine-inoperative cruise speed) needs ETOPS approval, and a North Atlantic crossing takes you well past that. Your flight plan's equal time points — where you'd divert if an engine quit — and ETOPS fuel planning add a whole layer of realism to your long-haul ops.
VATSIM long-haul — flying a 777 across an ocean on VATSIM means oceanic clearances, position reports in non-radar airspace, simulated HF radio, and handoffs between oceanic control centres. It's the pinnacle of what flight simulation can be, and the 777 is the perfect aircraft for it.
The PMDG 777-300ER is one of the deepest aircraft simulations available for MSFS. Just the startup teaches you systems management concepts that transfer directly to every Boeing widebody — master this and the 787 and 747 will feel like meeting an old friend. Take your time with it. The 777 rewards patience more than any other addon I've flown.